

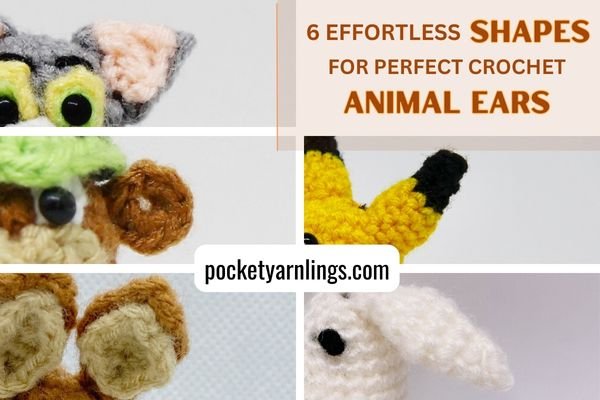
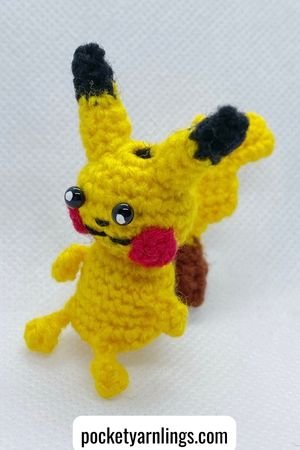
6 Effortless Shapes for Perfect Crochet Animal Ears
The art of crafting animal amigurumi ears offers a delightful exploration into the realm of crochet creativity. These small yet defining features bring vibrancy and personality to your creations. This guide delves into the essential materials and a spectrum of crochet techniques, from shaping 2D circles and triangles to more intricate 3D forms like spheres and cones.
Table of Contents Show
Introduction of Animal Ears
With step-by-step patterns and suggestions for various shapes, you'll embark on a journey to create ears for creatures ranging from bears to rabbits, cats to fantasy beings. We will start off with materials and tools needed, then move onto important crochet techniques that you need to know first before moving onto the actual shaping and detailing thereafter.
Materials Needed for Animal Amigurumi Ears
To craft animal amigurumi ears, you need to gather these essential materials:
Yarn: Choose yarn in colours suitable for the animal's ears, matching the desired species or character traits.
Crochet Hook: Select a crochet hook suited for the yarn weight to achieve the desired ear size and texture.
Stuffing: Use soft stuffing material to fill the ears, providing shape and volume. These are for the 3D shaped ones, not the 2D shaped ones.
Yarn Needle: Have a yarn needle on hand for sewing and weaving in ends neatly, either to attach a flat 2D or a 3D shape to the animal head.

With these materials at your disposal, you're well-equipped to crochet charming and distinctive ears for your amigurumi creatures. For the most part, we will be using crochet techniques to shape the animal ears, so I have not included other accessories like using cloth or felting materials.
Crochet Techniques for Crocheting Animal Ears
When crafting animal amigurumi ears, mastering key crochet techniques is essential for achieving desired shapes and textures. I will talk a bit more specifically about shapes later on.
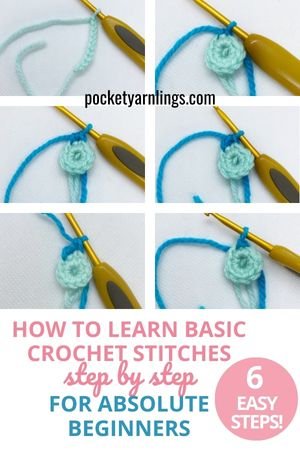
Basic Crochet Stitches for crocheting animal ears
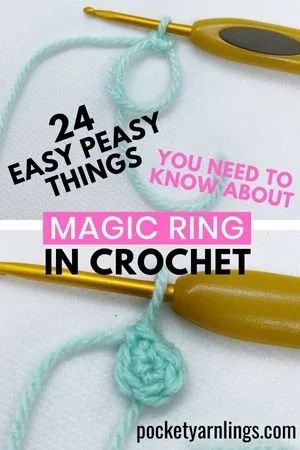
Magic Ring or Adjustable Loop: Begin your ear with a magic ring or adjustable loop to create a tight, closed centre, allowing for seamless shaping from the centre outward. It is for flat 2D circles or even 3D shapes as well.
Single Crochet (sc): Practice single crochet stitches, for both along a row and around a round.
Double Crochet (dc): This is especially for if you intend to crochet flat triangles or ovals for ears, which will be elaborated on later.
Treble Crochet (tr): This may or may not be necessary, depending on triangular or oval ear shapes, just like for double crochet stitches.
Basic Crochet Techniques for crocheting animal ears
Single Crochet increase: This is to increase the stitches along a row or around a round, both for 2D and 3D shapes.
Decrease (sc2tog or invisible decrease): Learn to decrease stitches to shape the ears, tapering them where needed for various animal ear styles.


Amigurumi Techniques for crocheting animal ears
Working in the Round: Practice crocheting continuously in a spiral to form any relevant 3D shapes for animal ears.
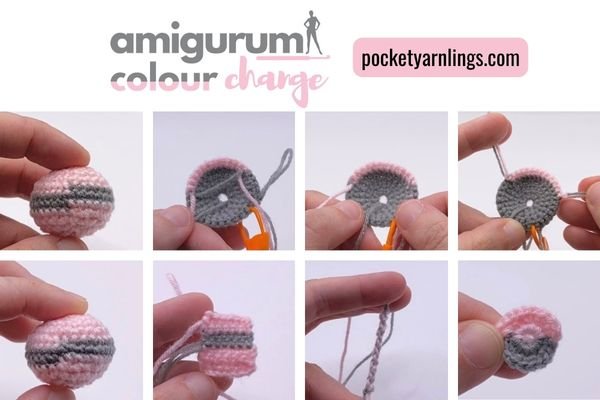
Colour Changes: Familiarize yourself with colour changes within rounds or rows to create patterns or markings in the ears, matching the characteristics of specific animals.
Stuffing: More relevant for 3D ear shapes which there is a space for stuffing, not so much for the flat 2D shapes that can be sewn directly onto the animal head.
Sewing attachment: Whether you choose to attach 2D flat ears or 3D ears to the animal head, there is some assembly work involved, which will be elaborated on further below.
Mastering these crochet techniques enables you to create an array of animal ear styles, from bunny ears to cat ears or any creature you envision in your amigurumi world.

Free Animal Shaping Starter Guide
Crocheting Basic Animal Ear Shapes
Crafting animal ears using a variety of 2D and 3D shapes brings diversity and character to amigurumi creations. Here I have subdivided them into simple 2D shapes and then slightly more complex 3D shapes. For 2D shapes, that would include circle, triangle and oval shapes, while for 3D shapes, that would include spherical, conical and biconvex shapes.
For each part, I will include a short pattern example with its corresponding picture and then some links to further blog posts to help customize those individual shapes!
How to Crochet Animal Ears with 2D shapes?
Let us start off with some simple 2D shapes first, which I find are easiest to implement and also easier to attach to the animal heads. I actually choose these shapes over the 3D shapes most of the time. We will start off with circular ears, then triangular ears and finally oval ears.
Circle Animal Ears
Crocheting circles forms rounded ears, suitable for creatures like bears, bunnies, or mice. Start with a magic ring or chain loop and work rounds to create circular shapes. Here is a sample pattern example below for my bear amigurumi.
Circle Animal Ear Pattern
Round 1: Magic ring sc7
Finish off leaving a tail for sewing to head.
For more ideas on how to customize different types of flat 2D circles, check out this comprehensive post, “14 useful things you need to know about How to Crochet a Circle”.

Triangle Animal Ears
Crocheting triangular shapes gives pointed or angular ears, perfect for animals like cats, dogs, or foxes. Begin with a chain and then work rows or rounds to form the desired triangular shape. See the example for the cat below.
Triangle Animal Ear Pattern
Row 1: Ch4
Row 2: Work into 2nd ch from hook, sl st 1, hdc1, dc1
Finish off leaving a tail for sewing to head.
For more ideas on how to customize different types of flat 2D triangles, check out this comprehensive post, “6 Super Easy ways on How to Crochet a Triangle Pattern”.

Oval Animal Ears
Crocheting ovals results in elongated ears, ideal for animals like rabbits, pigs, squirrels, foxes. You could start off with a foundation chain and then work different stitch heights around it or you could even start off with a magic ring. Here I have included just one example but you can check out the oval shape blog post for even more ideas to achieve this shape.
Oval Animal Ear Pattern
Round 1: Ch9
Round 2: Sc2, hdc1, dc2, hdc1, sc2, rotating as you go, work into the other side of chain, sc2, hdc1, dc2, hdc1, sc2 – 16st
Finish off leaving a tail for sewing to head.

For more ideas on how to customize different types of flat 2D ovals, check out this comprehensive post, “8 extraordinary ways on How to Crochet an Oval Pattern”. You can also check out the full bunny pattern from where this ear pattern was pulled from over here, “8 steps to a Free long eared Bunny Crochet Pattern”.
How to Crochet Animal Ears with 3D shapes?
Then we move onto some 3D shapes suggested below. You could crochet these 3D shapes and add stuffing then attach them to the animal head. Or you could also choose to flatten the 3D pieces (with no stuffing) and sew them down as thickened 2D pieces, some crocheters prefer to do that. Generally if the shape I am crocheting is quite small in the round, I may choose not to include any stuffing at all. It is up to you to experiment with what you like!
Spherical Animal Ears
Forming ears with spherical shapes can offer a rounded and soft appearance, fitting animals like teddy bears, pandas, or certain dogs. Create a small circular base and work rounds to close the top into a spherical form. Not something I do often but worth trying.
Spherical Animal Ear Pattern
Round 1: Magic ring sc4 – 4st
Round 2: 2sc4 – 8st
Round 3-4: Sc8 – 8st
Round 5: Sc2tog4 – 4st
Attach ears on either side of head.
For more ideas on how to customize different types of 3D spheres, check out this comprehensive post, “Mastering Crochet Balls: Step-by-Step Guide for Creating Perfect Spheres”.
Conical Animal Ears
Crafting ears in a conical shape creates pointed and sharp features, suitable for creatures like wolves, foxes, or certain birds. Begin with a small magic ring and then increase as you progress to the wider part of the cone or begin with a small circular base and gradually decrease stitches to form a pointed tip.
Conical Animal Ear Pattern
Round 1: Magic ring sc4 – 4st
Round 2: Sc3, 2sc1 – 5st
Round 3: Sc4, 2sc1 – 6st
Round 4: Sc5, 2sc1 – 7st
Round 5: Sc6, 2sc1 – 8st
Round 6: Sc8 – 8st
Round 7: Repeat round 6 – 8st
Attach ears on either side of head.
For more ideas on how to customize different types of 3D cones, check out this comprehensive post, “9 Different Creative Exciting Ways for How to Crochet Cones”.
Biconvex Animal Ears
This shape involves two convex curves on both sides, akin to a flattened sphere, offering a unique appearance to ears for fantasy creatures or imaginative designs. It is like a conical shape that tapers at the other end, or a 3D pointed oval shape. I often use this for rabbits and it can be used to replace the flat oval ear shape mentioned above.
Biconvex Animal Ear Pattern
Round 1: Magic ring sc3
Round 2: Sc2, 2sc1 — 4st
Round 3: (Sc1, 2sc1) x 2 — 6st
Round 4: (Sc2, 2sc1) x 2 — 8st
Round 5: Sc8 — 8st
Round 6: (Sc2, sc2tog1) x 2 — 6st
Round 7: (Sc1, sc2tog1) x 2 — 4st
No stuffing required.
Attach ears on either side of head.

By employing various 2D and 3D shapes, adjusting sizes, and applying different shaping techniques, you can create an array of diverse and captivating animal ears, adding personality and distinctiveness to your amigurumi characters.
How to Attach Crochet Animal Ears to Head
Attaching 2D and 3D ears to an animal head in amigurumi involves a detailed assembly process for a secure and polished finish. Here I have broken it down into before attachment, during attachment and post attachment for easier reference.
Before Attachment of Animal Head to Body
Prepare Both Parts: Ensure both the ears and the head are complete and stuffed appropriately for the 3D shapes as intended. Leave a yarn tail on both the ears and head for sewing. Usually for me, it involves one 2D ear and one 3D spherical head that need assembly.
Positioning: Determine the ideal placement of the ears on the amigurumi head. Use pins or stitch markers to temporarily position the ears to ensure proper alignment before sewing. This is sometimes specified on the pattern in which round of the head but I usually just try to approximate the symmetry.
During Attachment of Animal Head to Body
Sewing Technique: Thread the yarn tail from an ear onto a yarn needle. Align the ear to the desired position on the head and start sewing using a whip stitch or preferred sewing method. Ensure the stitches are tight enough to hold the ears securely but not too tight to distort the shape or head.
Securing the Attachment: Sew around the ear's perimeter where it meets the head, making multiple passes to reinforce the attachment. Knot the yarn securely inside the head or ear to prevent unraveling.

There are 2 ways to go about doing this, the first is to sew down one flat piece standing up against the 3D spherical head, while the second method is to sew an open 3D ear piece against the closed 3D spherical head. For the details on how to go about doing both of these and more, check out this blog post on “12 creative ways on How to Join Crochet Pieces Together”, which covers them in extensive detail.
After Attachment of Animal Head to Body
Weaving Ends: After securing both ears, weave in the yarn ends inside the amigurumi head to hide them neatly.
Final Adjustments: Make any final adjustments to the ear's positioning or stitches to ensure they are securely attached and aligned symmetrically on the animal head.
Attaching both 2D and 3D ears to an amigurumi animal head requires attention to detail and precision in sewing to achieve a stable and professional-looking attachment. Even if the final product appears slightly asymmetrical, it really does add to the charm of the final amigurumi!
Customization and Personalization of Crochet Animal Ears
In amigurumi, personalizing and customizing ears can enhance the uniqueness of your creations. You could try out any of the suggested shapes above for different amigurumi projects so that you create your own style and preference. Here are some other ways you can customize and personalize just the animal ear portion of your animal amigurumi.
Mixing 2D Ears: Consider adding a second set of 2D ears in a contrasting colour in front of the existing ears. This technique introduces an extra layer, offering a playful or whimsical touch to the amigurumi. For example, layering smaller contrasting ears in front of larger ones can create depth and character.
Varying Colours in 3D Ears: Experiment with changing colours within the 3D shapes of ears. Incorporating colour changes within the spherical, conical, or other 3D shapes adds visual interest and depth. For instance, transitioning from one colour to another halfway through a cone-shaped ear can create a different vibrant effect.

By blending different colours and layering ear shapes, you infuse personality and individuality into your amigurumi characters, making them stand out and enhancing their visual appeal. These customization techniques allow for endless creativity, enabling you to craft distinctive projects that you can call your own!
Crocheting Other Facial Features of Animal Heads
This part I decided to briefly mention that crocheting animal ears is just one component of animal facial shaping. The facial ensemble also includes snouts, cheeks, which together with the ears, collectively define the creature’s expression and character.
There are other separate blog posts that explore crafting techniques for crocheting animal snouts, and in addition, animal bodies and animal limbs as well, which all offer in-depth guidance to enhance these facial elements and complete your amigurumi’s personality!
Animal Faces
Animal Bodies

Conclusion of Crocheting Animal Ears
These seemingly small elements carry immense character, infusing life and distinctiveness into your handmade creations. By honing various crochet techniques and exploring diverse shapes, from simple circles to intricate cones, you've unlocked the potential to craft a myriad of charming ears. I hope this article has allowed your imagination to soar so that you can add a little bit of whimsy and uniqueness into every animal amigurumi you create! Remember to pin the image above to Pinterest for future reference!