4 Different Crochet Animal Nose Patterns to Get Started With
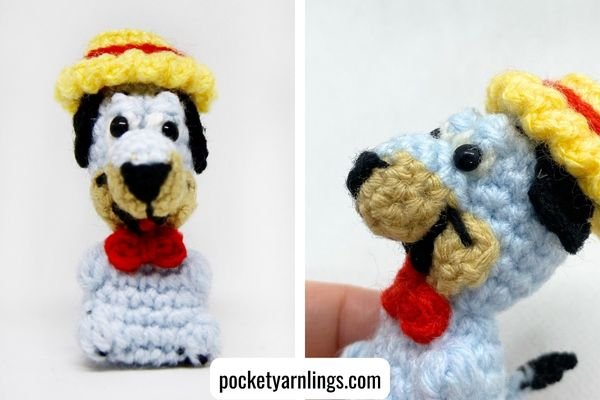
Animal noses in amigurumi are a great way to add distinctive facial features in your animal amigurumi projects. This journey into crafting animal noses can be dissected into two focal points: the diverse shapes of snouts and the unique styles of noses. Let's dive into the world of crocheting animal noses and unlock the magic of character creation in amigurumi!
Table of Contents Show
There are affiliate links in this post. We will receive a commission if you make a purchase through our affiliate link at no extra cost to you.
Introduction of Crocheting Animal Noses
Let us first talk about different animal nose shapes and styles as a summary. Then gather the necessary materials and tools to get started, together with the basic crochet techniques you need to know before embarking on crocheting animal noses. Continue into the quintessential parts of animal shaping and then detailing with the final attachments.
Animal Nose Shapes and Styles
Noses in animal amigurumi can be thought about in 2 categories, one is different shapes of snouts and the other one is different styles of noses. Here I will briefly talk about them before diving into each part individually later on.
Shapes of Noses: Animal snouts vary widely, from different shapes like triangular ones found in animals like horses to rounded ones seen in bears or pigs. Each shape contributes to the animal's overall appearance and character. Even within the same shapes, creating different sizes will create different types of noses, for examples larger triangular or conical shape for horses while smaller ones for beaks in birds.
Styles of Noses: Different styles of noses add distinctiveness to amigurumi. Button noses, small and circular, offer a cute and endearing look, ideal for teddy bears or dolls. Embroidered noses, crafted using embroidery or thread yarn, allow for intricate detailing.
Understanding the nuances of nose shapes and styles enables creators to match specific characteristics of animals, bringing authenticity and charm to amigurumi.
Materials and Tools for Crocheting Animal Noses
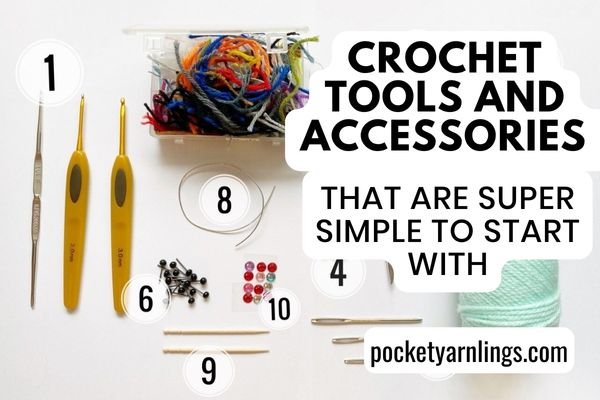
To craft animal amigurumi noses, you'll require specific materials to achieve different styles and shapes:
Yarn: Choose yarn colours suitable for the desired snout and nose colours, typically black, brown, pink, or other shades depending on the animal species. Think about possible yarn colour changes as well.
Crochet Hook: Select a crochet hook suited for the yarn weight to achieve the desired snout size and texture.
Embroidery or Thread Yarn: For embroidering intricate nose details like sewing down small triangles.
Darning Needle: A thin needle suitable for embroidery work or sewing to attach the snout securely to the amigurumi.
Stuffing Material: Small amounts of stuffing to fill the nose and give it shape, ensuring it matches the overall firmness of the amigurumi.
Beads or Safety Noses: For achieving a shiny or realistic finish, particularly for certain types of animals like bears and dogs, you might opt for small beads or safety noses to add texture and detail.
These materials allow for various nose styles, whether embroidered, sculpted, or attached as separate pieces, enabling you to create realistic and charming animal noses for your amigurumi characters.
Crochet Techniques for Crocheting Animal Noses
Here's a list of basic crochet techniques for crafting animal noses and snouts in amigurumi that you need to know before embarking on animal nose shaping. They are subdivided into basic crochet stitches, basic crochet techniques and amigurumi techniques. We will be mostly exploring 3D shapes so the techniques to achieve that are correspondingly included below.
Basic Crochet Stitches for crocheting animal noses
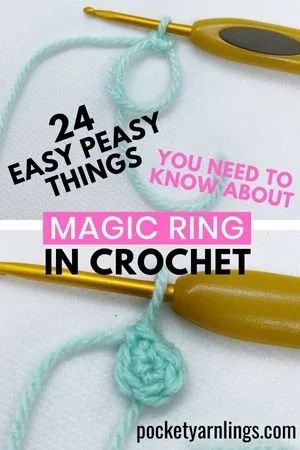
Magic Ring or Adjustable Loop: Begin your project seamlessly by using this technique to create a tight, closed centre for animal snouts, whether for spheres or cones.
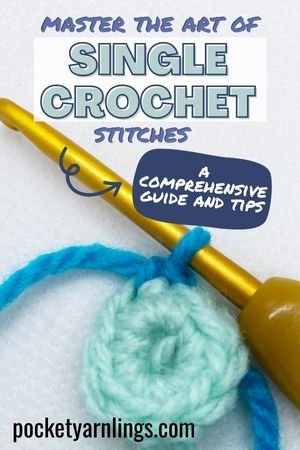
Single Crochet (sc): Master the most basic single crochet stitch, to be done in rounds, as will be elaborated more on later.
Basic Crochet Techniques for crocheting animal heads
Single Crochet Increase: Understand how to increase stitches to shape the snout, gradually expanding the diameter for 3D shapes.
Invisible Decrease: Learn the invisible decrease technique to seamlessly reduce stitches when attempting shaping like spheres or cones.
Amigurumi Techniques for crocheting animal heads
Working in the Round: Practice crocheting continuously in a spiral to form snouts.
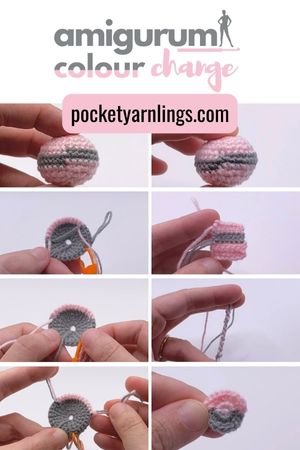
Colour Changes: Familiarize yourself with changing yarn colours to create distinctive features such snout colour changes for various animal characteristics.
Stuffing: Learn the art of stuffing amigurumi snouts appropriately, ensuring a firm yet soft texture and shaping the animal nose to your desired form.
Sewing attachment: This is predominantly to sew open 3D pieces onto animal amigurumi head and also not to forget sewing done embroidery work for nostrils.
Free Animal Shaping Starter Guide
Crocheting Basic Animal Snout Shapes
If you are wondering “how to crochet animal noses”, this section will talk all about different types of 3D shapes to crochet for sculpting animal noses or snouts. For each part, I will also include a short pattern example with its corresponding picture and then some links to further blog posts to help customize those individual shapes!
Spherical Animal Snout
Crafting a spherical snout involves starting with a small circular base, then working single crochet increases, then continuous rounds and then gradually decreasing stitches to form a rounded, ball-like shape. This shape is suitable for animals like bears, pigs, or certain dog breeds, giving them a soft and rounded nose appearance.
Spherical Animal Snout Pattern
Round 1: Magic ring sc10 – 10st
Round 2-4: Sc10 – 10st
Round 5: Sc2, sl st 1 and end off – 3st
Finish off leaving a tail for sewing to head.
(Did not include colour changes here.)
For more ideas on how to customize different types of 3D spheres, check out this comprehensive post, “Mastering Crochet Balls: Step-by-Step Guide for Creating Perfect Spheres”.
Conical Animal Snout
Creating a conical snout begins with a small circular base and involves gradually increasing stitches in each round to form a wider, cone-shaped base. The wider part is supposed to be attached onto the animal head later on. This shape is ideal for animals like foxes, wolves, or birds, providing a more pointed or tapered nose appearance.
Conical Animal Snout Pattern
Round 1: Ch2, 3sc1 into 2nd chain from hook – 3st
Round 2: 2sc3 – 6st
Round 3: Sc6 – 6st
Round 4: Repeat round 3 – 6st
Finish off leaving a tail for sewing to head.
For more ideas on how to customize different types of 3D cones, check out this comprehensive post, “9 Different Creative Exciting Ways for How to Crochet Cones”.
Cylindrical Animal Snout
Crocheting a cylindrical snout starts similarly to a sphere but involves maintaining the same diameter for several rounds, creating a tubular shape. This shape works well for animals like horses, cows, or some reptiles, giving them a longer, tube-like nose appearance.
Cylindrical Animal Snout Pattern
Round 1: Magic ring sc5 — 5st
Round 2: 2sc5 — 10st
Round 3: Sc10, BLO — 10st
Round 4: (Sc1, sc2tog1) x 3, sc1 — 7st
Round 5: Sc7 — 7st
Round 6-7: Repeat round 5
Finish off leaving a tail for sewing to head.
For more ideas on how to customize different types of 3D cylinders, check out this comprehensive post, “How to Crochet a Tube in 10 different useful styles”.
Ovoid Animal Snout
An ovoid snout resembles an elongated, rounded shape, achieved by starting off with an oval instead of a magic ring by way of a foundation chain. Then continue to single crochet all along both sides of the foundation chain in an oval round. It's well-suited for animals like bears, bunnies, or certain mammals, offering a gently elongated and rounded nose appearance, mimicking the contours of these creatures' noses.
Ovoid Animal Snout Pattern
Round 1: Ch4, sc2, 3sc1, go around, sc1, 2sc1 – 8st
Round 2: Sc3, 2sc1, sc3, 2sc1 – 10st
Round 3: Sc3, sc2tog1, sc3, sc2tog1 – 8st
Finish off leaving a tail for sewing to head.
Experimenting with these basic shapes and adjusting the number of rounds, increases, or decreases allows for customization to match the specific animal snout you aim to create in your amigurumi projects.
Detailing Techniques for Crafting Animal noses
After going through all the different types of shapes you can crochet for the animal snout, this section is more about detailing after the sculpting. Also, I briefly talk about crocheting small noses, not snouts, which can be subsequently sewn onto the snout. This is to complete the full animal nose look.
Embroidery: Learn basic embroidery stitches like the backstitch or satin stitch to embroider noses onto amigurumi. Use embroidery yarn to carefully craft small triangular, round, or pointed shapes for different animal noses.
Nose Accessories: Experiment with techniques such as adding beads or using safety noses to create texture and detail, especially for glossy or realistic animal nose finishes.
Sculpting: Sculpting noses involves manipulating stuffing or yarn within the amigurumi to form three-dimensional nose shapes. By shaping and moulding the stuffing with your fingers or a crochet hook, you can create various nose styles like bulbous noses or slightly raised shapes.
Attaching Separate Pieces: For more intricate or realistic noses, crochet separate pieces using techniques like crocheting in rounds or rows to shape specific nose designs. Attach these pieces securely to the amigurumi snout to achieve detailed and accurate nose styles. For instance, a smaller spherical black nostril that is attached separately onto the animal snout.
Colour Changes: Practice colour changes within stitches to achieve multi-coloured or detailed patterns in the nose, replicating the unique features of specific animal noses.
How to Attach Crochet Animal Nose to Head
Attaching a nose to animal amigurumi is two-fold, with the first part involving the snout attachment to the animal head and the second part involving the nostril attachment to the snout.
Before Attachment of Animal Nose to Head
Prepare Different Parts: Ensure you have all the necessary parts that are supposed to be sewn together, including the animal head, the animal snout and the small animal nose. Remember to leave a yarn tail for all 3 parts for sewing.
Positioning: Determine the ideal placement of the nose on the amigurumi snout and then the whole unit on the animal head. Use pins or stitch markers to temporarily position the nose to ensure proper alignment before sewing.
During Attachment of Animal Nose to Head
Sewing Technique: I generally prefer sewing the snout onto the animal head first. Thread the yarn tail from the snout onto a yarn needle. Align the snout to the desired position on the head and start sewing using whip stitch. This involves sewing an open 3D piece to a closed 3D amigurumi head. Then the next step is to sew on the small animal nostril on the top anterior part of the animal snout.
Securing the Attachment: Sew around the snout perimeters where it meets the head and likewise for nose on the snout, making multiple passes to reinforce the attachment. Knot the yarn securely inside the head or snout to prevent unravelling.
After Attachment of Animal Nose to Head
Weaving Ends: After securing the nose, weave in the yarn ends inside the amigurumi head to hide them neatly.
Final Adjustments: Make any final adjustments to the snout and nose's positioning or stitches to ensure it is securely attached and aligned symmetrically on the animal's face.
Crocheting Other Facial Features of Animal Heads
This part I decided to briefly mention that crocheting animal snouts is just one component of animal facial shaping. The facial ensemble also includes ears, cheeks, which together with the snouts, collectively define the amigurumi's expression and personality.
There are other separate blog posts that explore crafting techniques for crocheting animal ears, and in addition, animal bodies and animal limbs as well, which all offer in-depth guidance to enhance these facial elements and complete your amigurumi’s personality!
Animal Faces
Animal Bodies
Conclusion of Crocheting Animal Noses
Crafting animal noses in amigurumi unfolds a world of creativity and distinction. Exploring shapes, styles, and techniques empowers creators to sculpt unique identities for their creatures. Try out spherical, conical, cylindrical and ovoid shapes for the snouts and then try out embroidery detailing on it – there are so many ways to mix and match to make your animal amigurumi project a distinctive unique piece of artistry! Remember to pin the image above if you found this useful and want to refer back to it later!


