5 Fundamental Things to know about Puff Stitch Crochet
Puff stitches are a popular form of textured crochet stitches that crocheters like to use to create a dense rounded shape on their fabric. Puff stitches can be used individually as decorative elements or combined in patterns to create intricate designs, textures, and raised motifs in blankets, hats, scarves, and various other crocheted items.
Table of Contents Show
What is a puff stitch?
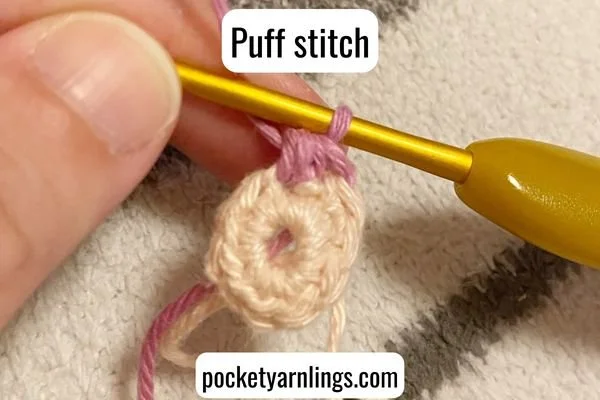
A puff stitch is a crochet technique that creates a raised, textured cluster of stitches. It's formed by partially completing several stitches in the same stitch or space and then pulling the yarn through all the loops to create a compact, puffy cluster. There are variations of the puff stitch, but the basic idea involves grouping stitches together to form a dense, rounded shape on the fabric.
What is the abbreviation for puff stitch in crochet?
The abbreviation for the puff stitch in crochet patterns is usually "Puff"." However, it's essential to check the specific pattern you're following, as abbreviations can sometimes vary between different crochet patterns or designers.
What does puff stitch mean in crochet?
It is the most commonly used crochet abbreviation for a puff stitch in crochet. This is also the way I commonly write out my pattern when using a puff stitch. There is another alternative way to write it which is not commonly used, mentioned in the next answer.
What is ps crochet abbreviation?
The abbreviation "ps" in crochet doesn't commonly stand for a specific stitch or technique. However, in some cases, "ps" might refer to a "puff stitch," especially if the context of the pattern involves a stitch that creates a puffy or textured effect. Always refer to the pattern's instructions or accompanying stitch glossary to clarify the meaning of any crochet abbreviation used in a particular pattern.
How do you do puff stitch in crochet?
To crochet a basic puff stitch, you can follow these steps:
Yarn Over (YO): Start by yarn over (wrapping the yarn around your hook) before inserting your hook into the designated stitch or space.
Insert Hook: Insert your hook into the specified stitch or space where you want to create the puff stitch.
Yarn Over and Pull Through: Yarn over again and pull up a loop through the stitch. You'll have three loops on your hook.
Repeat Yarn Over and Pull Through: Yarn over once more and pull another loop through the same stitch. This action creates more loops on your hook. Repeat this step a few times, depending on the pattern's instructions, typically between 3 to 5 times.
Yarn Over and Pull Through All Loops: After creating the required loops on your hook, yarn over and pull through all the loops on the hook at once, securing them together.
There you have it, the completed puff stitch! It is actually a half double crochet bobble stitch but I will talk more about bobble stitches below.
How many loops does a puff crochet stitch have?
The number of loops in a puff stitch can vary depending on the specific pattern or design you're following. Generally, a basic puff stitch typically involves gathering multiple loops together before closing them off. Commonly, it might involve creating 3 to 5 loops on the hook before pulling the yarn through all of them to complete the stitch. However, more complex or decorative puff stitches might involve gathering more loops, resulting in a denser or larger puff.
Special stitches similar to puff stitches
For this section, we are talking about different types of textured stitches that can appear quite similar to a puff stitch but they are achieved using a different sequence of steps. We will be comparing puff stitches with bobble stitches, popcorn stitches and cluster stitches.
Are bobble and puff stitches the same?
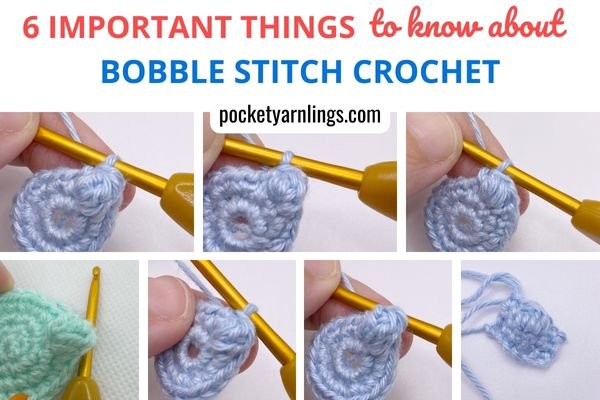
A puff stitch is technically a half double crochet bobble stitch, while a bobble stitch routinely refers to a double crochet bobble stitch. See the different steps involved in crocheting a double crochet bobble stitch below.
In short, to make a 4dc bobble stitch:
Yarn over, insert hook in indicated st, yarn over, pull up loop, yarn over, draw through 2 loops, (yarn over, insert hook in same st, yarn over, pull through 2 loops) 3 times, yarn over, pull through 5 loops on hook
To learn all about bobble crochet stitches, check out this article on “6 important things to know about Bobble Stitch Crochet”.
What is the difference between popcorn stitch and puff stitch?
A puff and popcorn stitch are both very different, I would say a puff stitch is closer to a bobble stitch. The final appearance is quite different as a puff stitch looks like a raised rounded stitch while a popcorn stitch is more of a raised conical stitch.
To make a 3hdc pop or a 3 half double crochet popcorn stitch, the following steps are involved.
1) Make a half double crochet stitch - yarn over first, then insert hook, yarn over, draw yarn through, yarn over again and draw through all 3 loops to form a hdc.
2) Repeat again another 2 more times into the same st to get 3hdc in the same st.
3) Drop the loop from hook. Insert hook into the 1st hdc done (both front and back loops).
4) Grab the dropped loop and draw it through the first hdc st.
5) The popcorn st looks like it is popping forward in the front.
6) Do a sc in the next st to seal the popcorn st down securely.
Now you see the completed 3 half double crochet popcorn stitch.
To learn all about popcorn crochet stitches, check out this article on “6 unmissable steps on How to do a Popcorn Stitch in Crochet”.
What is the difference between a cluster stitch and a puff stitch?
A cluster stitch involves crocheting a set of stitches partially into the same space with unfinished loops and them completing them to form a group, while a puff stitch just involves multiple loops. Also, the appearance of a cluster stitch is that it is often visible as separate elements grouped together while a puff stitch appears like a rounded condensed stitch. Finally check out the steps involved in a cluster stitch below which are different from that of a puff stitch.
Steps for double crochet cluster:
1. Yarn over the hook before inserting the hook.
2. Insert your hook into the desired stitch.
3. Yarn over again, pull yarn through the stitch.
4. Yarn over, draw through 2 (of 3) loops, should have 2 loops on the hook.
5. Yarn over again, insert hook into SAME stitch.
6. Yarn over, pull yarn through the stitch, should have 4 loops on the hook.
7. Yarn over, draw through 2 (of 4) loops, should have 3 loops left on the hook.
8. Yarn over for last time.
9. Draw yarn through all 3 loops on the hook.
Free Amigurumi Shaping Starter Guide
Learn how to create a toy for your child with your own hands in 5 simple steps.
Working puff stitches in rows and rounds
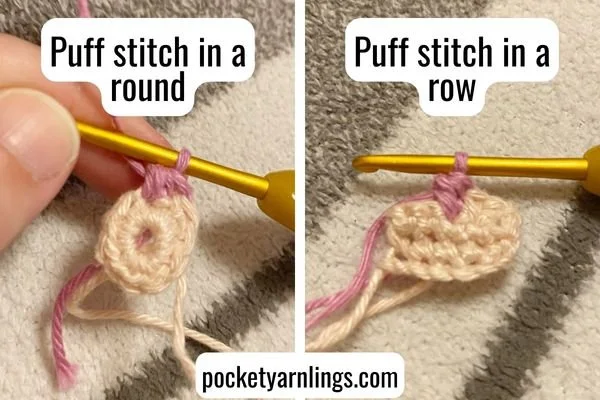
The steps involve in crocheting the puff stitch, whether in a row or in a round are the same, except the final appearance might look slightly different.
How to crochet puff stitch in a row?
Proceed with crocheting a puff stitch like you would usually do after crocheting along the row. You might want to leave a few regular single crochet stitches along the rest of the row as a few consecutive puff stitches might not fit so well and the row might start to curve along the side.
Also, if you are crocheting back and forth, along the right side and then the wrong side of the rows, then the puff stitch on each type of row will look different. The bulge you are supposed to see will be facing opposite sides. To avoid this and still create your desired textured appearance, then only crochet puff stitches on the rows that are facing the right sides.
If you do not know how to tell your right sides from your wrong sides, whether for rows or rounds, check out this comprehensive article on '8 effortless ways to tell Which side of yarn is Right side in Crochet'.
How to crochet puff stitch in a round?
Follow the same steps above for crocheting a puff stitch but this time in a round. It is easier to work in a round, because you should be crocheting in a continuous clockwise direction and the bulge of the puff stitch should always be facing outwards. You might want to work some single crochet stitches in between each puff stitch so that they are not squashed together or some crocheters might end off with a chain of 1 after completing each puff stitch.
How to use a puff stitch in amigurumi
Puff stitches can add texture and visual interest to amigurumi projects. You could incorporate it in specific areas like the body of an animal to give it a fuzzy appearance. Or simply as just a decorative element like embellishments. Here are 2 examples below of how I incorporated puff stitches into my amigurumi.
Using puff stitches to make amigurumi nose
Consider using a puff stitch to create a raised appearance in the middle of a sphere to give the appearance of a small nose for an amigurumi doll face. I have similarly done this for bobble stitches as well. Just position the puff stitch properly in between two eyes and above the mouth and it will look like a nose. The image above is using bobble stitch as an example.
Using puff stitches to make amigurumi cheeks
Likewise, consider using puff stitches on either side of a spherical face to create the appearance of raised cheeks. When doing so, do not use the puff stitch for the nose too or the face will look too cluttered. These various forms of shaping can add more dimension to the amigurumi doll face and using a puff stitch is smaller and more subtle than using a bobble stitch. The image above is using bobble stitch as an example.
Conclusion of crocheting puff stitches
In conclusion, crocheting puff stitches offers a versatile way to add texture, dimension, and decorative elements to your crochet projects, including amigurumi and various other items. These stitches can be utilized to create raised surfaces, intricate patterns, and distinctive designs. By mastering the technique and exploring variations in loop counts, frequency, and placement, you can achieve unique textures and visual effects in your crocheted creations and amigurumi!
Free Amigurumi Shaping Starter Guide
Learn how to create a toy for your child with your own hands in 5 simple steps.


