

Free Baby Yoda Crochet Pattern
Here it is - my free Baby Yoda aka Grogu pattern. I have been meaning to put it up on my blog but just never got down to it. It came from my Bounty Hunter Collection which I’m really proud of! This pattern is pretty fast, with minimal sewing parts like the ears and the coat, so have fun crocheting up this one!

There are affiliate links in this post. We will receive a commission if you make a purchase through our affiliate link at no extra cost to you. Do note I have used some if not most of these products at some point in time.
Table of Contents Show
Crocheting Baby Yoda / Grogu
To crochet a simple baby yoda, there are quite a few parts involved. I would say this pattern is a ambitious beginner crochet pattern.
The parts involve include the main head continuing into body, the ears and finally the coat - that is really it! Each part is small and relatively simple to make with the only attachment being the ears to the head, as well as the coat which is optional. Let’s get started!
Terminology for Crocheting Baby Yoda
Ch = chain
St = stitch (refers to number of stitches in one round)
Tc = treble crochet
2sc1 = single crochet increase (meaning 2 single crochet in same stitch)
Sc2tog1 = single crochet decrease (referring to invisible decrease)
Surface sc = surface single crochet
holding working yarn behind piece, hook in front of piece, insert hook through piece, yo, pull yarn through piece, proceed to sc
Materials and Tools for Crocheting Baby Yoda
2.5mm Clover crochet hook
Orion Top Deluxe Yarn, Crown Yarn (or any equivalent acrylic yarn), 1 ball of yarn each
Turquoise green
Light brown
Darning needle
Stitch markers
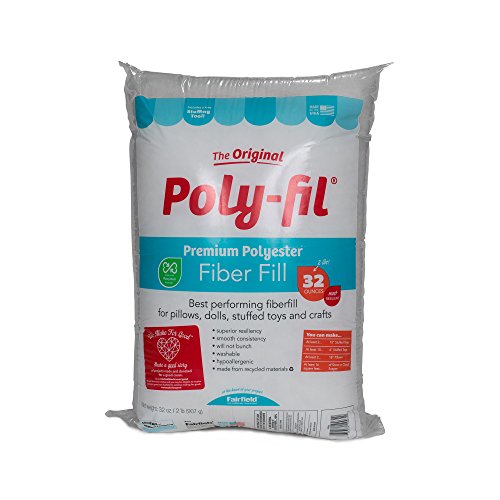
Filling – use leftover yarn or polyester fiberfill
Scissors
4mm Glass eyes x 2 - used for insertion, can be glued down
See how they look like and my selection for my amigurumis just below.
Also check out my full list of commonly used crochet tools and accessories here.
Now that you have gathered your supplies and had a look at the basic terminology to reading the following pattern, let us first get started!
Yarn
Orion Top Deluxe Yarn, Crown Yarn (or any equivalent acrylic yarn) - light brown, dark brown

Crochet hook
2.5-3.0mm Clover crochet hook

Stuffing
Use leftover yarn or polyester fibrefill
Darning Needles

Safety Eyes
4mm glass eyes or safety eyes

Stitch Markers
Plastic stitch markers or metal stitch markers

Crochet Baby Yoda Head
Use turquoise green yarn to start the head.
Round 1: Ch4, sc2, 3sc1, go around and turn the whole piece, sc1, 2sc1 – 8st
Round 2: Sc3, 2sc1, sc3, 2sc1 – 10st
Round 3: 2sc10 – 20st
Round 4: Sc20 – 20st
Round 5-6: Repeat round 4 – 20st
Round 7: Sc2tog10 – 10st
Round 8: Sc2tog5 – 5st

Crochet Baby Yoda Body
Continue using turquoise green yarn for the body.
Round 10: 2sc5 – 10st
Round 11: 2sc10 – 20st
Round 12: Sc8, (sc1, ch6, 3hdc into 3rd ch from hook, sl st 3 down ch, sl st 1 back onto main st), sc6, (sc1, ch6, 3hdc into 3rd ch from hook, sl st 3 down ch, sl st 1 back onto main st), sc4 – 20st
Round 13: Sc20 – 20st
Round 14: (Sc2, sc2tog1) x 5 – 15st
Round 15: Sc8, (sc1, ch6, 3hdc into 3rd ch from hook, sl st 3 down ch, sl st 1 back onto main st), sc2, (sc1, ch6, 3hdc into 3rd ch from hook, sl st 3 down ch, sl st 1 back onto main st), sc3 – 15st
Round 16:
Magic ring sc10 – 10st
(Sc1, 2sc1) x 5 — 15st
To sew onto Round 15 completed above
Crochet Baby Yoda Ears
Use a new set of the same turquoise green yarn for the ears. Make 2 sets of the ear.
Ch6, sl st 1, sc2, hdc1, dc1
See the video below to get an idea of how to make the ears.


Free Animal Shaping Starter Guide
Crochet Baby Yoda Coat
Use light brown yarn to make the coat.
Round 1: Ch25 – 25st
Round 2: Sc24, ch1, turn – 24st
Round 3-4: Repeat round 2 – 24st
Round 5: Sc2, sc2tog1, (ch6, skip 3st and sc down), sc2, sc2tog1, sc2, sc2tog1, sc2, (ch6, skip 3 st and sc down), sc2, ch1, turn – 15st
Check out this post all about using skipped stitches to create holes in your amigurumi projects.
Round 6: Ch2, dc1 in 1st st, dc2, sc5, dc9, sc5, dc3, ch1, turn – 25st
Round 7: (Sc2, sc2tog1) x 6, sc1, turn – 19st
Round 8: Ch3, 2tc1 in 1st st, tc17, 2tc1 – 21st
Fold down the last row (round 8) and invert it to become the collar wrapped around neck

Sleeves in coat
Make 2 sets of sleeves on the coat using light brown yarn.
Round 1: Surface sc14 all around both holes in coat (from round 5) in a circle to form sleeves – 14st
Round 2: Ch2, hdc1 in 1st st, hdc13, join up to top of initial ch – 14st
For more on surface crocheting, check out this post for step by step instructions.

Assembly of Crochet Baby Yoda Parts
Head component assembly
Add 2 glass eyes to the 4th row of face.
Attach the 2 ears to both sides of the head, at 3rd-5th row .
Body component assembly
Slip his 2 arms into the coat sleeves and try to pull out arm as much as possible (so it is visible within the circle of sleeve).
Fold down the last row of the coat and invert it, close it up at the front midline, just below the neck.
Sew down front coat opening in the midline as well. (Unless you wish to make the coat detachable, I prefer to sew it down so it hides all the loose stitches inside.)


Conclusion of crocheting Baby Yoda
There you have it, crocheting Baby Yoda. I had so much fun making this little guy and the rest of the Bounty Hunter set which you can check out below. I am especially proud of my Razor Crest spaceship as well! Some behind the scenes of how it was done can be found here.
To check out more of my ideas for using various types of crochet stitch techniques to shape amigurumi animals, grab my free Animal Shaping Starter Guide below! Inside, get quick ideas on how to get started on shaping ears, snouts, cheeks, bodies and limbs for animals!

Free Animal Shaping Starter Guide
Related articles
How do you Crochet Different Shapes in Amigurumi?
14 useful things you need to know about How to Crochet a Circle
8 extraordinary ways on How to Crochet an Oval Pattern
6 important things to know about Bobble Stitch Crochet
12 creative ways on How to Join Crochet Pieces Together
The 3 quick systematic steps involved in How to End a Crochet Project