

12 creative ways on How to Join Crochet Pieces Together
After you have completed your individual amigurumi pieces, then the very last step is to bring it all together! In this post I will be talking about the different ways of sewing amigurumi pieces together and also other techniques of attaching pieces together without sewing! Those methods include seamless crocheting and surface crocheting. Read on to see more!
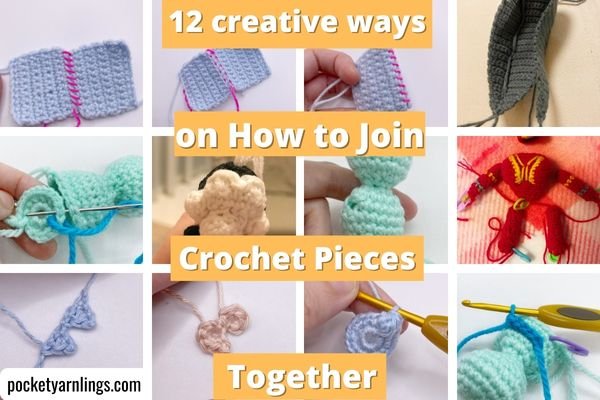
Table of Contents Show
How to join crochet pieces together?
Let me talk about a brief overview of joining crochet pieces together.
First off, sew pieces together with whip stitch or mattress techniques. Then we will look at joining flat 2D pieces together, on top of each other or at its sides, then joining 3D pieces - open to closed piece, open to open piece and closed to closed pieces.
Then we move onto seamless crocheting for 2D pieces and then 3D pieces which result in no sew amigurumi. And finally the last part is all about surface crocheting - what it is about and how it helps with joining crochet. It's a lot to cover so let's get started!
How to sew crochet pieces together?
The first and most basic way to join pieces together is to sew them together. Here we will talk about the most common stitching techniques to attach pieces together, which are the whip stitch and the mattress stitch methods.
How do you whip stitch in crochet?
Thread yarn through darning needle and get the 2 pieces you want sewn together in alignment. Insert needle and yarn through first crochet piece stitch corner then pull it out. String through the second crochet piece at the desired adjoining location, into and out of the desired stitch.
You should have a long strand of yarn going into and out of the first piece and then continuously in and out of the second piece. Pull it taut so that the edges are opposing and touching.
Then repeat this process again into the next stitch along the row, back into the first crochet piece adjacent stitch and out, then into the second piece adjacent stitch in and out.
The final seams should have the appearance of parallel lines in a row (whether horizontally or vertically depending on how you place the 2 pieces).

How do you mattress stitch in crochet?
Similarly, thread yarn through darning needle and get the 2 pieces you want sewn together in alignment. Insert needle and yarn through first crochet piece stitch corner then pull it out. String through the second crochet piece at the desired adjoining location, into and out of the desired stitch.
This is where it differs from the whip stitch above. Use the needle and insert into the adjacent stitch of the second crochet piece, further along the row. Pull it out from the other end.
Then string the needle and yarn through to the first crochet piece at the adjacent stitch. Pull the yarn taut to bring the two edges together.
The final seams should have the appearance of alternating 'u' and 'n' on opposite sides before they are pulled together. They look like rectangles on either sides of the 2 crochet pieces.

When should whip stitch be used?
Whip stitch is the most common way that amigurumi pieces are sewn together. It is the simplest way to get started and if the yarn colour used is the same as the 2 pieces being joined, the seams can look invisible.
You would pick this technique sometimes when you want the seams to be visible like in this example below when I sewed a wig cap down onto a head.


Why do you stitch a mattress?
Actually using mattress stitching is one of my favourite ways to sew pieces together. It is great for when you want to sew pieces together invisibly, even if the 2 crochet pieces are of different colours.
In fact, even with the seaming yarn in a different colour from the 2 pieces, after using the mattress stitch technique, you still would not be able to see the seams.
I like to use this method of stitching when all the amigurumi pieces to be joined are different colours and I was the seams to be invisible. See the other hair example below.


How do you crochet two flat pieces together?
For this first part, let us first start off with sewing 2D pieces. Here are 3 examples including the following:
1) Sew flat pieces on top of each other
2) Sew flat pieces side by side
3) Sew flat piece onto a 3D piece
For any of the following examples, you could use either a whip stitch or mattress stitch technique as mentioned above. I might show a combination of both methods in my examples.
How do you join two crochet panels together?
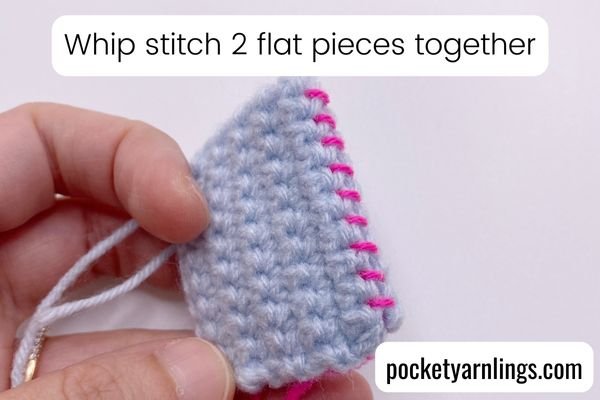
The simplest example of sewing include placing 2 panels on top of each other and sewing them together. Sewing them together would be the seams are at the edges of the panel. This is how it looks like when you whip stitch 2 flat pieces together.
As for an example with a mattress stitch technique, it is this set of bunny ears which consists of a larger grey pointed oval with a smaller pink pointed oval. I placed the 2 panels on top of each other and sewed it together using mattress stitch. I tried this method of sewing to minimize the pink stitches on the back of grey ears.

How do you join crochet sides together?
Next up is sewing crochet sides together, also either with whip stitch or mattress stitch. The steps on how to do this are already illustrated above. You could join the crochet pieces flat side by side or join them at an angle.
Here is an example of how I join 2 separate flat pieces at an perpendicular angle to create a 3D piece for the body of this quinjet space ship.

How do you sew flat pieces on amigurumi?
For this small section, we will be talking about sewing flat pieces onto amigurumi. The first example is sewing a flat 2D piece to an open amigurumi, the second example is a flat piece layered on top of a closed amigurumi , and the final example is a flat piece sewed at the side of a closed amigurumi.
How to sew flat pieces to an open amigurumi?
The easiest example here would be my old method of closing up my amigurumi bodies. I first started off my amigurumi bodies with a magic ring and then end off in an open cylinder. Then I would crochet a separate new circle and sew this flat piece onto the open cylinder.
This way of closing up was to ensure a flatter base and an easier way to ensure the amigurumi could stand up on a wider base.

Here is an example I did for Ben in his swimsuit, in this case, I used whip stitch technique to join the edges round the circular base to the circular open edge of the cylinder.
How to sew flat pieces to a closed amigurumi?
Let's move onto sewing flat pieces onto 3D pieces which could be done either with layering a flat piece onto an amigurumi or sewing a flat piece at its side onto an amigurumi.
For instance, this muzzle or snout layer on this skunk was sewn onto the head using mattress stitch method (because the seams at the edges are not obvious). This is a great way to layer faces and colours for amigurumi animal heads.

As for the example of sewing a flat piece on its side, this cat has its triangular ears crocheted as separate pieces, which were then sewn onto the sides of the cat head using whip stitch.


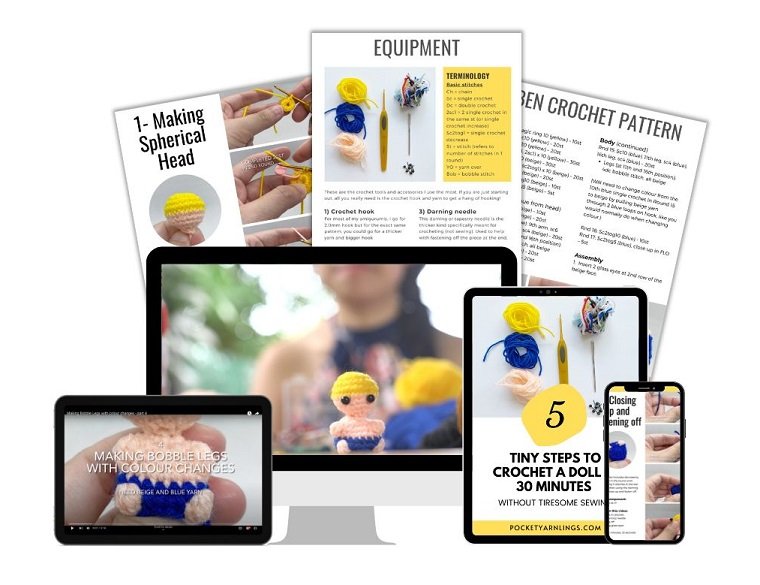
💡 Want to learn all the basics of crocheting amigurumi in one place?
Grab my free 77-page Amigurumi Foundation eBook — your complete step-by-step guide to mastering tools, stitches, and beginner toy techniques (normally $17!).
How do you sew two amigurumi pieces together?
Now we move onto sewing 3D pieces together which is what amigurumi assembly is all about! First we talk about sewing 2 open pieces together, then an open piece to a closed piece and finally 2 closed pieces together.
How do you sew two open amigurumi pieces together?
Here I am referring to sewing 2 pieces of amigurumi together that have opposing holes, which is not commonly done. The example I would give here is if you are sewing limbs to a main amigurumi body, you could try this method.
In the image below, I have skipped stitches and crocheted the hole in the main body. You might choose to do it this way because you do not have to pin or landmark the main body for subsequent attachment. By crocheting the holes, when you make a separate cylinder for the arm, it is easier to sew the arm down on the landmarked area for easier symmetry.

You could also use whip stitch or mattress stitch for this limb attachment to the main amigurumi body.
How to sew an open crochet piece to a closed piece?
This is probably what is most commonly done, which is to join one open crochet piece to another closed amigurumi piece. If done with whip stitch and in the same colour for the threading yarn and the 2 pieces, then the seams will appear invisible.
A simple example of this is sewing down this open ended snout to the closed up lion head piece. Some crocheters choose to use pins to landmark the location for attachment on the closed up piece, sometimes in a circle outline or sometimes in a square outline.

As for me, I generally just place the open piece at the approximate location and secure it down in 4 opposite parts, before working in the seams for the parts in between.
Another example includes sewing down a wig cap onto a head, an open piece to a closed piece. You could also similarly use whip stitch or mattress stitch to sew the pieces together.
How do you sew closed amigurumi pieces together?
The last example for sewing amigurumi pieces together is for closed up pieces. Some crocheters like to close up their amigurumi bodies and the corresponding limbs before sewing them together. The point of attachment will be much smaller and narrower for this than the example above, where you attach the open piece to the closed one.
I did it for this hulkbuster example here where I closed up the main trunk and also closed up the legs as well. Then I sewed on the legs to the bottom of the body on either side. As you can see, after the pieces have been closed up, the trailing yarn closed up from a narrow end. I find that this sometimes makes it slightly more difficult to sew the pieces together, as compared to the previous example of sewing an open piece to a closed piece.

Another great example of me sewing closed pieces together is when I sewed these quinjet pieces together. I made the main quinjet body first and completed it, then the symmetrical jet engines separately and closed them up. Then I attached the jet engines on either side of the main body. Like I mentioned above, the base of attachment is narrower and that meant that after I sewed it down, it wobbles a little bit from side to side.

How to sew crochet pieces together without needle?
For the next method of sewing crochet pieces together, without using any darning needle, would be what I call seamless crocheting. Some crocheters also call it no-sew amigurumi. This is one of my favourite ways to attach pieces together without assembly work but it can be limited to only certain shapes. I will talk about some 2D examples first and then some 3D examples.
How to join flat crochet shapes using no sew method?
Here we talk about 2 simple examples to illustrate what I mean about no sew method. The first is crocheting 2 triangles joined together in a flat piece, which is all done in just one foundation chain.

The second example is pretty similar but this time with 2 adjacent circles joined together, also along a foundation chain. So you see, with these simple methods, you could combine different flat shapes together without any sewing involved!

The limitations of this method is that only certain shapes can be crocheted this way and joined, so if you want to try something more complex and asymmetrical, you might still have to end up sewing.
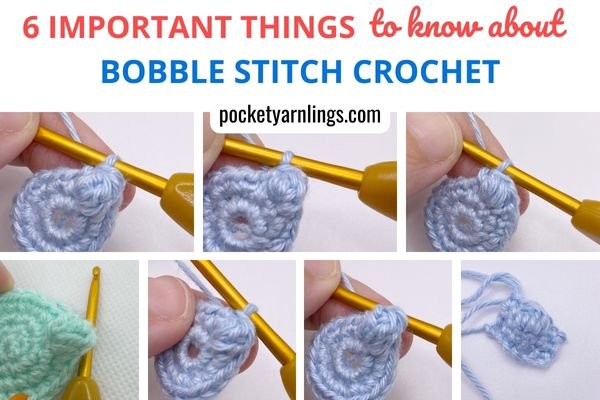
How to join 3D crochet shapes using no sew method?
Another great way to join amigurumi pieces together using no sew method, this time using 3D pieces. Actually it is simply making use of special crochet stitches like bobble or popcorn stitches. If you think about it, if you crochet a bobble stitch along a round, you are technically combining a sphere with a cylinder, without sewing! Likewise, for a popcorn stitch along a round, you are combining a cone with a cylinder.
I love using special crochet stitches to combine shapes in different variations without the need for assembly work. Just think about bobble, popcorn, loop, picot, cluster stitches, they all can be made into 3D shapes in combination with a cylinder! This is what I call seamless crocheting, which I have showed you can be done for 2D and 3D pieces. Click on the images below to access other blog posts detailing each technique!

How do you do surface crochet in amigurumi?
The very last method for joining amigurumi pieces which involves surface crocheting. We have discussed sewing right at the top, including many variations of sewing different types of pieces, then we talked about seamless crocheting. Now onto surface crocheting.
What does surface crochet mean?
Surface crocheting involves using a new set of yarn to crochet on another separate surface, whether it be a full or partial amigurumi body, or even an incomplete piece.
This is just like making a regular single crochet but now we directly apply it on the surface of a separate piece that you have already crocheted. A surface sc creates a raised overlapping layer on the original amigurumi, whereas a surface slip stitch creates a flattened effect instead.

How do you start a surface crochet?
Here are the steps involved in starting, doing and finishing a surface crochet:
1. Insert hook into a surface stitch, where overlapping new part is desired.
2. Draw new yarn through, it could be the same or different colour from the main Amigurumi body.
Then proceed onto doing the surface single crochet in the next part.
How do you do a surface single crochet?
Continue onto the next few steps:
3. Insert hook back into the same initial surface stitch.
4. Yarn over once.
5. Draw yarn through stitch, should have 2 loops on hook.
6. Then yarn over again.
7. Draw yarn through both loops on hook, to complete the first surface single crochet.
After the first completed surface single crochet, the next part I will talk about continuing from there.

How do you finish off surface crochet?
You could continue this next part in different ways, either with surface crocheting in a row or in a circle, depending on how you intend to proceed.
8. Insert hook again in the next stitch further along the row, draw yarn through again and continue single crochet row.
As you can see in the image below, I have gone onto surface single crocheting doing in a row. You can see how it adds an additional raised texture to the amigurumi. I also often use this effect to make jackets or belts for my amigurumis.

You could add on surface half double crochet or surface double crochet and so forth. I did that for my skirt example below.

How does surface crocheting join crochet pieces?
I have explained what surface crocheting is above but I have not showed how it can be used as a method for joining crochet pieces together. The simplest explanation would be you could surface crochet in a circle and then continue onto making a cylinder from there. I will elaborate more below.
How to surface crochet a circle?
With following the steps above, instead of surface crocheting in a row, do it in a circle instead. You could surface single crochet a circle on another closed amigurumi surface or even on an open surface.
Here is what I mean. Either start off with a flat piece or a 3D amigurumi. Then use a new yarn and a crochet hook to work surface single crochet stitches on the first amigurumi piece but this time in a round, like so:

What I like to do instead is to crochet a hole in the first amigurumi piece by skipping stitches. It serves as a good landmark for surface crocheting. So you see you can insert the crochet hook into the hole of the first piece and then start single crocheting in a circle by inserting the hook in consecutive skipped stitches.
Both ways you will end up with a surface crochet of a circle on an amigurumi piece. Then we move onto the next part which is how you join up crochet without sewing.
How do you join crochet with single crochet?
Finally the last part, which continues from the previous section. After you have completed the surface circle, it is just a matter of continuing in rounds. Use a stitch marker to marker the start of the first circle you made, then continue in rounds to create an extended cylinder.

So you see, after you extended the circle outwards into a cylinder, you have attached the cylinder onto the main amigurumi piece without any sewing! If you use your imagination, you could extended that circle outwards in other ways with other sides or other taller stitches. You can also surface crochet special stitches like picot or bobble stitches, the sky's the limit!
Conclusion of joining crochet pieces together
There you have it! Hopefully everything you need to know about joining crochet pieces together. I first started off talking about sewing pieces together, whether 2D or 3D pieces in various combinations, then we moved onto seamless crocheting and finally surface crocheting.

If you found this useful, please remember to share it or pin it to Pinterest. To check out more of my ideas for using various types of crochet stitch techniques to shape amigurumi, grab my free Amigurumi Shaping Starter Guide below!
💡 Want to learn all the basics of crocheting amigurumi in one place?
Grab my free 77-page Amigurumi Foundation eBook — your complete step-by-step guide to mastering tools, stitches, and beginner toy techniques (normally $17!).