

My Crocheted Pouf experiment using Recycled T-shirt yarn
While we are on the topic on making spheres and cylinders, this was my biggest (and longest) experiment that I did back in 2016. I was trying to make a DIY furniture pouf for my new home back then. Cue the image just below was what I was hoping for. BUT the catch was I wanted to use old recycled T-shirts from my old home!

Suffice to say, it did not turn out anything like that but hold out till the end to see how it turned out! So let’s start off with how I came up with the recycled T-shirt yarn, the simple Pouf pattern (cylindrical shape), the final piece and the problems I encountered because of the yarn medium I chose.
How to recycle old T-shirts into DIY yarn
For the purposes of illustration, I have used some paper to represent how the T-shirt would be cut up to form the final ball of yarn:
Step 1) Cut along the dotted line in picture

You will only be using the rectangular portion just below the cut, not the neckline or the sleeves. It should be a sort of cylindrical appearance but with holes at both ends.
Step 2) Mark out the lines to cut out

After the T-shirt has been cut across, pull it clockwise downwards so it appears horizontally across. The holes are at either ends on the left and right. If you are a very precise person, use a ruler to mark out equal intervals throughout the horizontal rectangle. Do note the width across each interval corresponds to the thickness of ‘your yarn’.
Step 3) Cut along the marked out lines

You should get this frilly appearance where the bottom is made up of many narrow columns while the top is still stuck together right across. The whole piece is subsequently shifted down until the top view is seen with the uncut portion.
4) Mark out the rest of the lines for cutting
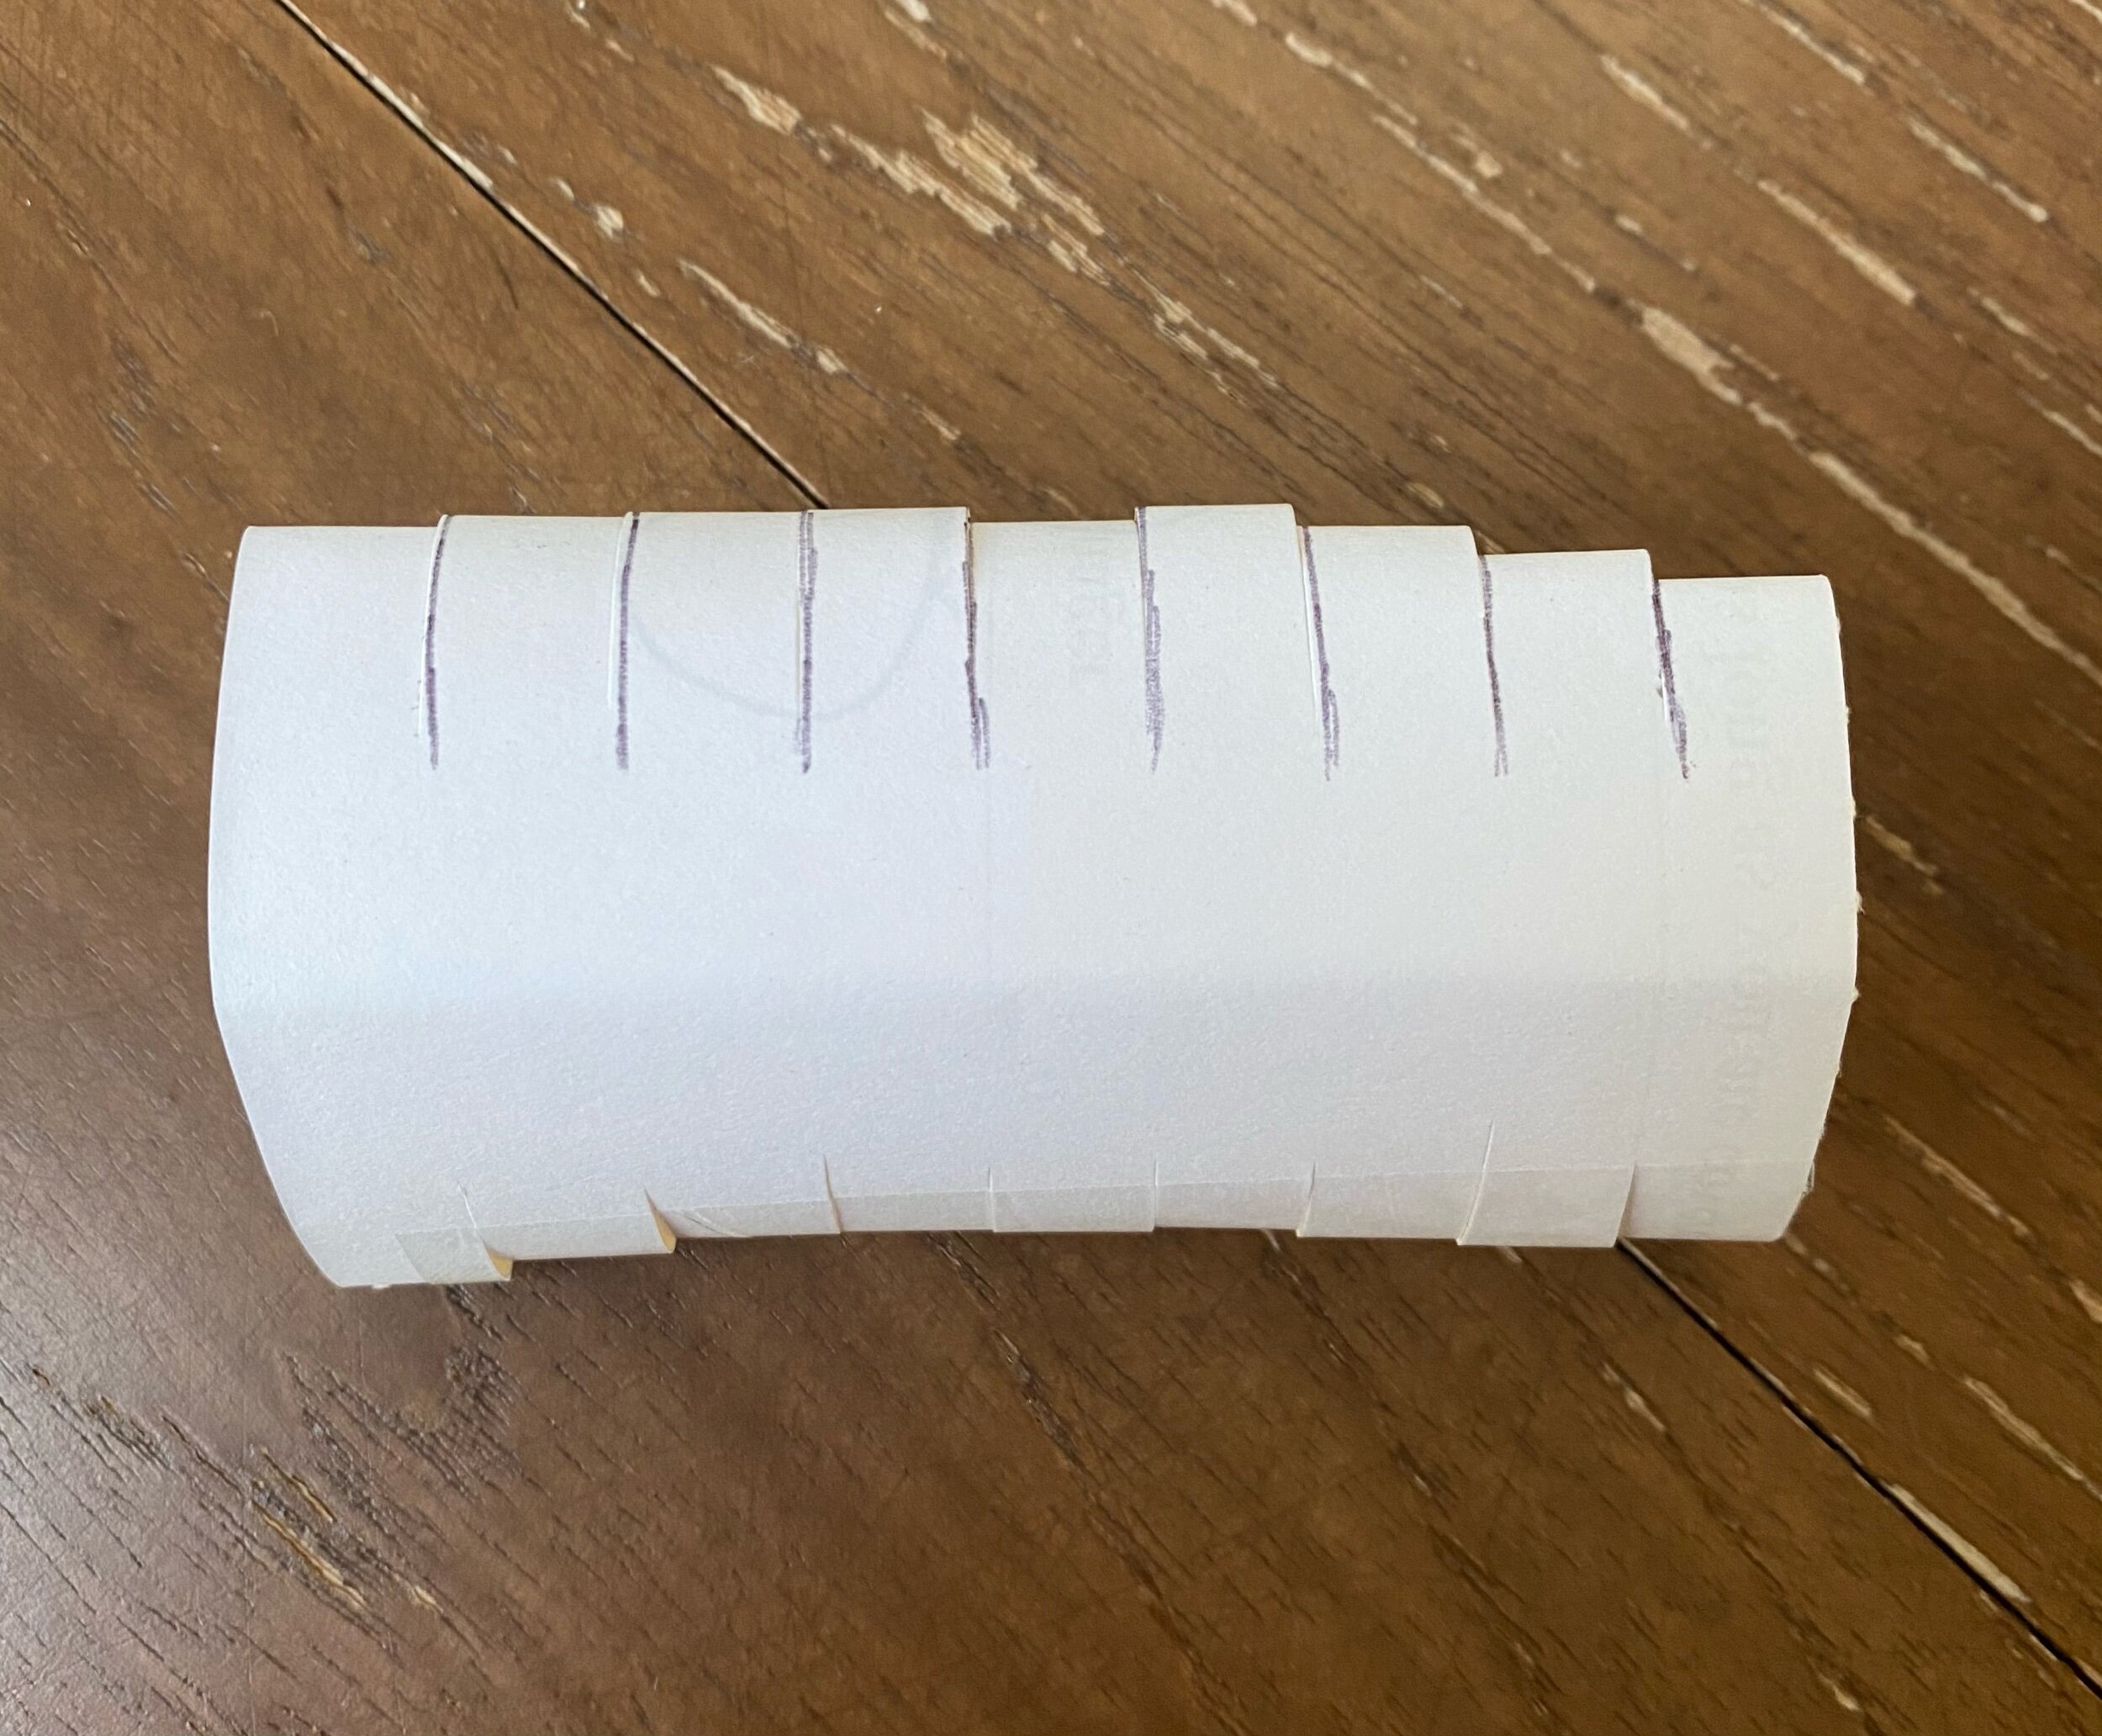

This time, when marking out the lines, do note they are at a slant, such that the 1st column at the bottom should lead into the 2nd column at the top (see image above). Continue this way for the rest of the rectangle.
Step 5) Cut out along the marked out lines


As you can see, once you start cutting into the marked out lines, a continuous narrow column starts to form, joining each preceding bottom column with the next top column. At the end, you should get one long continuous column or ‘yarn’.

This is how it appears like after all the cutting and wrap each cut-up T-shirt into individual balls of yarn like what I did below:

Full pattern for my DIY pouf and how it turned out
With the recycled T-shirt balls of yarn, the remaining equipment needed include, scissors, 10.0mm crochet hook and some recycled pillow stuffing. That’s really all! The number of T-shirts needed really depends on the size of the final Pouf you want.
Cylindrical pattern:
Main piece
Round 1: Magic ring 6 - 6st
Round 2: 2sc6 - 12st
Round 3: (Sc1, 2sc1) x 6 - 18st
Round 4: (Sc2, 2sc1) x 6 - 24st
Round 5: (Sc3, 2sc1) x 6 - 30st
Round 6: (Sc4, 2sc1) x 6 - 36st
Round 7: (Sc5, 2sc1) x 6 - 42st
Round 8: (Sc6, 2sc1) x 6 - 48st
Round 9: (Sc7, 2sc1) x 6 - 54st
Round 10: (Sc8, 2sc1) x 6 - 60st
Round 11: (Sc9, 2sc1) x 6 - 66st
Round 12: (Sc10, 2sc1) x 6 - 72st
Round 13: (Sc11, 2sc1) x 6 - 78st
Round 14: (Sc12, 2sc1) x 6 - 84st
Round 15-29: Sc84 - 84st
Round 30: (Sc12, sc2tog1) x 6 - 78st
Round 31: (Sc11, sc2tog1) x 6 - 72st
Round 32: (Sc10, sc2tog1) x 6 - 66st
Round 33: (Sc9, sc2tog1) x 6 - 60st
Round 34: (Sc8, sc2tog1) x 6 - 54st
Round 35: (Sc7, sc2tog1) x 6 - 48st
Round 34: (Sc6, sc2tog1) x 6 - 42st
Add the pillow stuffing inside the main piece cylinder.
Main piece side view

Main piece bottom view (with stuffing added)
Base piece
Round 1: Magic ring 6 - 6st
Round 2: 2sc6 - 12st
Round 3: (Sc1, 2sc1) x 6 - 18st
Round 4: (Sc2, 2sc1) x 6 - 24st
Round 5: (Sc3, 2sc1) x 6 - 30st
Round 6: (Sc4, 2sc1) x 6 - 36st
Round 7: (Sc5, 2sc1) x 6 - 42st
Round 8: (Sc6, 2sc1) x 6 - 48st
Round 9: (Sc7, 2sc1) x 6 - 54st
Round 10: (Sc8, 2sc1) x 6 - 60st
Round 11: (Sc9, 2sc1) x 6 - 66st
Round 12: (Sc10, 2sc1) x 6 - 72st
Round 13: (Sc11, 2sc1) x 6 - 78st
Round 14: (Sc12, 2sc1) x 6 - 84st
Round 15: (Sc13, 2sc1) x 6 - 90st
Round 16: (Sc14, 2sc1) x 6 - 96st
Round 17: (Sc15, 2sc1) x 6 - 102st
Round 18: (Sc16, 2sc1) x 6 - 108st
Round 19: (Sc17, 2sc1) x 6 - 114st
Round 20: (Sc18, 2sc1) x 6 - 120st
This base piece is to be inserted into the bottom of the main piece and overlapping it internally.
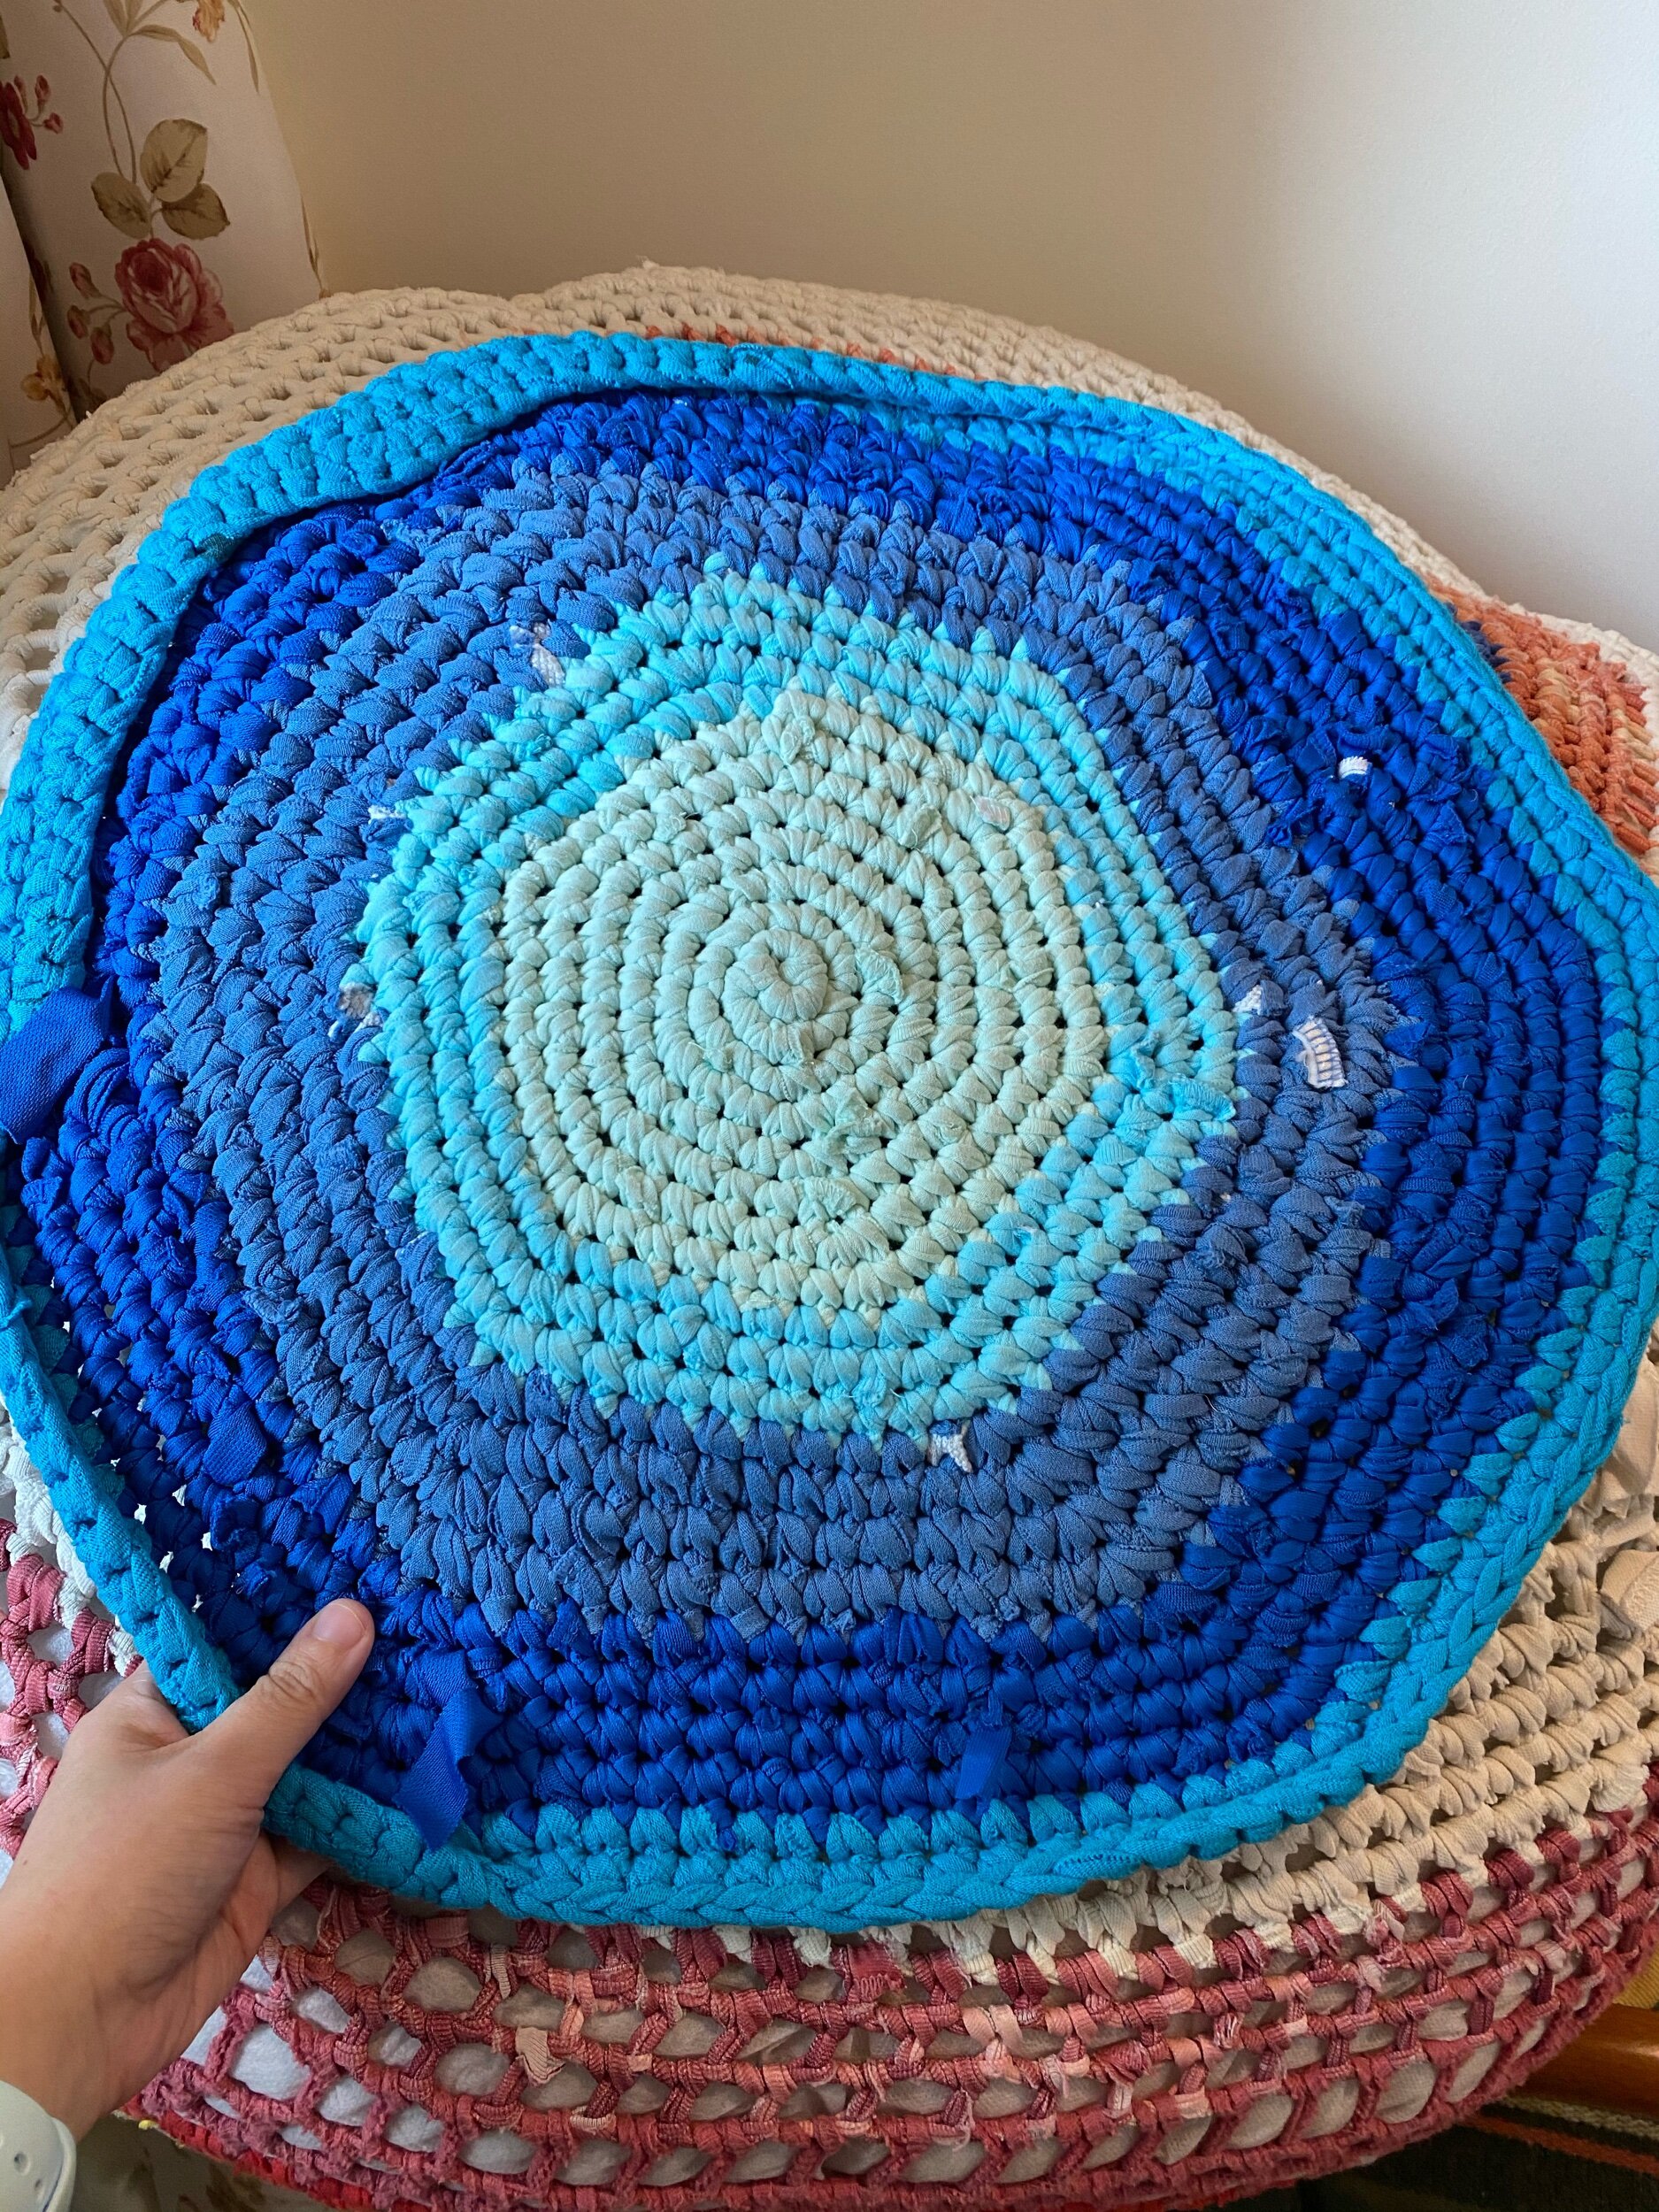

Add the base piece inside the main piece after stuffing with recycled pillows.
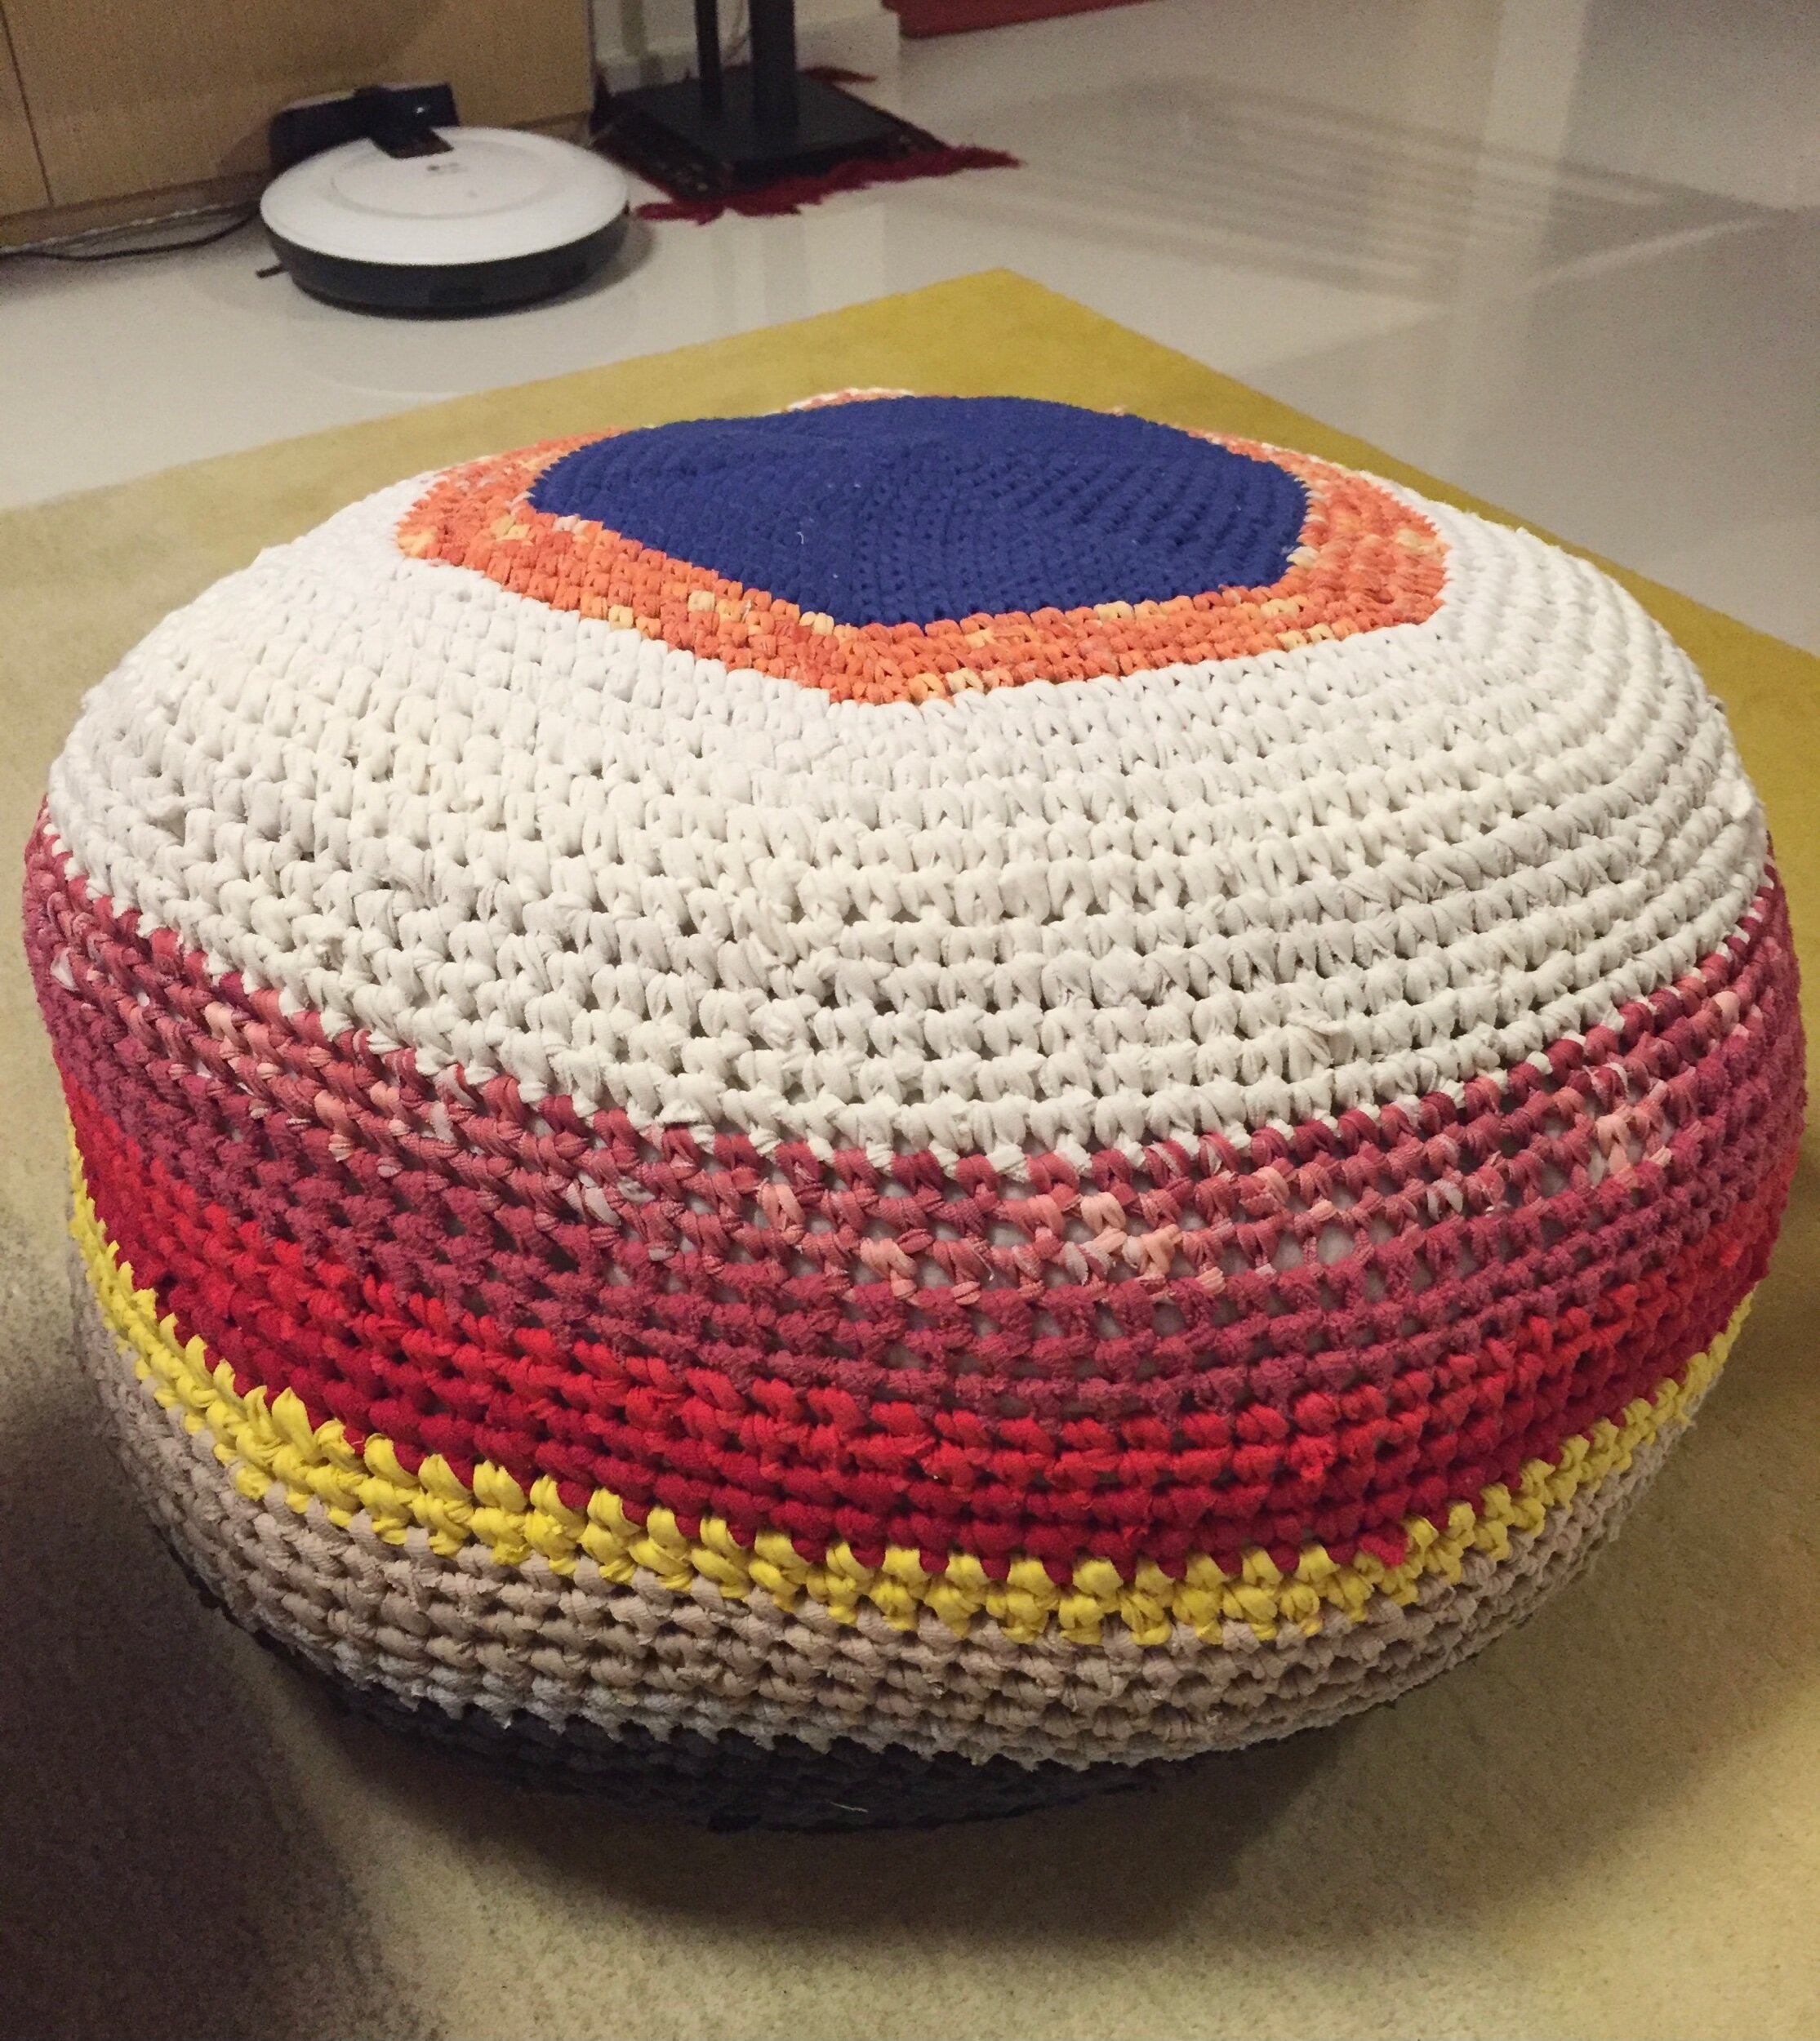
Final Pouf piece with size reference:

Problems I faced using recycled T-shirt yarn as my crochet medium:
So the final piece above does not look too bad right, or at least not that far off from what I initially intended. However, there was some issues along the making process which I faced and, 5 years on, this little furniture at home is showing signs of those issues as well.
Using recycled T-shirt yarn meant that I used various old cut-up T-shirts, where
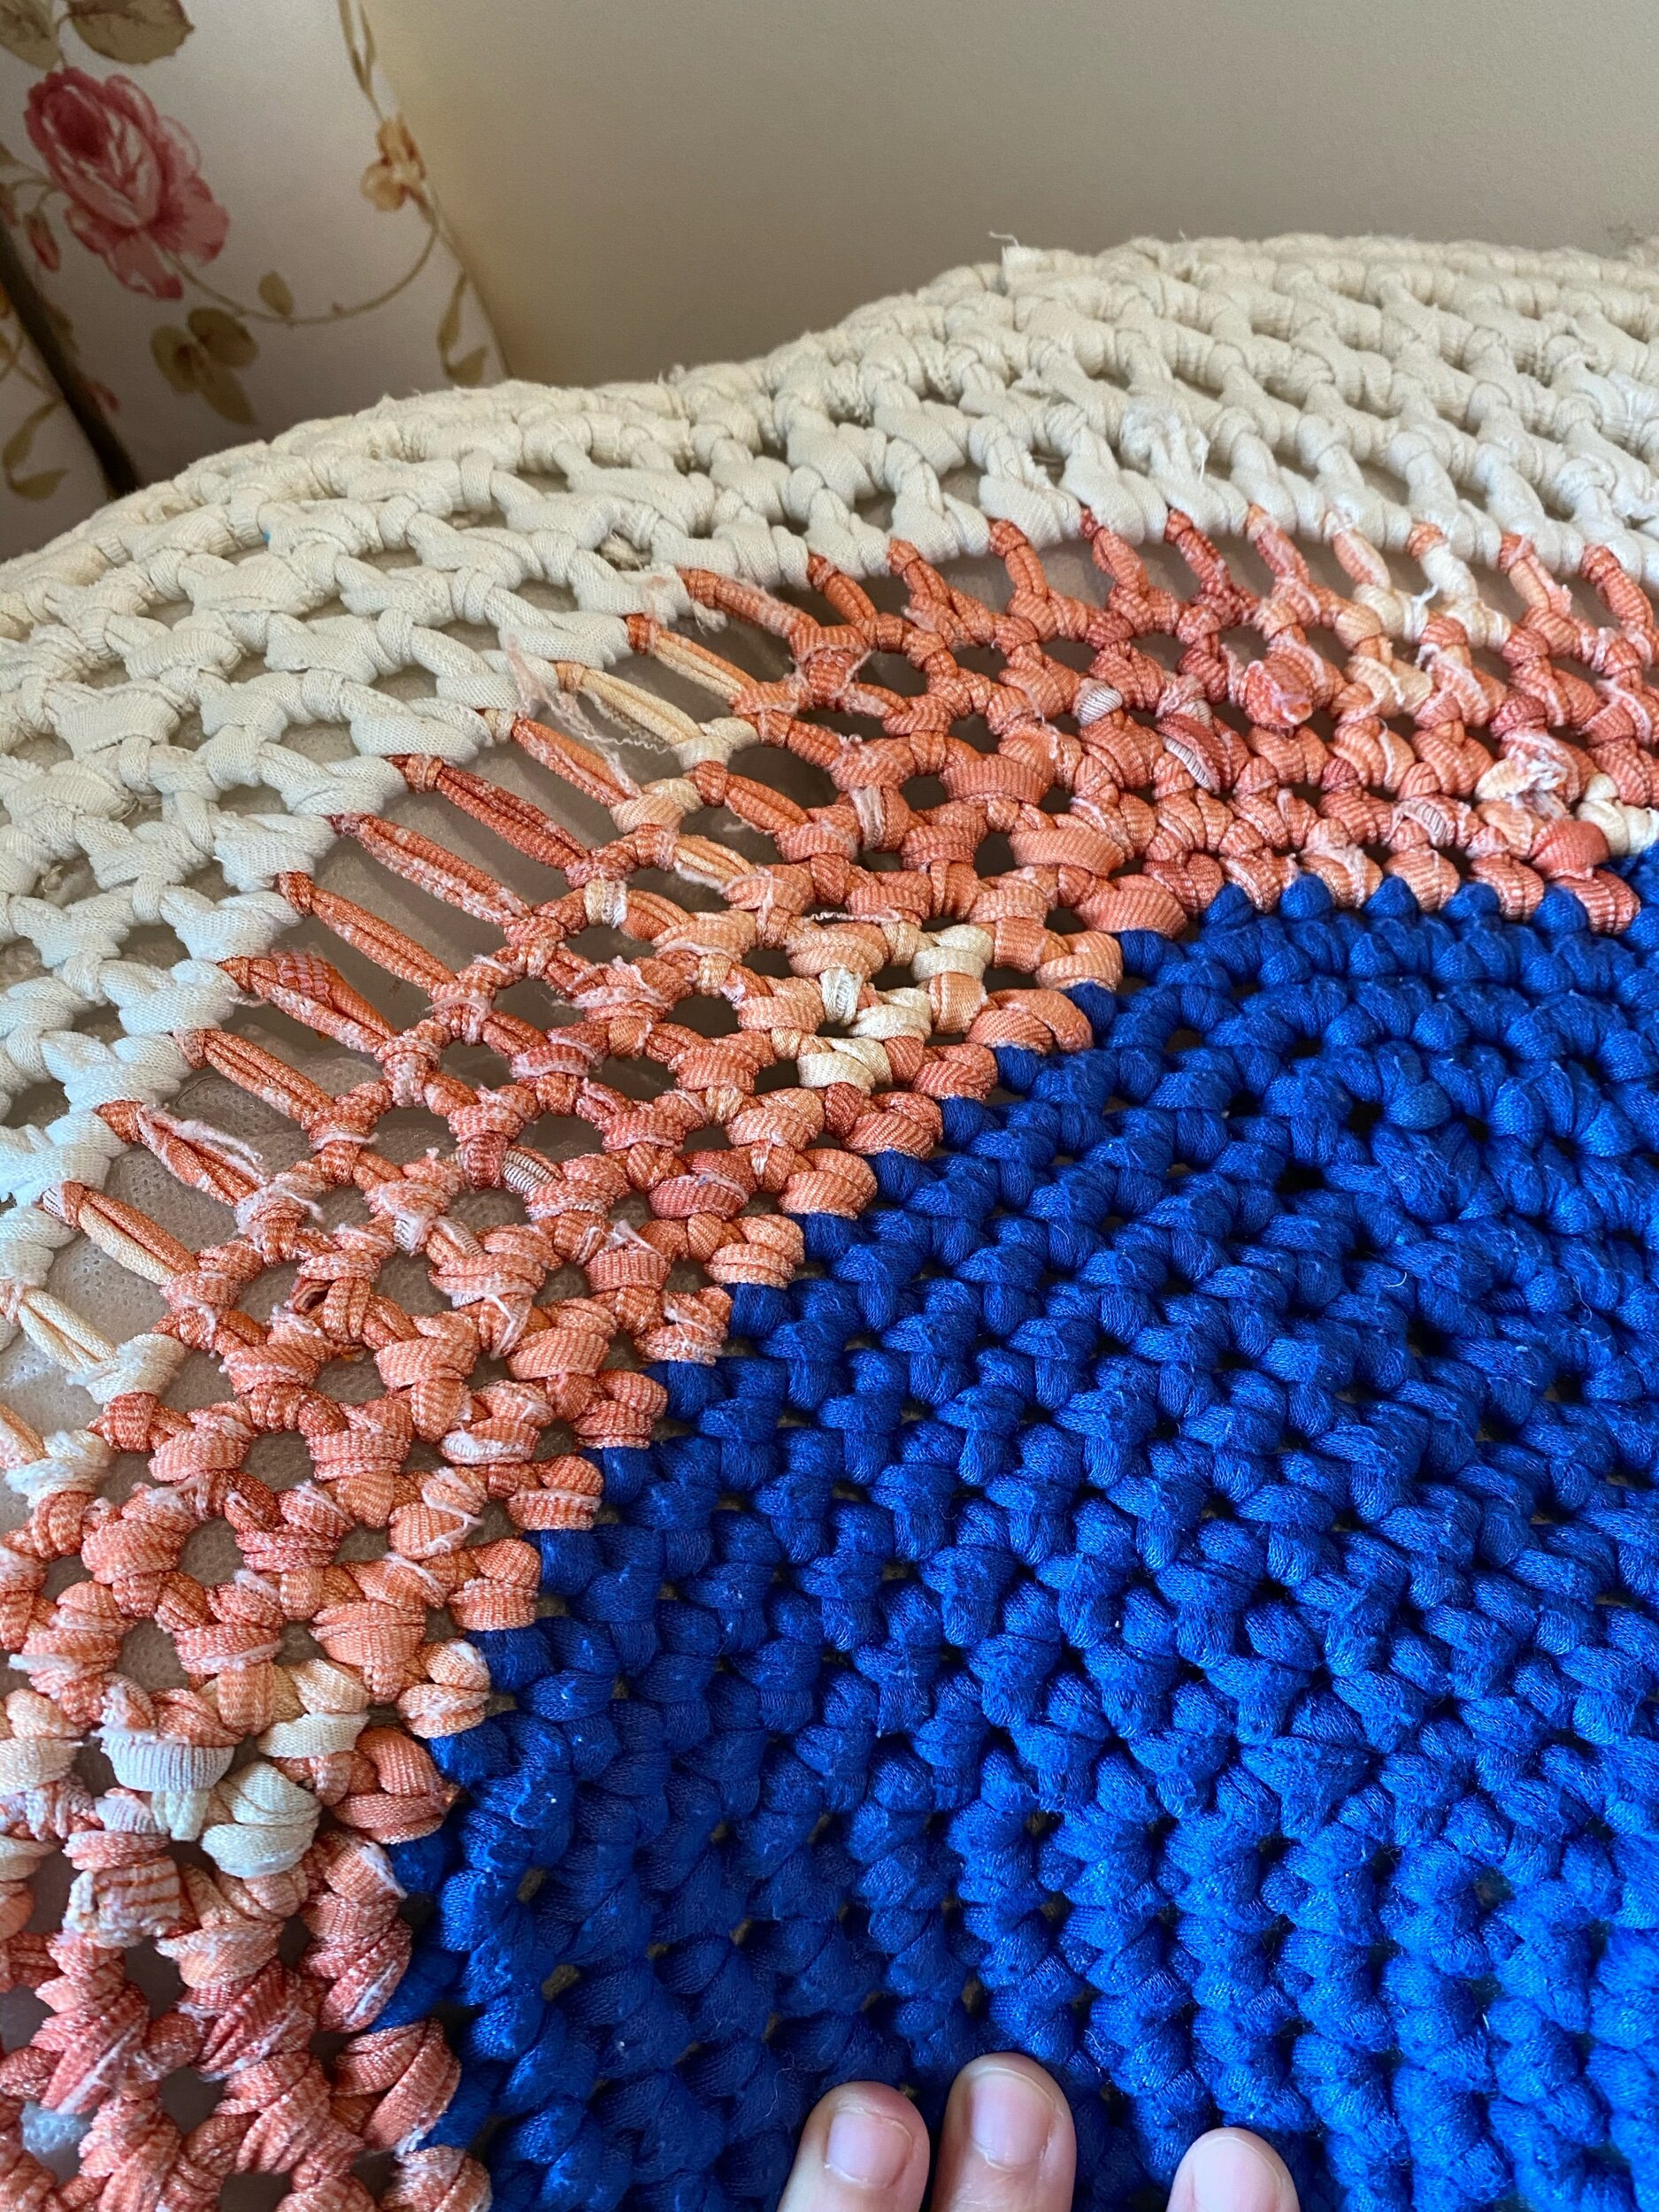
The tension was difficult to control with different T-shirts, resulting in obvious gaps in the final Pouf.
Thickness of the individual yarn balls was different because of different stretchability of each T-shirt and even within the same T-shirt because of varying prints or logos on it.
Gauging the quantity required to make the yarn was difficult because of the variability in the T-shirt sizes and hence the yarn length created. (I used my old T-shirts of my own, my husband’s, my siblings, my parents, my brother-in-law… you get the idea, I had no idea how much I was going to end up with or how big the Pouf was going to become!)
Weaving in ends was difficult to hide as a result of the gaps in between the rounds.

Cylindrical shape of the Pouf was difficulty to maintain and retain, mostly because of the DIY yarn and partially because I filled it up with recycled pillows as well!

All in all, the conclusion was that it was a fun experiment at the end and it was worth cutting up all those old T-shirts to create this DIY piece of furniture. One down-side to it is that I simply made it far too big and it’s taking up quite a lot of space in my tiny apartment now! But if you want to consider making a smaller version of a DIY Pouf for your home using recycled yarn, remember about all these points I mentioned above because you wouldn’t know if you don’t try it out for yourself! Have you tried any other DIY home decor projects before?