

8 Basic Tips on How to Crochet a Picot Stitch
The picot stitch is a decorative crochet technique that adds a small, pointed, or looped element to the fabric. This stitch is versatile and can be adjusted in size by varying the number of chains made in the loop. It's commonly used as an edging or as part of intricate designs in crochet projects. It can add texture and delicate accents in crocheted items such as borders, lacework, motifs, and more.

Table of Contents Show
Understanding the Basics of Crochet
Whether you're a beginner or an experienced crocheter, it's important to understand the basics of crochet before you start any project. In this section, we'll cover the fundamentals of crochet, including what a picot in crochet is and some crochet stitch fundamentals, so that it is easier to understand how to crochet a picot stitch.
What is a picot in crochet?
A picot is a small loop that is created by chaining a few stitches and then joining them back to the main body of the crochet work. Picots are often used as decorative elements in crochet, particularly in edgings and lacework.
To create a picot, you will need to chain a certain number of stitches, depending on the pattern you are following. Once you have chained the required number of stitches, you will need to join them back to the main body of the crochet work by slip stitching into the next stitch.

Crochet Stitch Fundamentals
Before you can start crocheting, you'll need to learn some basic crochet stitches. These stitches are the building blocks of crochet, and once you have mastered them, you'll be able to create a wide variety of crochet projects.
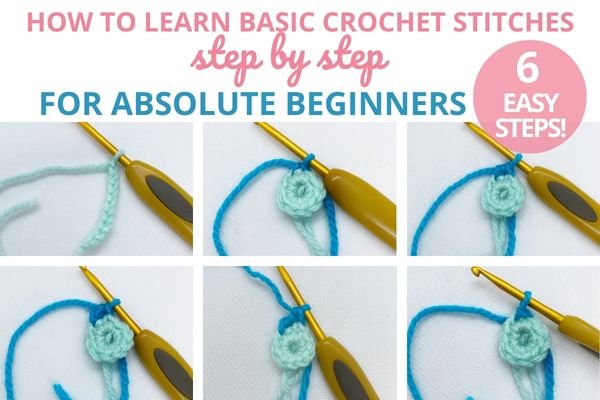
The most basic crochet stitch is the chain stitch, which is used to create the foundation for most crochet projects. Other basic crochet stitches include the single crochet stitch, the double crochet stitch, and the treble crochet stitch. Learn everything about them in this article, “How to Learn Basic Crochet Stitches step by step for Absolute Beginners - 6 Easy Steps!”.
By mastering the basic crochet stitches, you can move onto trying out picot stitches.
Mastering the Picot Stitch
Crocheting a picot stitch adds a beautiful decorative touch to any project. It's a simple and easy technique that can be used to create edgings, lace motifs, and more. In this section, we'll show you how to master the picot stitch with step-by-step instructions.
Starting the Picot Stitch
To start the picot stitch, you need to have a basic understanding of crochet stitches. You can use any crochet stitch as a base for your picot stitch, such as single crochet, double crochet, or treble crochet. Start off with these steps:
Work to the point in your pattern where you want to create the picot stitch. This can be at the end of a row, as an edging, or within the fabric for decorative purposes.
Creating the Picot Loop
The next step is to create the picot loop. This is what gives the picot stitch its distinctive look. Here's how to create the loop:
2. Chain a small number of stitches, usually 3-5, depending on the size of the picot you want to create.
3. After making the chains, slip stitch into the first chain you made (the one closest to your hook). This creates a small loop or bump.
Securing the Picot Stitch
Finally, you need to secure the picot stitch to prevent it from unraveling. Here's how to do it:
4. Work the next stitch as usual, whether it's continuing along the row, working the next stitch, or following the design instructions.

Here is a short picot stitch pattern to follow:
Row 1: Ch5
Row 2: Insert into 2nd ch from hook, sc1, (sc1, ch3, sc1 down side ch), sc1 in next main st, sc1 - 4st
Congratulations! You've now mastered the picot stitch. With a little practice, you'll be able to create beautiful edgings and motifs with ease.
What are the different types of Picot Stitches?
When it comes to crochet, picot stitches are a beautiful way to add a decorative edge to your project. They create a small loop that adds texture and interest to your work. There are different types of picot stitches that you can use depending on the look you want to achieve. Here are two common picot stitches that you can try:
How do you do a single crochet picot stitch?
A single crochet picot stitch is a simple stitch that you can use to create a small loop in your crochet project. Here are the steps to create a single crochet picot stitch:
Chain the desired number of stitches for your project.
Insert your hook into the first chain stitch.
Proceed to do a single crochet stitch along the side chain.
End off with a single crochet stitch along the main row.
How do you do a slip stitch picot stitch?
A slip stitch picot stitch is much like a single crochet picot stitch, but it creates flatter triangular appearance. Here are the steps to create a slip stitch picot stitch:
Chain the desired number of stitches for your project.
Insert your hook into the first chain stitch.
Proceed to do a slip stitch along the side chain.
End off with a single crochet stitch along the main row.

How do you do a double crochet picot stitch?
A double crochet picot stitch is more complex than a single crochet picot stitch. I have used it to make a larger sized triangle and it can be made into a 3D cone shape together with a concurrent cluster stitch.
Start Position: Begin at the point in your pattern where you want to create the double crochet picot stitch.
Double Crochet (dc) 1: Start by working 1 double crochet stitch.
Picot Stitch: To create the picot:
Chain a small number of stitches (usually 3 to 5 chains depending on the desired size).
After making the chains, slip stitch into the first chain you made (the one closest to your hook). This forms the picot bump.
Double Crochet (dc) 1: Complete the sequence by working another double crochet stitch.

By using these three picot stitches, you can create a beautiful and decorative edge on your crochet projects. Experiment with different yarns and colours to create unique and stunning designs.

Free Amigurumi Shaping Starter Guide
Learn how to create a toy for your child with your own hands in 5 simple steps.
Variations of Picot Stitches to Try
There are so many variations of picot stitches out there, even I get confused sometimes. Here are some types of picot stitches I have tried experimenting with, to get different results at the end. Remember to always check the designer’s legend at the start of the pattern and follow along according to those instructions, to get the best possible result at the end! If this part confuses you, just check out the video right below it to see what I mean!
Just chain alone
Ch3 then sc1 into same main st
Ch3 then sl st 1 into same main st
Working into 1st ch from main st
Ch3 then sc1 into 1st ch from main st, then sc1 into same main st
Ch3 then sl st 1 into 1st ch from main st, then sc1 into same main st
Working into 2nd ch from hook
Ch3 then sc1 into 2nd ch from hook, then sc1 into same main st
Ch3 then sl st 1 into 2nd ch from hook, then sc1 into same main st
Completing in the next main st
Ch3 then sc1 into 2nd ch from hook, then sc1 into next main st
Ch3 then sl st 1 into 2nd ch from hook, then sc1 into next main st
Double crochet picot
Long picot
Video of Variations in Picot Stitch
Check out the video below showcasing the different variations listed above. Also remember to subscribe to Pocket Yarnlings Youtube Channel with the button below to get updates on more amigurumi technique ideas!
Practical Tips for Crocheting Picot Stitches
Crocheting picot stitches can add a decorative touch to your project. Here are some practical tips to help you crochet picot stitches with ease.
Consistency in Tension
Maintaining a consistent tension is essential when crocheting picot stitches. A tight tension can make the picot stitches look small and cramped, while a loose tension can make them look floppy and uneven.
To maintain a consistent tension, try to keep your hook and yarn relaxed. Don't pull too tightly on the yarn when making stitches, and don't grip the hook too tightly. Experiment with different hook sizes and yarn types to find the right combination for your project.
Picot Stitch Variations
There are many variations of the picot stitch that you can use to add variety to your project. Some popular variations include:
Long Picot: This variation involves making a longer picot by chaining more than three stitches.
Picot Edging: This variation involves using picot stitches to create an edging around your project.
Slip stitch and double crochet picot stitches as stated above.
Experiment with different variations to find the one that works best for your project. Remember to maintain a consistent tension and have fun with your crocheting!

Advanced Crochet Techniques
If you're an experienced crocheter, you may be looking for ways to take your skills to the next level. Incorporating picot stitches into your patterns is a great way to add some extra flair to your work. Here are some tips for using picot stitches in advanced crochet projects.
Incorporating Picot Stitches into Patterns
Picot stitches can be used in a variety of ways to add interest to your crochet projects. One way to incorporate them is to use them as a border. For example, you could use a row of picot stitches to finish off the edge of a blanket or scarf. Alternatively, you could use picot stitches as a decorative element within a pattern. For example, you could use them to create a lacy effect in a shawl or sweater.
When incorporating picot stitches into your patterns, it's important to consider the overall aesthetic you're trying to achieve. Picot stitches can be used to create a delicate, lacy effect, or they can be used to create a more bold, graphic look. Experiment with different sizes and spacings of picot stitches to find the look that works best for your project.

Combining Picot Stitches with Other Techniques
Picot stitches can be combined with other crochet techniques to create even more complex designs. For example, you could use picot stitches in combination with cluster stitches to create a textured, three-dimensional effect. Alternatively, you could use picot stitches in combination with colour changes to create a bold, graphic design.
When combining picot stitches with other techniques, it's important to consider how the different elements will work together. For example, if you're using picot stitches and cluster stitches together, you'll need to make sure that the spacing of the picot stitches is consistent with the spacing of the cluster stitches in the subsequent round.
By incorporating picot stitches into your patterns and combining them with other techniques, you can take your crochet skills to the next level and create truly unique and beautiful designs.

Conclusion of how to crochet a picot stitch
The picot stitch is a crochet technique used to create decorative accents and delicate textures in projects. Adjust the picot's size by altering the number of chains to achieve a personalized touch in your designs. This stitch is versatile, ideal for adding intricate details, edging, or enhancing the beauty of various crochet patterns and I love using them for my amigurumi projects too!
Free Amigurumi Shaping Starter Guide
Learn how to create a toy for your child with your own hands in 5 simple steps.
Related articles
How do you Crochet Different Shapes in Amigurumi?
14 useful things you need to know about How to Crochet a Circle
8 extraordinary ways on How to Crochet an Oval Pattern
How to Crochet a Tube in 10 different useful styles
6 unmissable steps on How to do a Popcorn Stitch in Crochet