

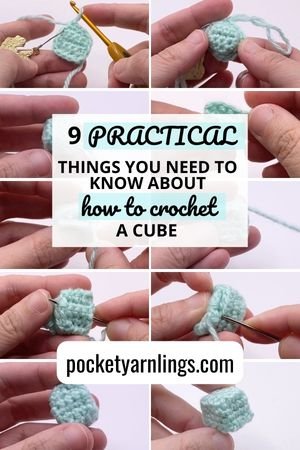
9 Practical Things you need to know about How to Crochet a Cube
Crochet cubes are often used in various projects, including amigurumi, children's toys, home décor, or even as building blocks for larger crochet constructions. They offer a fun and versatile way to explore geometric shapes in crochet and can be customized in numerous ways to suit different designs and preferences.
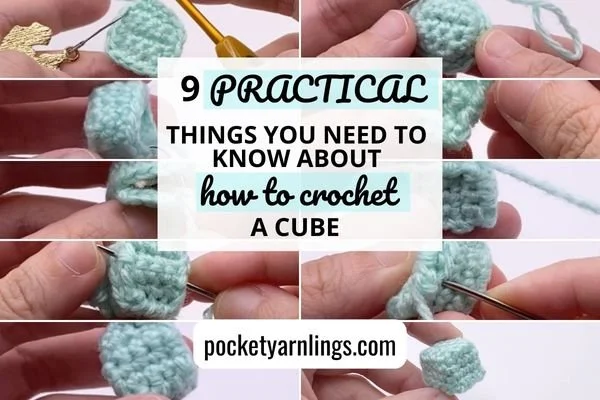
Table of Contents Show
What is a crochet cube?
A crochet cube is a three-dimensional shape made entirely of crocheted squares joined together at their edges to form a cube. Typically, each face of the cube is crocheted separately using a square pattern, and then the squares are stitched together to assemble the cube.
Can you crochet a cube?
Yes of course you can crochet a cube. To create a crochet cube, you would usually crochet six squares of the same size, one for each face of the cube. Once all six squares are completed, they are stitched together, joining the edges to form the cube shape. Another way to crochet a cube is to crochet a base square first and then work in rounds around that square and extend downwards into a cube shape, as will be discussed below.

How to crochet a cube step by step?
First, I will talk about the general steps involved in crocheting a cube and in the next section, I will include the pattern needed to create the cube. The 3D version of a square would be a cube with all 6 sides being the same size as the square.
Start off with a basic square pattern first by crocheting in rows back and forth.
Transition into rounds by crocheting all along four sides of square above.
Continue to progress down the rounds, also along four sides of square, with the appropriate number of rounds resulting in the same height as the square, since all the sides are equal in a cube.
Finish off with the same initial basic square to close up the last exposed side of the cube.
How to crochet a cube single crochet?
The most logical way to make a crochet cube would be to crochet 6 separate single crochet squares and then sew them together along their sides either using whip stitch or even crocheting them together. This is the method explained later until the granny square section.
On the other hand, I have listed another method as answered in the previous question above and the crochet cube is even faster to work up using this technique. The pattern is listed subsequently below.
We will start off with the square pattern first, then continue into rounds and end off with the same square covering the last side. The pattern is as follows below:
Row 1: Chain 5
Row 2: Sc4, ch1 and turn - 4st
Row 3-5: Repeat Row 2 – 4st
Turn and rotate whole piece, sc1 in last st, then place stitch marker here. Continue in rounds now, instead of rows.
Round 1: Sc1 in last st (as mentioned above), sc2 along side, 2sc1 in corner, turn and rotate, sc2 along bottom, 2sc1 in corner, turn and rotate, sc3 along side, turn and rotate, sc4 - 16st
Round 2-3: Sc16 in a round - 16st

Using a separate new piece of yarn, create the same square again:
Row 1: Chain 5
Row 2: Sc4, ch1 and turn - 4st
Row 3-5: Repeat Row 2 – 4st
Add stuffing to the first piece that has 5 sides, then close up the last side with the second square piece by sewing them together using whipstitch.
How do you crochet a rounded cube?
This method involves crocheting around a magic ring and making selected stitches fatter to simulate the corners of a square. Go ahead and try until Round 4 to get a small triangle, I wrote up to Round 5 so that the number pattern is easier to understand and continue if you want to make the square larger.
Round 1: Magic ring sc4 – 4st
Round 2: 4sc4 – 16st
Round 3: (Sc3, 4sc1) x 4 – 28st
Round 4: (Sc6, 4sc1) x 4 – 40st
Round 5: Sc40 BLO – 40st
Round 6: Sc40 – 40st
Round 7: Sc40 – 40st
Continue working in rounds, make the demarcation with BLO stitches so you can continue working downwards. Likewise, close up the last side with another square crocheted from a round.

How do you crochet a granny cube step by step?
Creating a granny cube involves making smaller granny squares and assembling them to form the cube. Here's a step-by-step guide to explain the general steps involved:
Steps:
Granny Squares: Start by crocheting six granny squares of the same size. You can make them using the classic granny square pattern.
Make Six Identical Squares: Crochet six squares, ensuring they are all the same size and have the same stitch count.
Assembly: Lay out the squares in a cross shape. Starting with two squares, place them right sides together and begin joining them along one edge. Use a slip stitch or single crochet to join the squares together. Repeat this step, joining each square to its adjacent one until you have a strip of three squares.
Forming the Cube: Fold the strip of squares into a U-shape, joining the ends together to form a loop of three squares. Then, take the remaining three squares and join them to the open edges of the loop, forming a cube shape. Make sure to stitch the squares together securely at the corners to maintain the cube's shape.
Secure and Finish: Weave in any loose ends and adjust the cube as needed to ensure all sides are aligned and the cube holds its shape properly.
Here is an example of a granny square cube toy to check out.
What is the easiest cube to crochet?
The easiest cube to crochet is usually a solid cube made of single crochet stitches. This simple cube doesn't involve intricate patterns or complex stitches, making it perfect for beginners. On top of that, if you crochet using the single crochet square method that continues into a round and then subsequently going further downwards, this is the fastest and easiest way to crochet up a cube. Remember the last part involves crochet a separate square piece and closing up the cube.
Why is my crochet cube not square?
If your crochet cube is not square, there might be a few reasons, most commonly from uneven tension resulting in sides that are not uniform and hence distorted. Also, if there are mismatched stitch counts on any sides of the square because of skipped stitches, you could end up with a side that is longer. Lastly another common reason for an uneven crochet cube is during the assembly part right at the end, the squares are not aligned correctly.

Why is my crochet cube not flat in the round?
Sometimes you might encounter your crochet cube not being flat in the round, much like how a flat 2D square can curl up. This can be from multiple increases within the same stitch, which can occur with the crochet square in a round method. Or it you are incorporating increases or decreases incorrectly, or using different stitch heights in different rounds, it can cause the sides of the cube to curl up. Other common reasons would include tension issues and joining errors. Joining the rounds incorrectly can cause a slight shift or spiral effect, making the cube appear less flat.
How to crochet a cube with clear edges?
In order to crochet a cube with clear edges, troubleshoot the above problems by checking your tension and ensuring consistency in your stitches. Double check stitch counts in each row so that the squares all match up. Use the same yarn and hook size throughout the project. Finally, carefully assemble the squares, ensuring they are aligned properly before stitching them together.

Free Amigurumi Shaping Starter Guide
Learn how to create a toy for your child with your own hands in 5 simple steps.
How many stitches do you need to crochet a cube?
The number of stitches required to crochet a cube depends on several factors, including the desired size of the cube, the stitch pattern used, and whether you're working in the round or creating individual squares.
For a basic cube made of six squares assembled together, the number of stitches needed per square will vary based on the square's size, stitch pattern, and desired density of the fabric.
How do you crochet a small cube?
To crochet a small cube, you'll typically crochet six smaller squares of the same size and then assemble them to form the cube. Start off with a small square with fewer stitches in the foundation chain and work fewer rows. For example, you might start with a chain of 5 with a row of 4 stitches and work 4 rows to create a small square.
You could continue in rounds like the pattern example given earlier in this post. Or on the other hand, you could follow the granny square assembly method mentioned earlier, which involves joining up 3 squares in a row twice and combining both pieces together.
How to crochet a large cube?
Adjusting the size of the squares and the number of stitches in each row will allow you to create cubes of various sizes. So, for the example of a large cube, you could start off with a larger foundation chain like a chain of 15 with a row of 14 stitches, then subsequently work down 14 rows to keep the equal square shape.
By creating larger squares and assembling them in the same manner as a regular-sized cube, you can craft a larger version.
How long does it take to crochet a cube?
The time it takes to crochet a cube can vary widely based on several factors:
Size of the Cube: Larger cubes with more significant squares will naturally take longer to crochet than smaller ones.
Experience Level: Beginners might take more time compared to experienced crocheters due to the learning curve and getting accustomed to the stitches and assembly.
Stitch Complexity: If you're using more intricate stitch patterns or decorative elements, it might take longer to complete each square and assemble the cube.
Crochet Speed: Personal crochet speed varies among individuals. Some people crochet faster than others, so the time taken can differ.
Consistency and Focus: Crocheting requires attention to detail. The time taken might vary depending on interruptions, breaks, or distractions while working on the project.
As a rough estimate, a basic cube made up of squares crocheted in a simple stitch pattern might take a few hours for an experienced crocheter. However, larger or more complex cubes with intricate patterns and larger squares could take several hours or even days to complete.
How to crochet variations of a cube?
This section is talking about different variations of a cube, which is something you might consider when you are crocheting your next crochet project or amigurumi. They can be quite similar to a cube shape, either in a 2D form or a 3D form. For more details in each case, there may be links to other more comprehensive blog posts.
How to crochet a square?
The simplest crochet square pattern is below. To add onto to it, you could add a single crochet border around it, much like the base square used in the crochet cube example above.
Row 1: Chain 5
Row 2: Sc4, ch1 and turn - 4st
Row 3-5: Repeat Row 2 – 4st
You can check out more about “10 Helpful Things you need to know about How to Crochet a Square”.

How to crochet a rectangle?
This on the other hand, is the simplest crochet rectangle pattern is below. To add onto to it, you could add a single crochet border around it, much like the base square used in the crochet cube example above. In the next part, I will also talk about crocheting a 3D rectangle or a cuboid shape, which is very similar to crocheting a cube.
Row 1: Chain 7
Row 2: Sc6, ch1 and turn - 4st
Row 3-5: Repeat Row 2 - 4st
You can check out more in this article, “12 Actionable Techniques you need to know about How to Crochet a Rectangle” below.

How to crochet a rectangular cube?
A 3D rectangle would mean a cuboid, with 4 sides being rectangular and longer and the last 2 opposite sides smaller like a square. The steps are very similar to crocheting a cube except this time the sides are not equal in length, but opposite sides do match up.
We will similarly start off the same way as the rectangle above, then continue into rounds and end off with the same rectangle covering the last side. The pattern is as follows:
Row 1: Chain 7
Row 2: Sc6, ch1 and turn - 4st
Row 3-5: Repeat Row 2 – 4st
Turn and rotate whole piece, sc1 in last st, then place stitch marker here. Continue in rounds now, instead of rows.
Round 1: Sc1 in last st (as mentioned above), sc2 along side, 2sc1 in corner, turn and rotate, sc4 along bottom, 2sc1 in corner, turn and rotate, sc3 along side, turn and rotate, sc6 - 20st
Round 2-3: Sc20 in a round - 20st
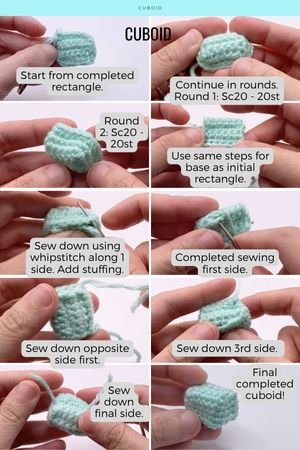
Using a separate new piece of yarn, create the same rectangle again:
Row 1: Chain 7
Row 2: Sc6, ch1 and turn - 4st
Row 3-5: Repeat Row 2 – 4st
Add stuffing to the first piece that has 5 sides, then close up the last side with the second rectangular piece by sewing them together using whipstitch. I have used this method to create a couch and a similar more long-winded version to create an ice cream truck.
Here is another useful article to check out, “How do you Crochet Different Shapes in Amigurumi?”. Also, go ahead and pin the image to Pinterest if you found this article useful!
Conclusion of how to crochet a cube
Crocheting a cube involves transforming a square base into a three-dimensional form through a strategic transition from rows to rounds. By crocheting identical squares and joining them together, a cube structure emerges, providing a versatile foundation for various amigurumi creations or miniature objects like presents or furniture. This method allows crafters to explore the transition between flat shapes and solid structures in crochet, which is a great way to brainstorm new ways to incorporate both 2D and 3D shapes in your next amigurumi!
Free Amigurumi Shaping Starter Guide
Learn how to create a toy for your child with your own hands in 5 simple steps.
Related articles
How do you Crochet Different Shapes in Amigurumi?
14 useful things you need to know about How to Crochet a Circle
8 extraordinary ways on How to Crochet an Oval Pattern
10 Helpful Things you need to know about How to Crochet a Square
How to Crochet a Tube in 10 different useful styles
Mastering Crochet Balls: Step-by-Step Guide for Creating Perfect Spheres