

Surface Crochet for Limb Attachment to Amigurumi

Surface crocheting is another one of my favourite techniques for making amigurumis, whether it be detailing or even the limbs. This method allows for attachment of separate pieces without the sewing involved at all! I have previously used it in various ways, read on more to see what I mean.
Ways to use Surface Single Crochet in Amigurumi
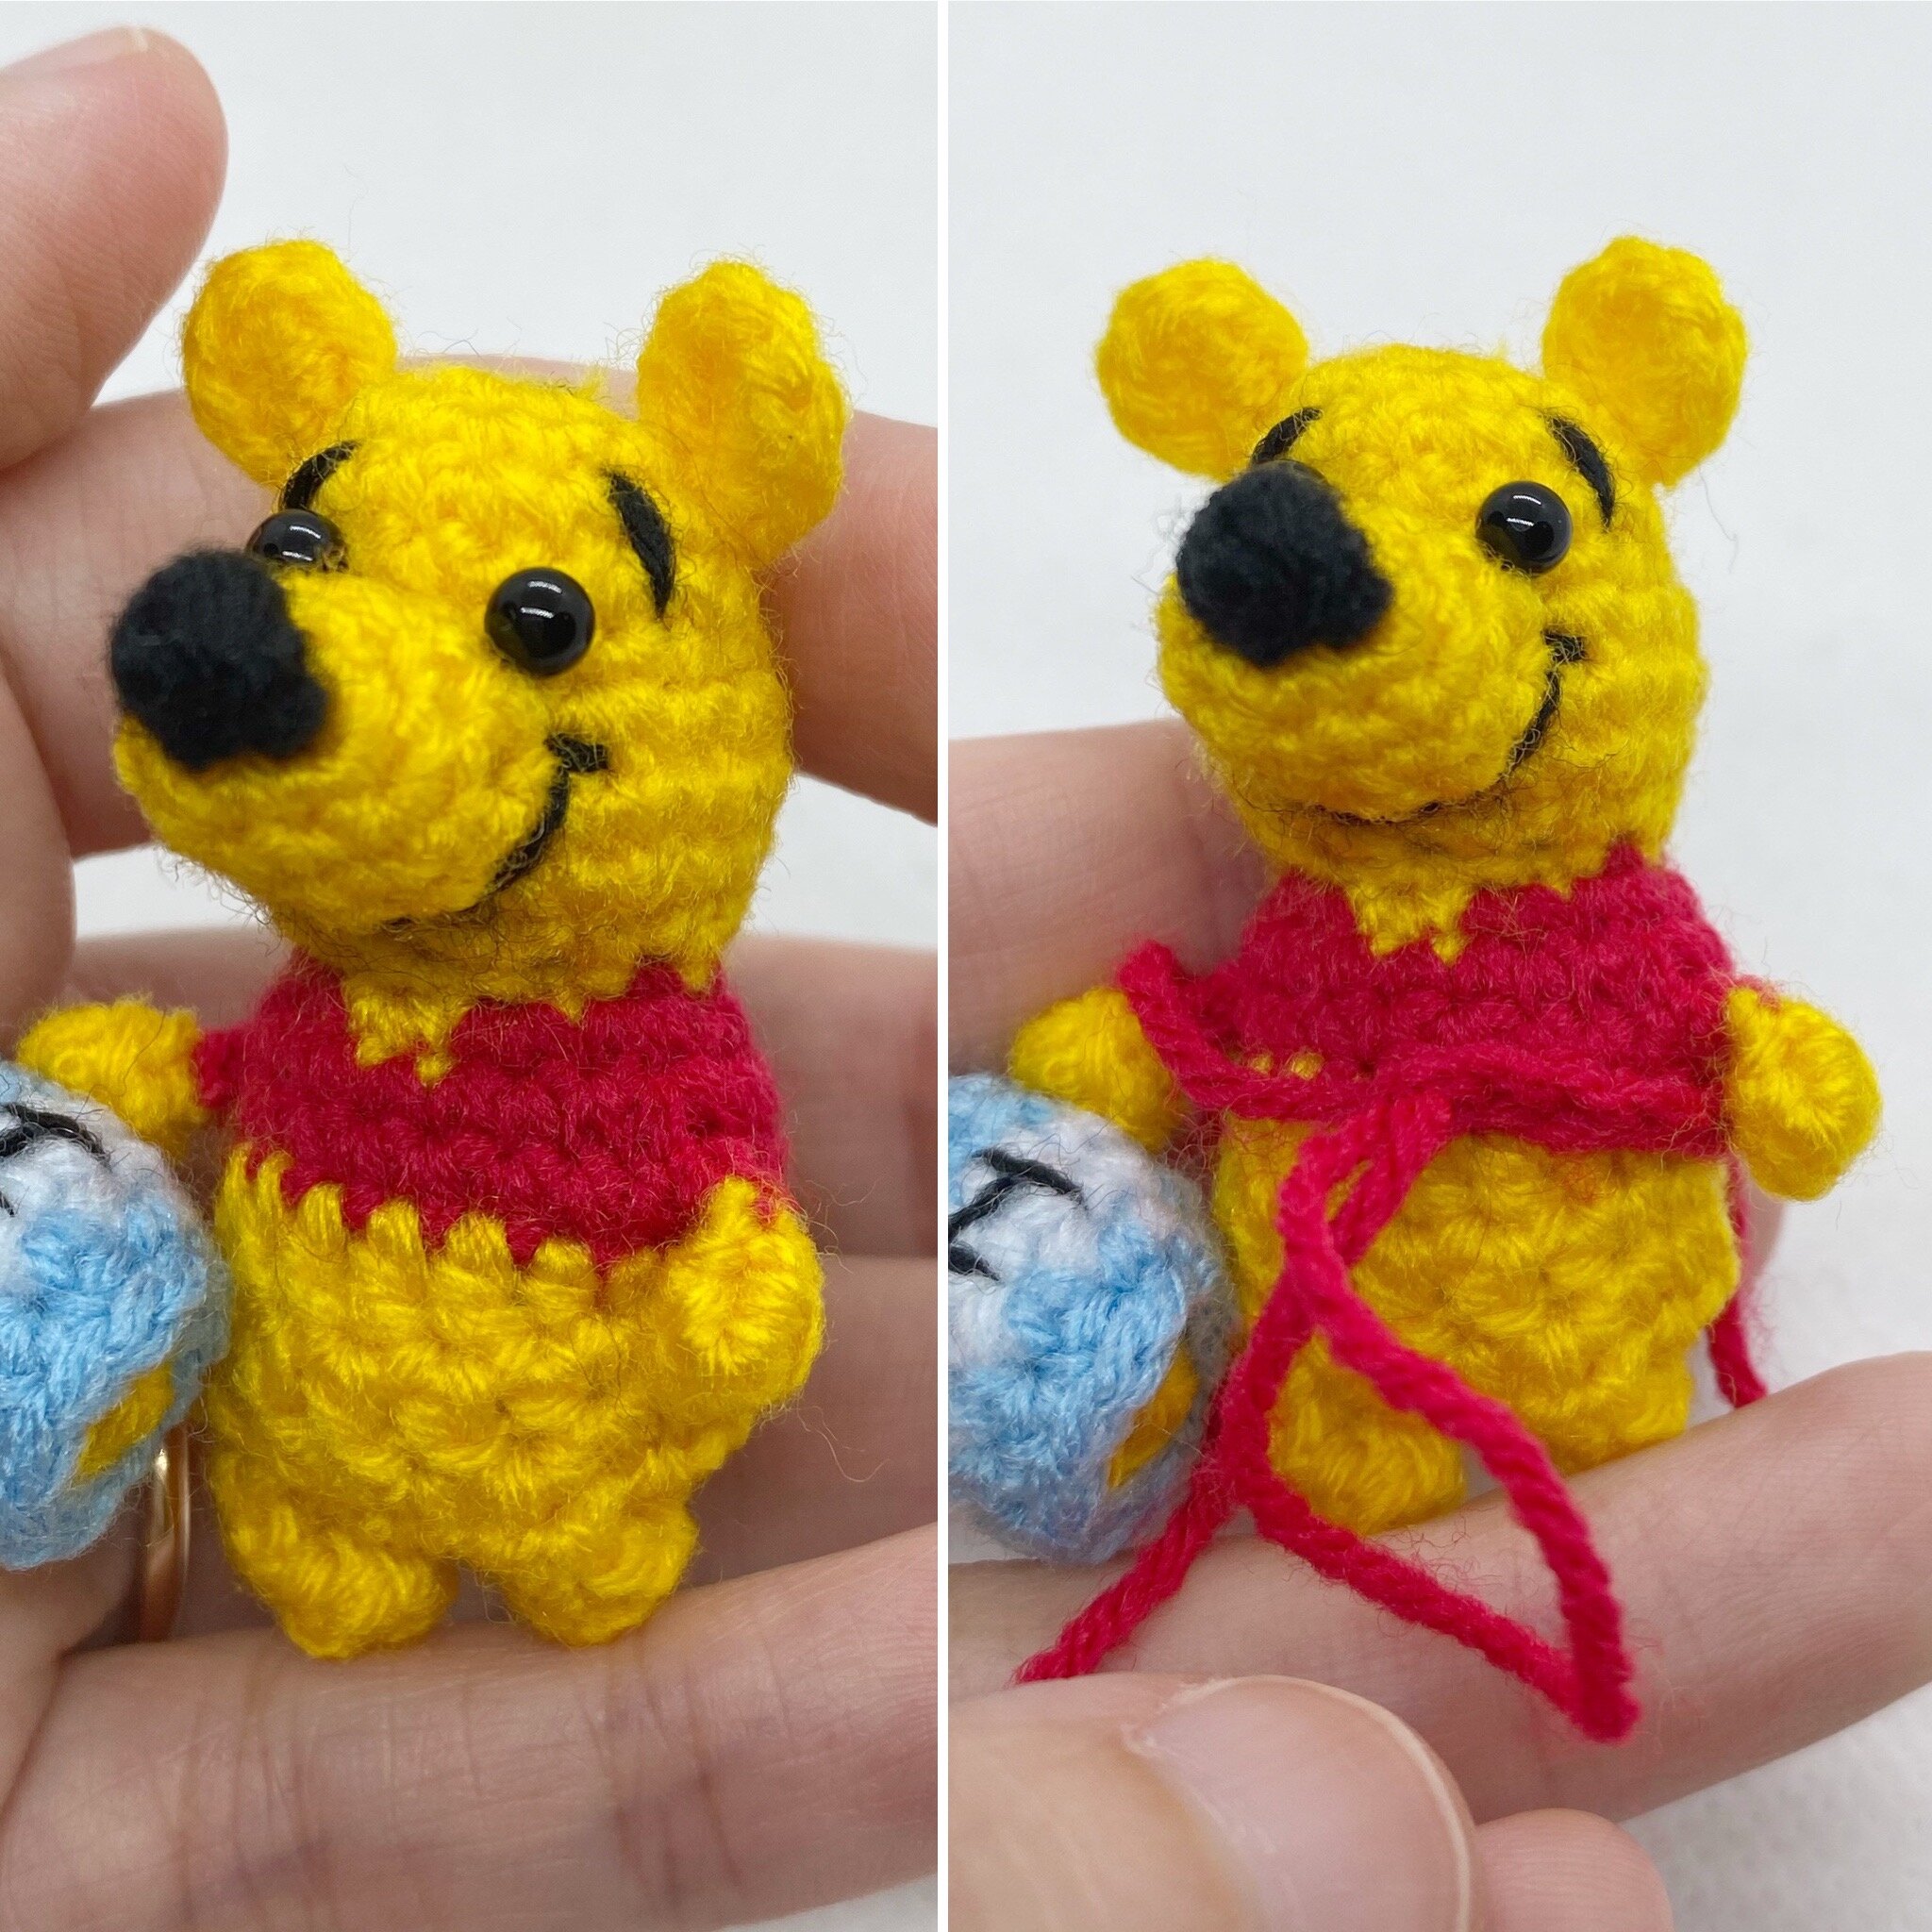
To add a little distinct border to shirts or T-shirts or even jackets, sometimes I just add on a surface crochet at the distinct colour changes in the body of the amigurumi, kind of what I did with Pooh bear below.
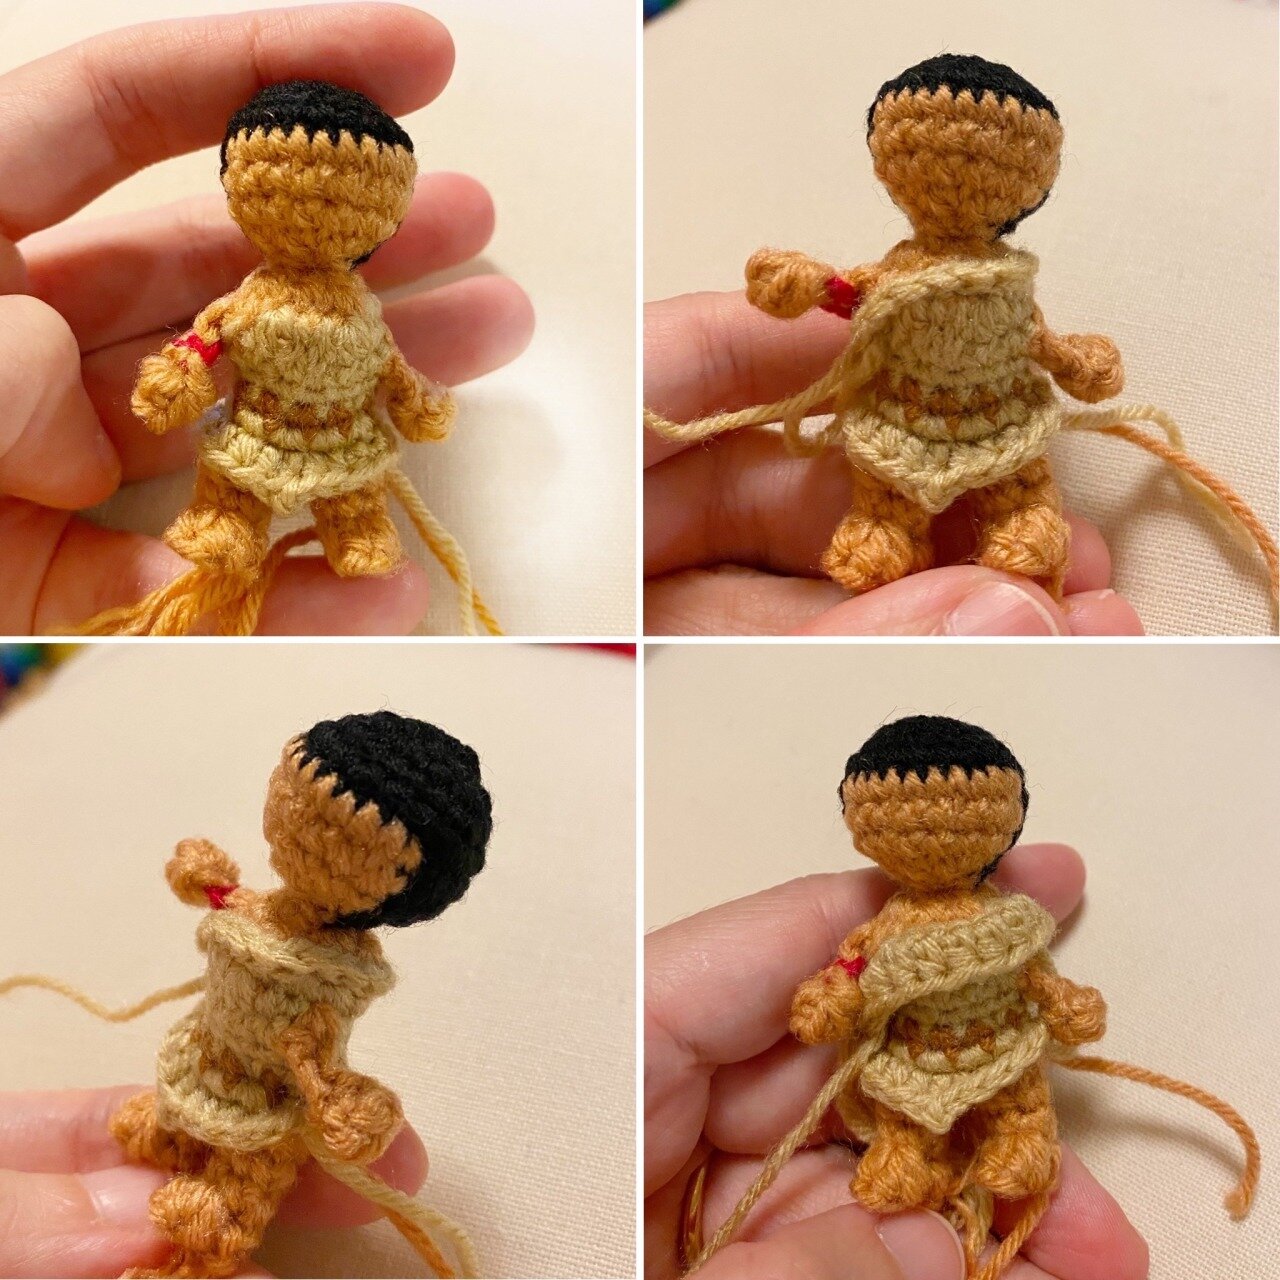
In the case below, I added on a chest toga flap for Pocahontas! After making the base surface sc layer, I continued crocheting on top of that layer to create the flap effect. So the initial surface sc was the starting point, and you can continue crocheting in rounds on top of it!
I have even used this method for making hair - I tried picot stitches, loops stitches to make short little coily hair just like what I did for a past commission below!
If you like to see more of the different amigurumi hair techniques I have come up with, to make short hair, long hair, coily hair, fringes and facial hair - go check out “24 creative ways on How to Crochet Doll Amigurumi Hair”!

These are just some examples of how to incorporate surface single crochet into your amigurumi, I’m sure there are many other ways yet for me to explore! Also, do check out an earlier post I did about using surface slip stitch instead to do Amigurumi detailing (it was about Dobby!)
Making a surface single crochet
This is just like making a regular single crochet but now we directly apply it on the surface of a separate piece that you have already crocheted. A surface sc creates a raised overlapping layer on the original Amigurumi, whereas a surface sl st creates a flattened effect instead.
Have a completed Amigurumi body piece ready. Also have another separate ball of yarn with the desired colour (whether same or different).
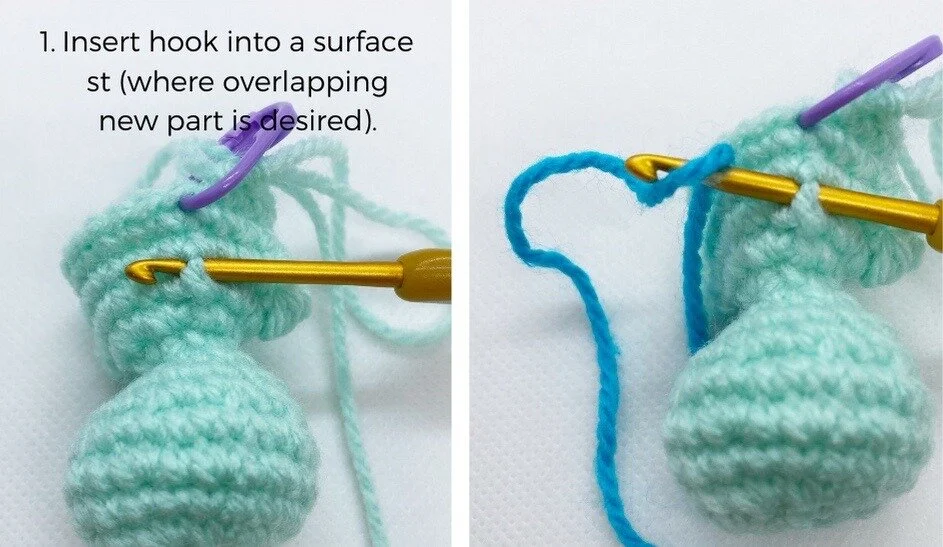
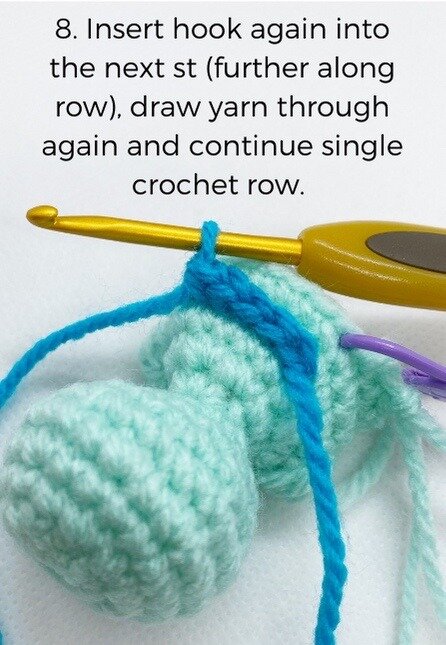
In step 1, insert hook into the surface of the ami and out through the adjacent stitch. Then pull yarn through both holes like in step 2.
Step 3 involves inserting hook back into same initial surface st as in step 1, in 2 adjacent holes.

Steps 4-7 involves the usual steps with making a regular single crochet but this time it’s on another surface. (If you choose to draw the yarn in step 5 through loop on the hook, you will end up with a surface slip stitch.)

You would have completed the first surface sc in step 7. Then continue on further down the row and all around the ami too, like what I did with Pocahontas above.
The completed row of surface single crochet! You can see how it adds an additional raised texture to the ami. I also often use this effect to make jackets or belts for my other amis.
With your imagination, the sky’s the limit! You could add on surface half double crochet or surface double crochet and so forth. Similarly, I did that for Pocahontas’ skirt!


As for making the limbs, I used this same surface crochet method to create the amigurumi bodies for the 4th and 5th little guys seen below! It can also be used to making standing amigurumis, not necessarily only sitting ones. How do you make your ami bodies? Comment below and let me know!
Here are all 9 different ways to make amigurumi bodies that I have come up with!

In the steps above, I first showed how to work surface crochet in a straight, linear way across a 3D surface to build confidence with the technique. Once you’re comfortable with that, the next step is applying it to actual amigurumi construction — like attaching a cylindrical limb onto a spherical body.
In the video below, you’ll see how this same idea translates into adding an arm onto a body using surface crochet.
Create Dolls That Feel Truly Your Own
Ever wished you could tweak a doll pattern so it looks exactly the way you imagined? In this free training, you’ll learn how simple shaping techniques can help you start customizing your own amigurumi dolls with confidence.
What’s Next
🧵 How to Crochet Dolls: 7 Key Techniques for Body, Head, Hair & Clothes »
Your complete parent guide—learn all the core components of doll-making in one place.
🔗 Crocheting Limbs Onto Amigurumi Without Attachment »
Learn how to create simple no-sew arms and legs using the hdc bobble stitch on a chain.
😄 5 Creative Ways on How to Crochet Doll Faces »
Add charm and character to your dolls with these easy face-design techniques.