

Making Quinjet - Part 2
If you have not checked out the 1st part yet - go check out the previous post. We last left off with the top part of the Quinjet done. Now we will proceed with the bottom half as well as the rest of the detailing on the quinjet.
Just quick recap of the individual Quinjet parts:
Main body | Cockpit | Cargo hold | Jet engines | Detailing
We have covered the parts for main body and cockpit in the previous post. Now onto the cargo hold!
Cargo Hold
The cargo hold is essentially made up of 2 triangles and and middle piece that has a sharp and a blunt end. When you sew them all together, you get this:

Stuff cargo hold with filling and place it under the top quinjet piece (made in previous post). It should align down the midline, directly underneath the main body base piece side (i.e. the dark grey side). Then sew it down. Remember to place it such that the narrower end is in the front and the slope at the back corresponds to the jet’s backdoor.

Jet engines and engine fins
These was inspired from laser cannons from an earlier Razor Crest, but this time it’s more cuboid in the front than round. Start off with an orange rectangular piece and then surface sc around it with an electric blue layer. Continue going around and move on to black and grey layers later on.
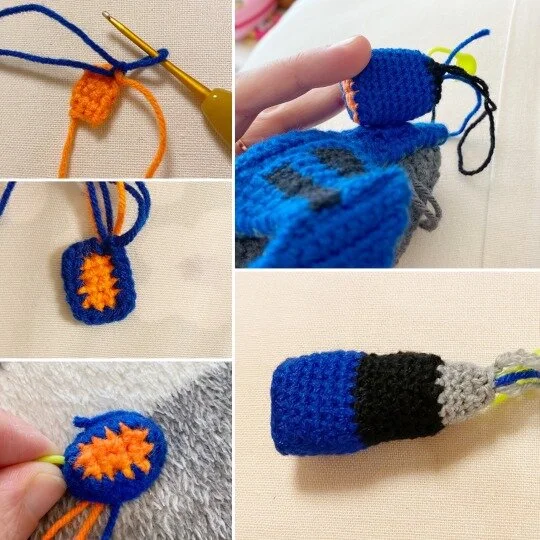
To make the jet engines look recessed in, I made a landmark over the surface crocheted electric blue layer by making a BLO (back loop only) row. Then I started surface crocheting it in the reverse direction - forwards instead. The final pieces turned out recessed in just like I wanted:

Add in the jet engine fins on either sides so that they look symmetrical, before they are placed onto the quinjet main body.

Assembly
This part is the fun part, when putting them all together! The assembly is generally progressive, with each new piece added on to the previous one. But sometimes at the end, all the individual grouped parts have to come together… Here I have added on the jet engines onto the posterior 2/3 of the main body at the sides:

Detailing
For additional detailing, I added on a top hatch just behind the orange windows and also some rotors and the avengers logo as you will see later.

The rotors are supposed to be visible from the top as semi-circles but from the bottom as full circles. I have tried to do that here using orange yarn. Of course the final touches would include using grey yarn to string in the alphabet ‘A’ at the side.


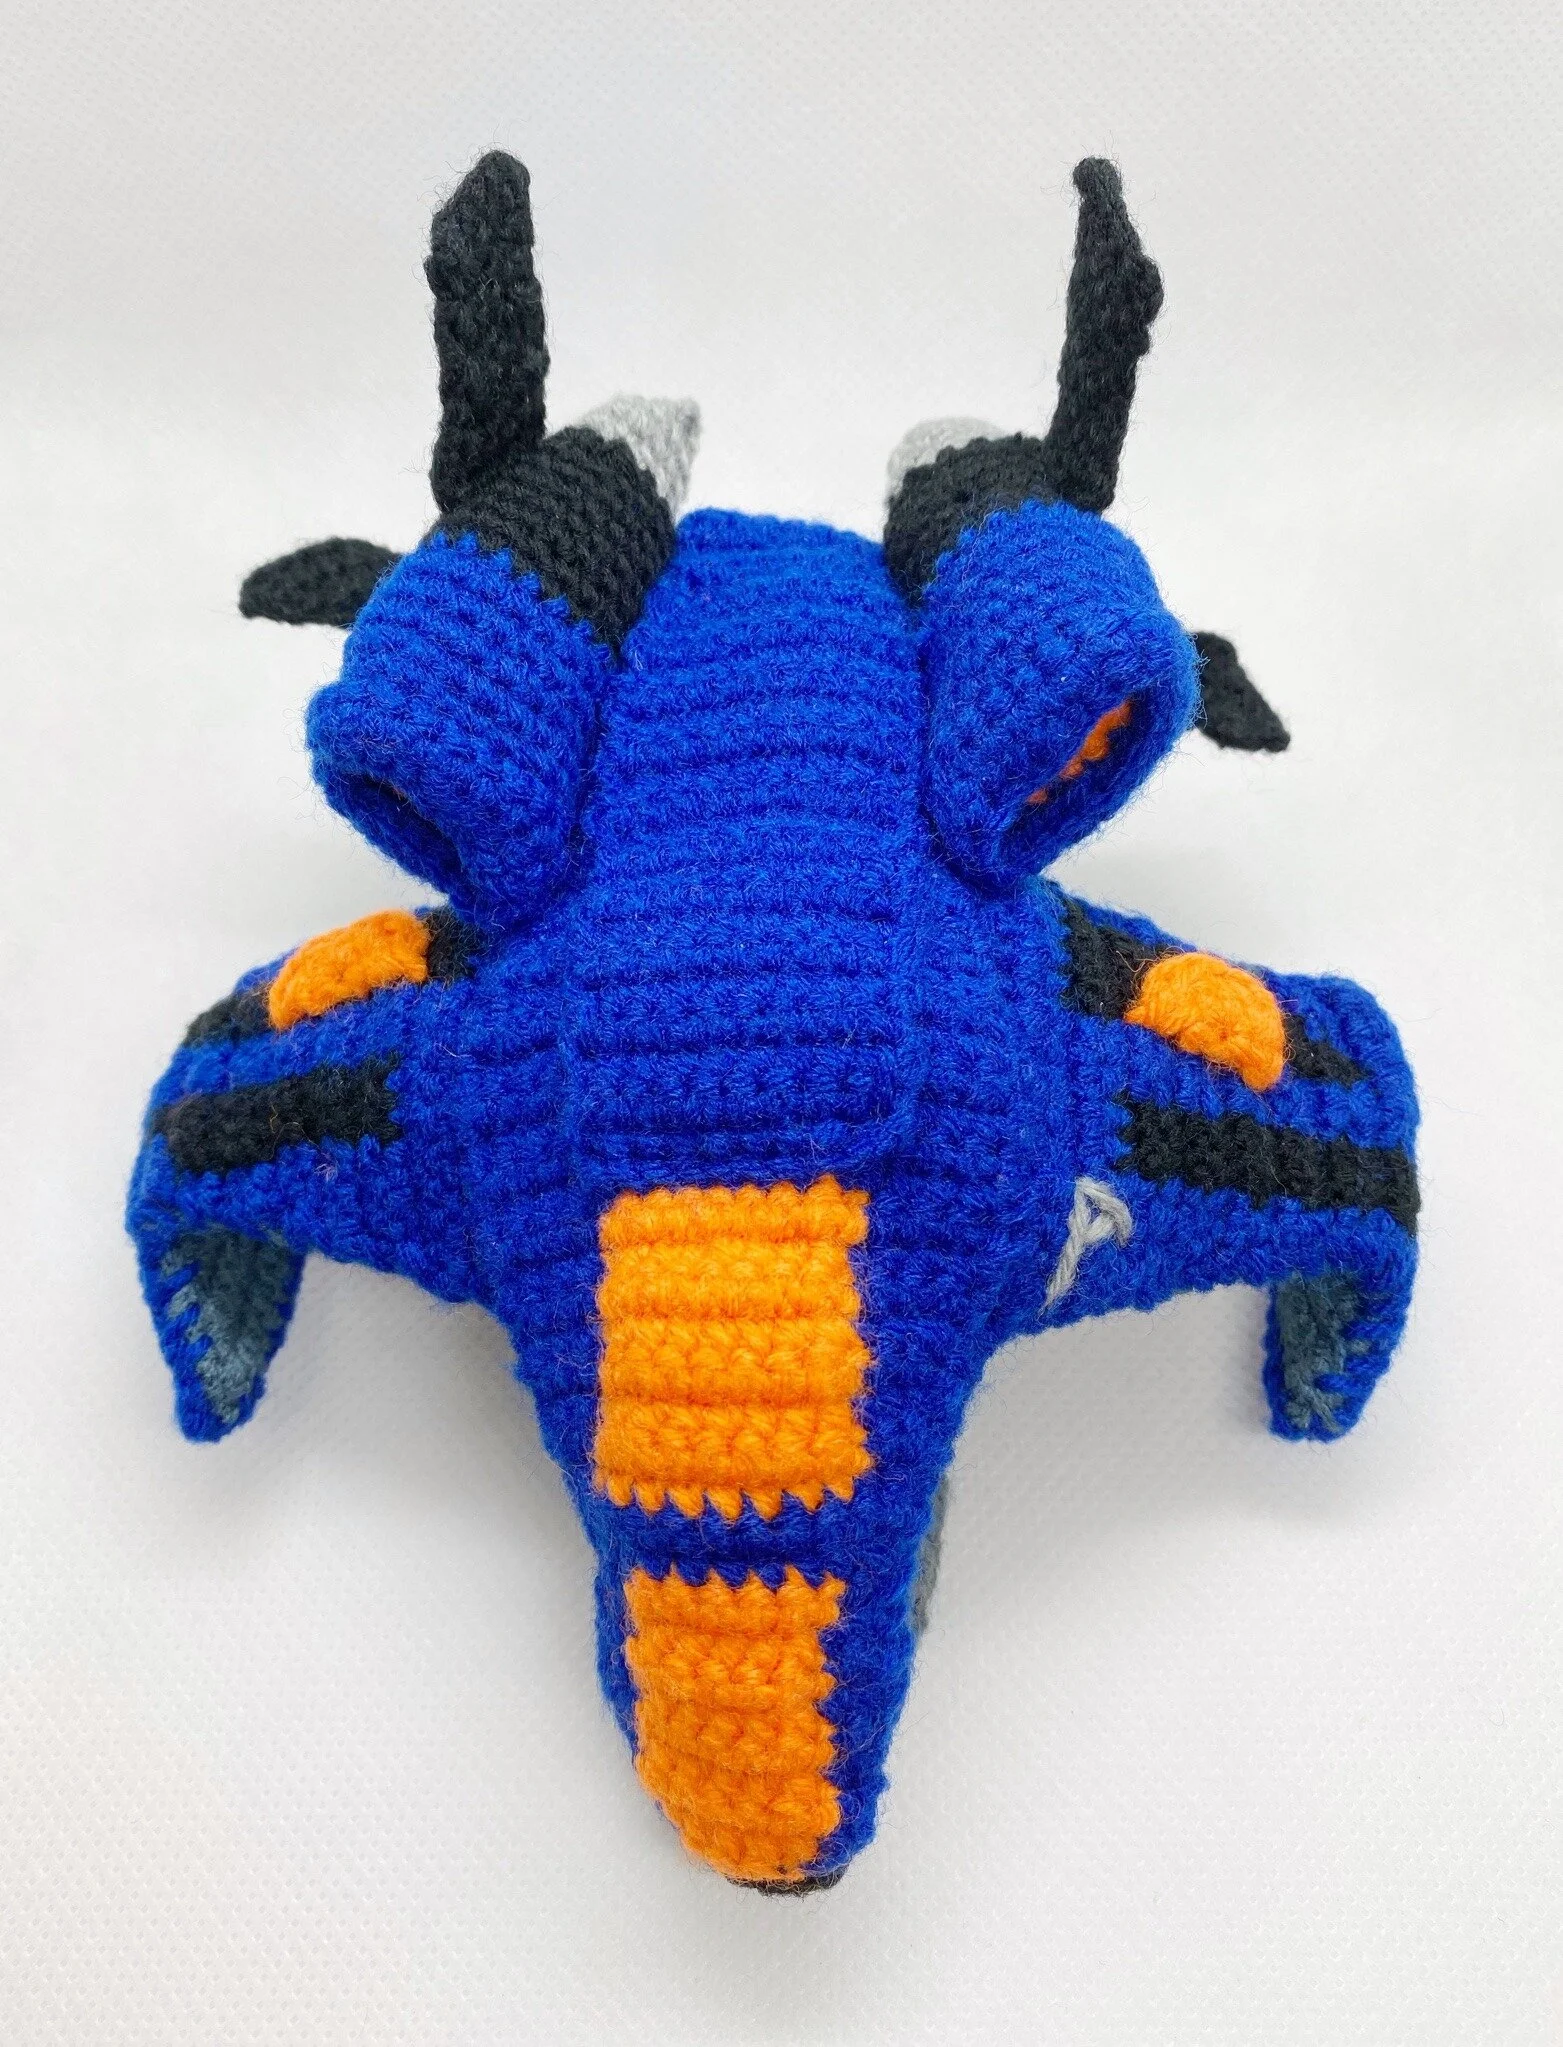
Ta-da! The final Quinjet! I have so much fun making this pattern. Check out many different views of it in the next post and look out for it in the form of hanging baby crib mobile that I made!


If you would like to make your very own mini-Quinjet, check out full pattern below. You can mix up the colours to whichever version you want - probably the Ultron one cos it’s white and cool! If you do make one, please tag us at pocketyarnlings on instagram, I would really love to see it!
