

Using Tunisian Crochet in Amigurumi
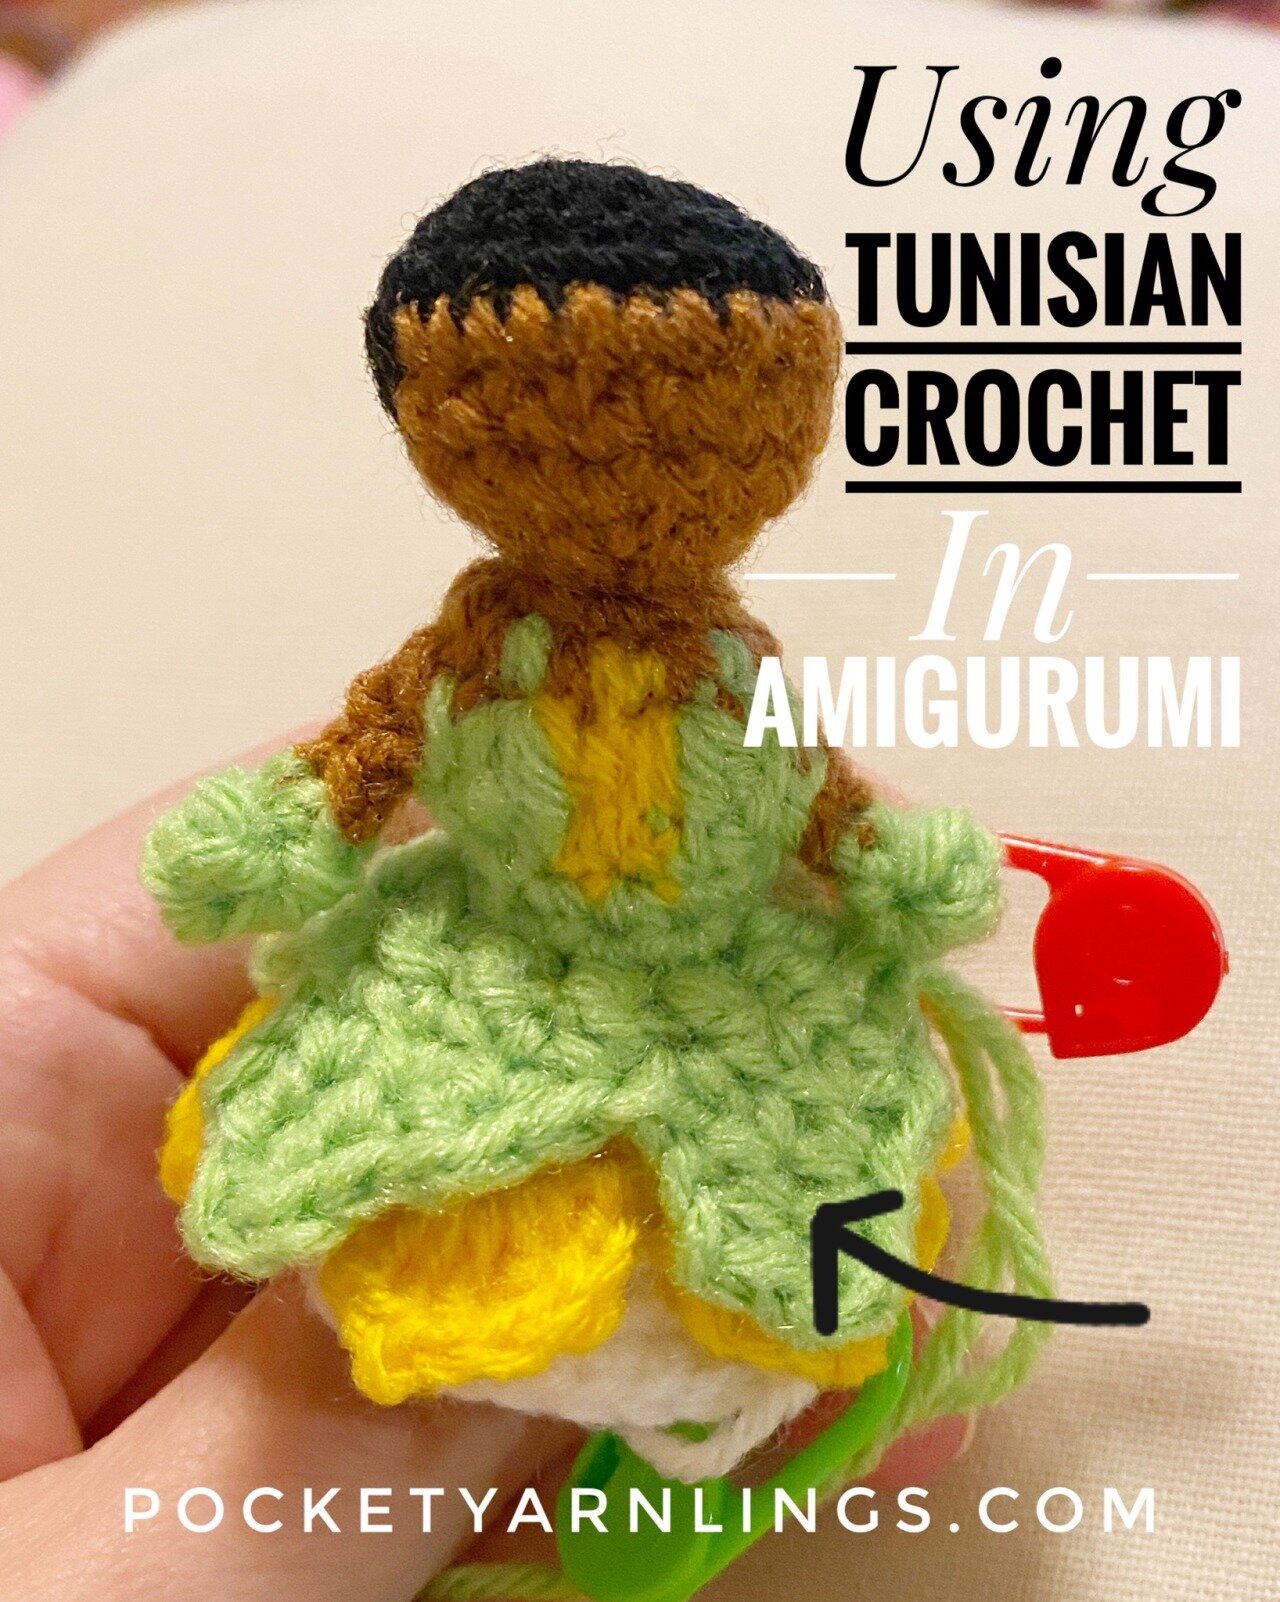
My first attempt at doing Tunisian crochet! This time it’s for Tiana from Princess and the Frog. I was experimenting with making her dress and I decided to make 3 skirt layers. Read on to see how I used Tunisian crochet in her skirt.
Experimenting
It started off when I wanted to make the top-most skirt edges to look like leaves. So I tried out using treble crochet stitches like how I did with Belle but it ends up with a lot of gaps in between stitches.

So I tested Tunisian crochet using a simple magic circle first to see how it would look like as a skirt. Got that idea off a pattern for making a rose + leaf unit. Had couple of kinks and gaps to sort out…
Layered skirts
This is how she looks like and her 3 skirt layers. The bottom-most layer is main up of regular white single crochet stitches. The middle layer consists of spade-like stitches in yellow. And the top-most layer is where I used Tunisian crochet to make the leaf-like stitches.

Using Tunisian crochet in Amigurumi
For easier visualization, how it roughly looks like when doing the Tunisian crochet around the skirt below. I’ll have to say first off this is my first experience using Tunisian crochet so I’m definitely no expert at it!
How to do Tunisian Crochet
The following steps mentioned are largely in relation to the Tiana skirt pattern and my first foray into incorporating Tunisian crochet in Amigurumi.
For easier illustration, I used dark blue yarn as the start of the skirt, with light blue as the existing colour in the round:
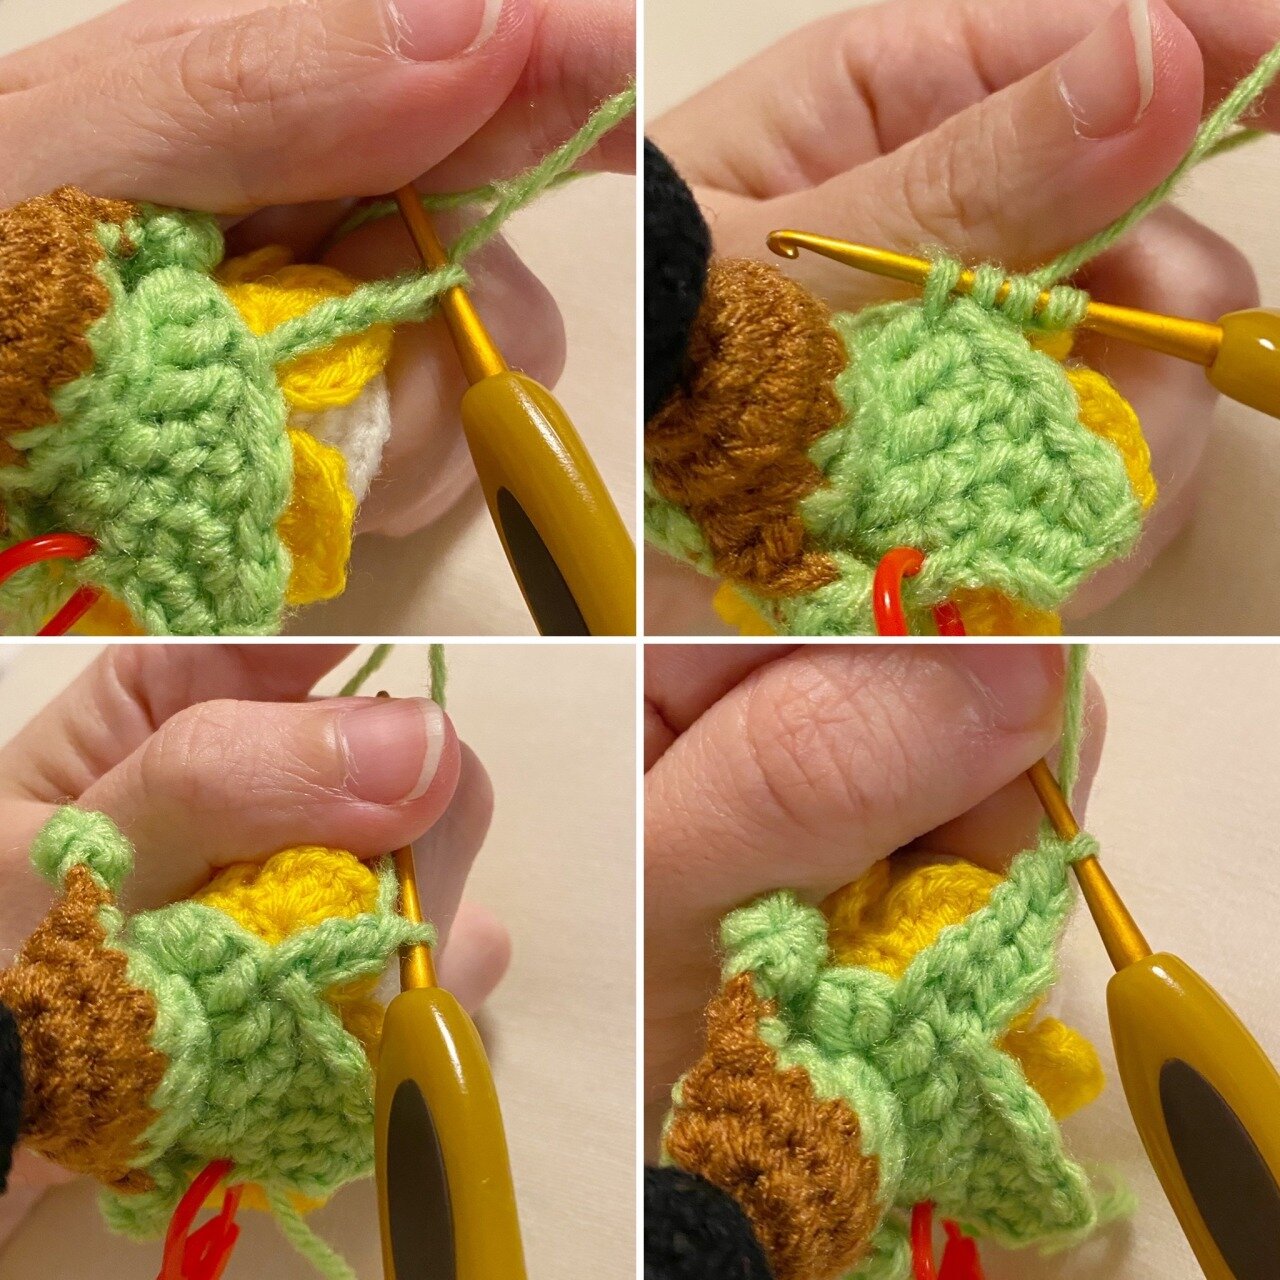
Row 1: Ch3,
Row 2: Work tunisian stitch into chain –
Forward pass = make 2yo into ch (2nd and 3rd photo), 1yo into same main st (last photo),

Return pass = then yo and pull yarn through 1 loop only (1st and 2nd photo), then (yo and close 2yo together) x 3

—> Made 1st column!
Row 3: Ch2, work tunisian stitch into ch and previous row

• Forward pass = make 1yo into ch, 3yo into horizontal back bar stitches, 1yo into next main st,

• Return pass = then yo and pull yarn through 1 loop only, then (yo and close 2yo together) x 5

—> Made 2nd column!
Ok so I’m not sure if those instructions made any sense, but I was attempting to write out a Tunisian crochet pattern - which consists of forward and return passes. Hope it’s easy to understand!

Ta-da the final Tiana! If you enjoyed this part of the pattern and would like to try out the rest of Tiana, check out the full single pattern over here! Otherwise, there’s always the free Elsa pattern here as well!