

Free Picard Pattern for Star Trek fans!

Woo Hoo Picard is back! This series is not quite like Star Trek Voyager but it’s nice to see Jean Luc again and Data! I made this collection back when I started watching that Star Trek series and it was one of my simpler designs when I used to make everything as seamless as possible. It finally ended up in a nice little Voyager nursery mobile that I made, also managed to sell 2 sets of it on Etsy before I decided to switch to selling patterns instead, it was a lot of effort to make the mobile every time!
This version of Picard has the bobble stitches as his arms, I did make a later version where the bobble arms extend outwards on a chain as you will see at the end, together with the nursery mobile I was talking about!
Terminology
Ch = chain
Sc = single crochet (2sc1 means 2 single crochet in same ch)
St = stitch (refers to number of stitches in one round)
Dc = double crochet (yarn over 1x)
Sc2tog1 = single crochet decrease
Bobble stitch = 4 double crochet bobble (4dc bob)
Surface sc = single crochet directly onto surface
Materials and Tools
Orion Top Deluxe Yarn, Crown Yarn (or any equivalent acrylic yarn) - grey, beige, black, maroon, silver
Filling – use leftover yarn or polyester fiberfill
Scissors
Liquid correction tape
Gold and silver pens
Head
Start off using beige yarn, since Picard is mostly bald :).
Round 1: Magic ring 10 (beige) – 10st
Round 2: 2sc10 (beige) – 20st
Round 3: Sc20 (beige) – 20st
Round 4: (Sc1, 2sc1) x 8 (beige), (sc1, 2sc1) x 2 (grey) – 30st
Round 5: Sc12 (grey), sc12 (beige), sc6 (grey) – 30st
Round 6: (Sc1, sc2tog1) x 4 (grey), (sc1, sc2tog1) x 5 (beige), (sc1, sc2tog1) x 1 (grey) – 20st
Round 7: Sc6 (grey), sc12 (beige), sc2 (grey) – 20st
Round 8: Sc2tog3 (grey), sc2tog6 (beige), sc2tog1 (grey) – 10st
Round 9: Sc2tog5 (beige) – 5st
Body
Continue into the body from head, switch to black yarn from beige.
Round 10: 2sc5 (black) – 10st
Round 11: 2sc10 (maroon) – 20st
Round 12: Sc1 (black), sc7 (maroon), sc1 (black), sc1 (maroon), 11th arm, sc7 (maroon), 19th arm, sc1 (maroon) – 20st
Arms (at 11th and 19th position): 4dc bobble stitch, top half beige + bottom half maroon

(Bobble stitch for arms = top half beige, bottom half maroon
From the 10th single crochet in Round 12, you will have 1 maroon loop on hook
Yarn over beige, insert hook, yarn over beige again, draw beige yarn through –> you will have 2 beige loops and 1 maroon loop on hook
Then draw maroon yarn through 2 beige loops on hook –> you will have 2 maroon loops on hook
Repeat process: yo beige, insert hook, yo beige and draw beige yarn through –> you will have 2 beige loops and 2 maroon loops on hook
Then draw maroon yarn through 2 beige loops on hook –> you will have 3 maroon loops on hook
Repeat again: yo beige, insert hook, yo beige and draw beige yarn through –> you will have 2 beige loops and 3 maroon loops on hook
Then draw maroon yarn through 2 beige loops on hook –> you will have 4 maroon loops on hook
Repeat last time: yo beige, insert hook, yo beige and draw beige yarn through –> you will have 2 beige loops and 4 maroon loops on hook
Then draw maroon yarn through 2 beige loops on hook –> you will have 5 maroon loops on hook
Then pull through maroon yarn through all 5 maroon loops on hook and sc1 in next main stitch.)
Body – continued
Continue from Round 12 of body above, using black yarn.
Round 13: Sc1 (black), sc7 (maroon), sc1 (black), sc7 (maroon), sc1 (black), sc3 (maroon) – 20st
Round 14: Sc1 (black), sc7 (maroon), sc1 (black), sc5 (maroon), sc3 (black), sc3 (maroon) – 20st
Round 15: Sc12 (black), 13th leg, sc5 (black), 19th leg, sc1 (black) – 20st
Legs (at 13th and 19th position): 4dc bobble stitch, both top and bottom black
Follow same method as above for the bobble stitch for arms, except this time it’s a regular 4dc bobble stitch with one colour.
Make a separate piece for the base and using whipstitch, attach it to round 15. Alternatively, you could just do decrease and finally close up in front loops only.
Round 16: Magic ring 10 then 2sc10, to join up to round 15 (black) – 20st
Wig cap
Make the wig cap using light grey yarn.
Round 1: Ch13
Round 2: Sc12, turn
Round 3: Sl st 1, sc8, ch1 and turn
Round 4: Sc8
Attach wig cap onto the posterior hairline of the head.

Assembly
Attach wig cap onto posterior hairline of head.
Insert 2 glass eyes at 5th row from the top, approximately in line with the 2nd row of the grey hairline.
Rank pip
Use liquid correction tape (I know improvisation right?) or white nail polish to make the pips and subsequently colour them with a gold pen.
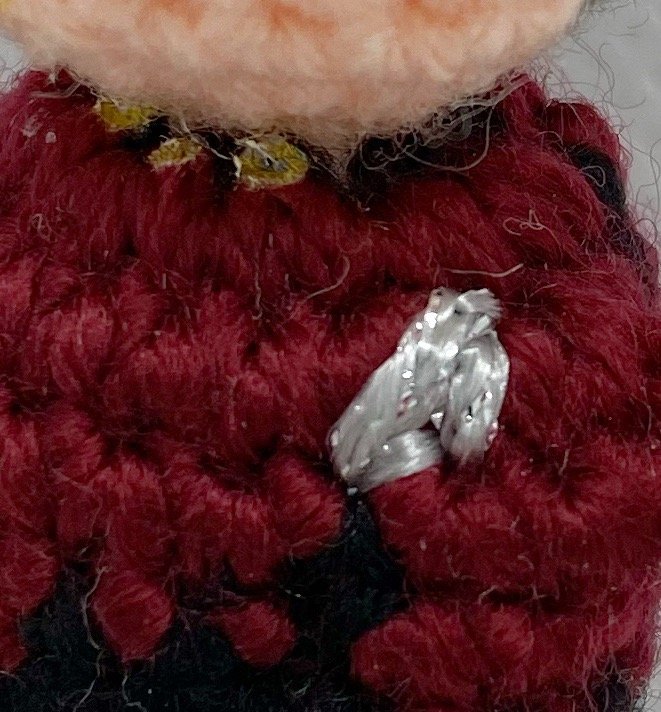
Enterprise pin
Use silver yarn to form a triangle (see diagram) OR
Use a small piece of cloth, cut out the shape of a small triangle and colour it with a silver pen.

Disclaimer: Do tag us @pocketyarnlings on Instagram or share a picture once you have completed it. You may link to this pattern from your website but please do not repost it onto your page. Hope you have fun making it!

Picard when I decided to experiment with new arms that extend outwards, these are all explored in my ‘Making Basic Amigurumi Bodies Ebook’ as the first 2 methods I used to make ami bodies. The rest of the head and body are essentially the same as the above. And here is my…. Star Trek Voyager mobile! I was so pleased with how the Starship Enterprise turned out. What do you think of it? Only Trekkie fans will get it… :)

If you had fun making Picard, remember to check out the rest of the Crew below and my Starship Enterprise pattern! It was my first attempt at making a more complex vehicle pattern and I even incorporated rhinestones inside for the lights - check out the behind the scenes of making that over here!


Decided to release this Picard pattern for free because of the series running again so it’s time to whip out the hooks and make Picard along, while watching the series! Who’s with me :):):)?