

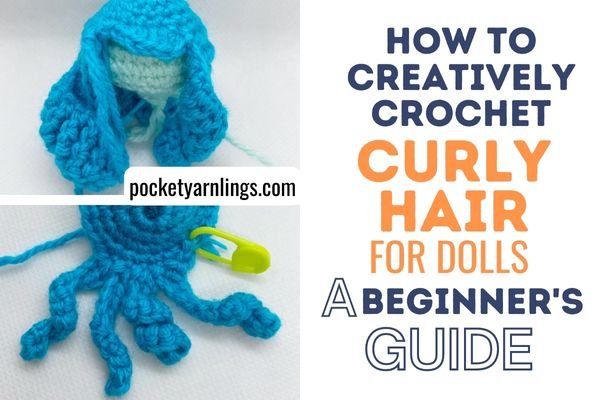
How to Creatively Crochet Curly Hair for Dolls: A Beginner's Guide
Are you looking for a fun and easy way to add some personality to your doll's hair? Crocheting curly hair might be just the thing you need! With a few simple steps, you can create beautiful, bouncy curls that will make your doll stand out from the rest.
To get started, you'll need some yarn in the colour of your choice and a crochet hook. Choose a yarn that is lightweight and has a bit of stretch to it, as this will help your curls hold their shape. You can also experiment with different textures and colours to create unique looks for your dolls.
Once you have your materials, it's time to start crocheting! With just a few basic stitches, you can create a variety of curly hairstyles, from tight ringlets to loose, beachy waves. Whether you're a seasoned crocheter or a beginner, this is a fun and rewarding project that you're sure to enjoy. So grab your yarn and let's get started!
Table of Contents Show
Understanding Doll Hair Types
When it comes to crocheting hair for dolls, it's important to understand the different types of doll hair. This will help you choose the right yarn and create the perfect hairstyle for your doll.
Straight Hair
Straight hair is the most common type of doll hair and it is easy to crochet and style. If you want to create a natural-looking hairstyle, choose a yarn that mimics human hair, such as mohair or alpaca. These yarns have a natural sheen and texture that will make your doll's hair look realistic. Otherwise, you could also make use of cotton yarn often used for amigurumi in certain styles to mimic straight hair like making use of long chains.
Curly Hair
Curly hair can be more challenging to crochet than straight hair, but it can also be more fun and rewarding. There are many different types of curls, from tight ringlets to loose waves. To achieve the perfect curl, choose a yarn with a tight twist, such as a wool or acrylic blend. You can also use a curling iron or hot rollers to set the curls in place. Or you could try out any of the techniques mentioned below to create curly doll hairstyles.

Wavy Hair
Wavy hair is a combination of straight and curly hair. It has a natural wave that adds texture and volume to the hair. To crochet wavy hair, choose a yarn with a medium twist, such as a silk or bamboo blend. These yarns have a soft drape that will create a natural-looking wave in your doll's hair. I also tend to change up the crochet pattern and stick to the same yarn to change up the hair from curly to wavy styles. See more on that below.

Frizzy Hair
Frizzy hair is a unique type of doll hair that requires a special technique to crochet. To create frizzy hair, use a yarn with a loose twist, such as mohair or wool. Crochet the hair using a loop stitch, which will create a fuzzy texture that mimics frizzy hair. You can also use a wire brush to fluff up the hair and create even more texture.
By understanding the different types of doll hair, you can choose the right yarn and create a hairstyle that will make your doll look amazing. Whether you're crocheting straight hair, curly hair, wavy hair, or frizzy hair, have fun and be creative!
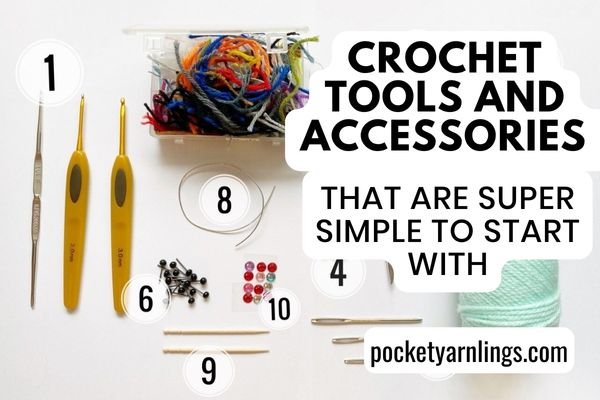
Materials Needed for Crocheting Curly Doll Hair
Crocheting curly hair for dolls can be a fun and rewarding project. Before you start, you will need to gather a few materials. Here are the essential items you will need:
Choosing the Right Yarn
When it comes to choosing yarn for crocheting curly doll hair, you will want to look for a type of yarn that has a lot of texture. This will help create the curls you are looking for. Here are some yarns that work well:
Mohair yarn
Boucle yarn
Chenille yarn
Eyelash yarn
You can also use regular yarn, but you will need to create the curls yourself by using a hair roller or a similar tool or change up the crochet pattern such that the long strands made end up curling up, which can be done!
Crochet Hooks and Other Tools
You will need a crochet hook to make the curls. You can use any size crochet hook, but a smaller hook will create tighter curls. You may also want to use a hair roller or a similar tool to help create the curls – although this is generally not my period method to go to.
Here are the materials you will need:
Crochet hook
Yarn
Hair roller or similar tool
Scissors
Once you have gathered all your materials, you are ready to start crocheting curly doll hair. Check out my full list of Crochet Tools and Accessories.
How do you create Curly Hair for a Doll using Crochet Techniques?
Crocheting curly hair for dolls is a fun and creative way to add a unique touch to your doll collection. With a few simple techniques, you can create beautiful curls that will make your doll stand out. Here's how to do it.
Creating the Foundation Chain
The first step in creating curly hair for your doll is to create the foundation chain. To do this, you will need to choose the yarn colour and thickness that you want to use. Once you have your yarn, you can start by making a slip knot and then creating a chain of stitches.
The length of your foundation chain will depend on the size of your doll's head and how long you want the hair to be. It's a good idea to measure the doll's head circumference and add a few extra stitches to ensure that the hair will fit properly.
Forming the Curls
Once you have created the foundation chain, you can start forming the curls. To do this, you will need to work in rounds, starting at the back of the doll's head and working your way forward.
To create shorter curls, you will need to use a technique called "loop stitch." This involves pulling loops of yarn through the stitches of the foundation chain and then pulling them tight to create a curl. To make the curls look more natural, you can vary the size of the loops and the tension of the yarn. You can also use a combination of different yarn colours to create a more realistic look. Here is an example of how I used loop stitch for Nightcrawler’s hair.

For the next section, I will be touching more on long curly hair. If you find this article useful, remember to pin it to Pinterest so that others might benefit from reading it too!

How can you make spiral curls using crochet for a doll's hair?
Crocheting curly hair for dolls is a fun and creative way to add some personality to your doll's appearance. One of the most popular types of curls is spiral curls. Here's how you can make spiral curls using crochet for a doll's hair. For this section, I will talk about certain steps you can try out for your next doll amigurumi.
Deciding hair length
Before you start crocheting, you need to decide how long you want your doll's hair to be. The length of the hair will affect the size and shape of the curls. If you want tight, bouncy curls, go for shorter hair. If you want looser, more relaxed curls, go for longer hair.

Step 1) Decide on length of initial chain
This will impact upon the eventual length of the hair. In this example in above, I made a chain of 18. Note that once you start to curl it in the subsequent steps, the length will get shorter.
Generally, the curlier it gets, the shorter the length will turn out, so you can adjust the length initially by changing the number of chains that you start with.
Deciding hair width
The width of the hair will also affect the size and shape of the curls. If you want smaller, tighter curls, use thinner strands of hair. If you want larger, looser curls, use thicker strands of hair.


Step 2) Decide on stitch height (sc, hdc, dc, tr or taller stitches)
Changing the type of stitches used, whether it be sc, hdc, dc, tr or any long stitches, will change width of each curl.
The curls will get progressively wider with taller stitch heights. This generally translates into bigger curls! You can always go as wide as you want - up to dtc, ttrc or even qtr!
Deciding hair curliness
The curliness of the hair will determine how curly the curls will be. If you want tight, springy curls, use hair that is naturally curly or wavy. If you want looser, more relaxed curls, use hair that is straight or only slightly wavy.

Step 3) Decide on number of stitches in each chain (2sc1, 3sc1, 4sc1 etc)
Increasing the number of stitches in each chain will change how coily the curl is! The image just above showing the curls from sc17 to 2sc17 to 3sc17 visibly makes the curl much denser. Also, much more coily!
Deciding hair bounciness
The bounciness of the hair will affect how much the curls bounce and move. If you want bouncy, lively curls, use hair that is lightweight and has some natural bounce. If you want more subdued, relaxed curls, use hair that is heavier and doesn't bounce as much.

Step 4) Vary the stitch height (e.g. increasing from sl st 1, sc1, hdc1, dc1, tc1 etc)
I often making increasing stitch height along the length of the chain because it has a svelte effect at the end when you let it curl up.
In the example above (which I don't use often), the stitches are increasing until they become very wide at the top (remember to skip 8st to sl st back to main st).
In the second example just above, I usually increase till a certain point and then it subsequently becomes uniform stitches. See the effect after it curls up?

Step 5) Vary the stitches in each chain (e.g. alternate sc1 and 2sc1 or other variations)
Referring to the image above, I start off with ch11 and then 4 subsequent curls with slight variations. The middle 2 curls are the base comparisons - 2nd one is sc10, 3rd one is 2sc10. Remember to sl st to next main st in round to hold the curls down.
1st curl involves alternating 2sc1 and sc1 along the chain, this produces a curl somewhere between a wavy one and a curly one.
The 4th curl starts off with more stitches in each ch (2sc5) and then reduces to less stitches in each ch (sc5) later on. This creates a flattened effect at the top of the hairlock and the curls only appearing at the bottom.

By following these guidelines, you can create beautiful spiral curls using crochet for your doll's hair. Experiment with different lengths, widths, curliness, and bounciness to find the perfect style for your doll. Have fun and let your creativity shine!
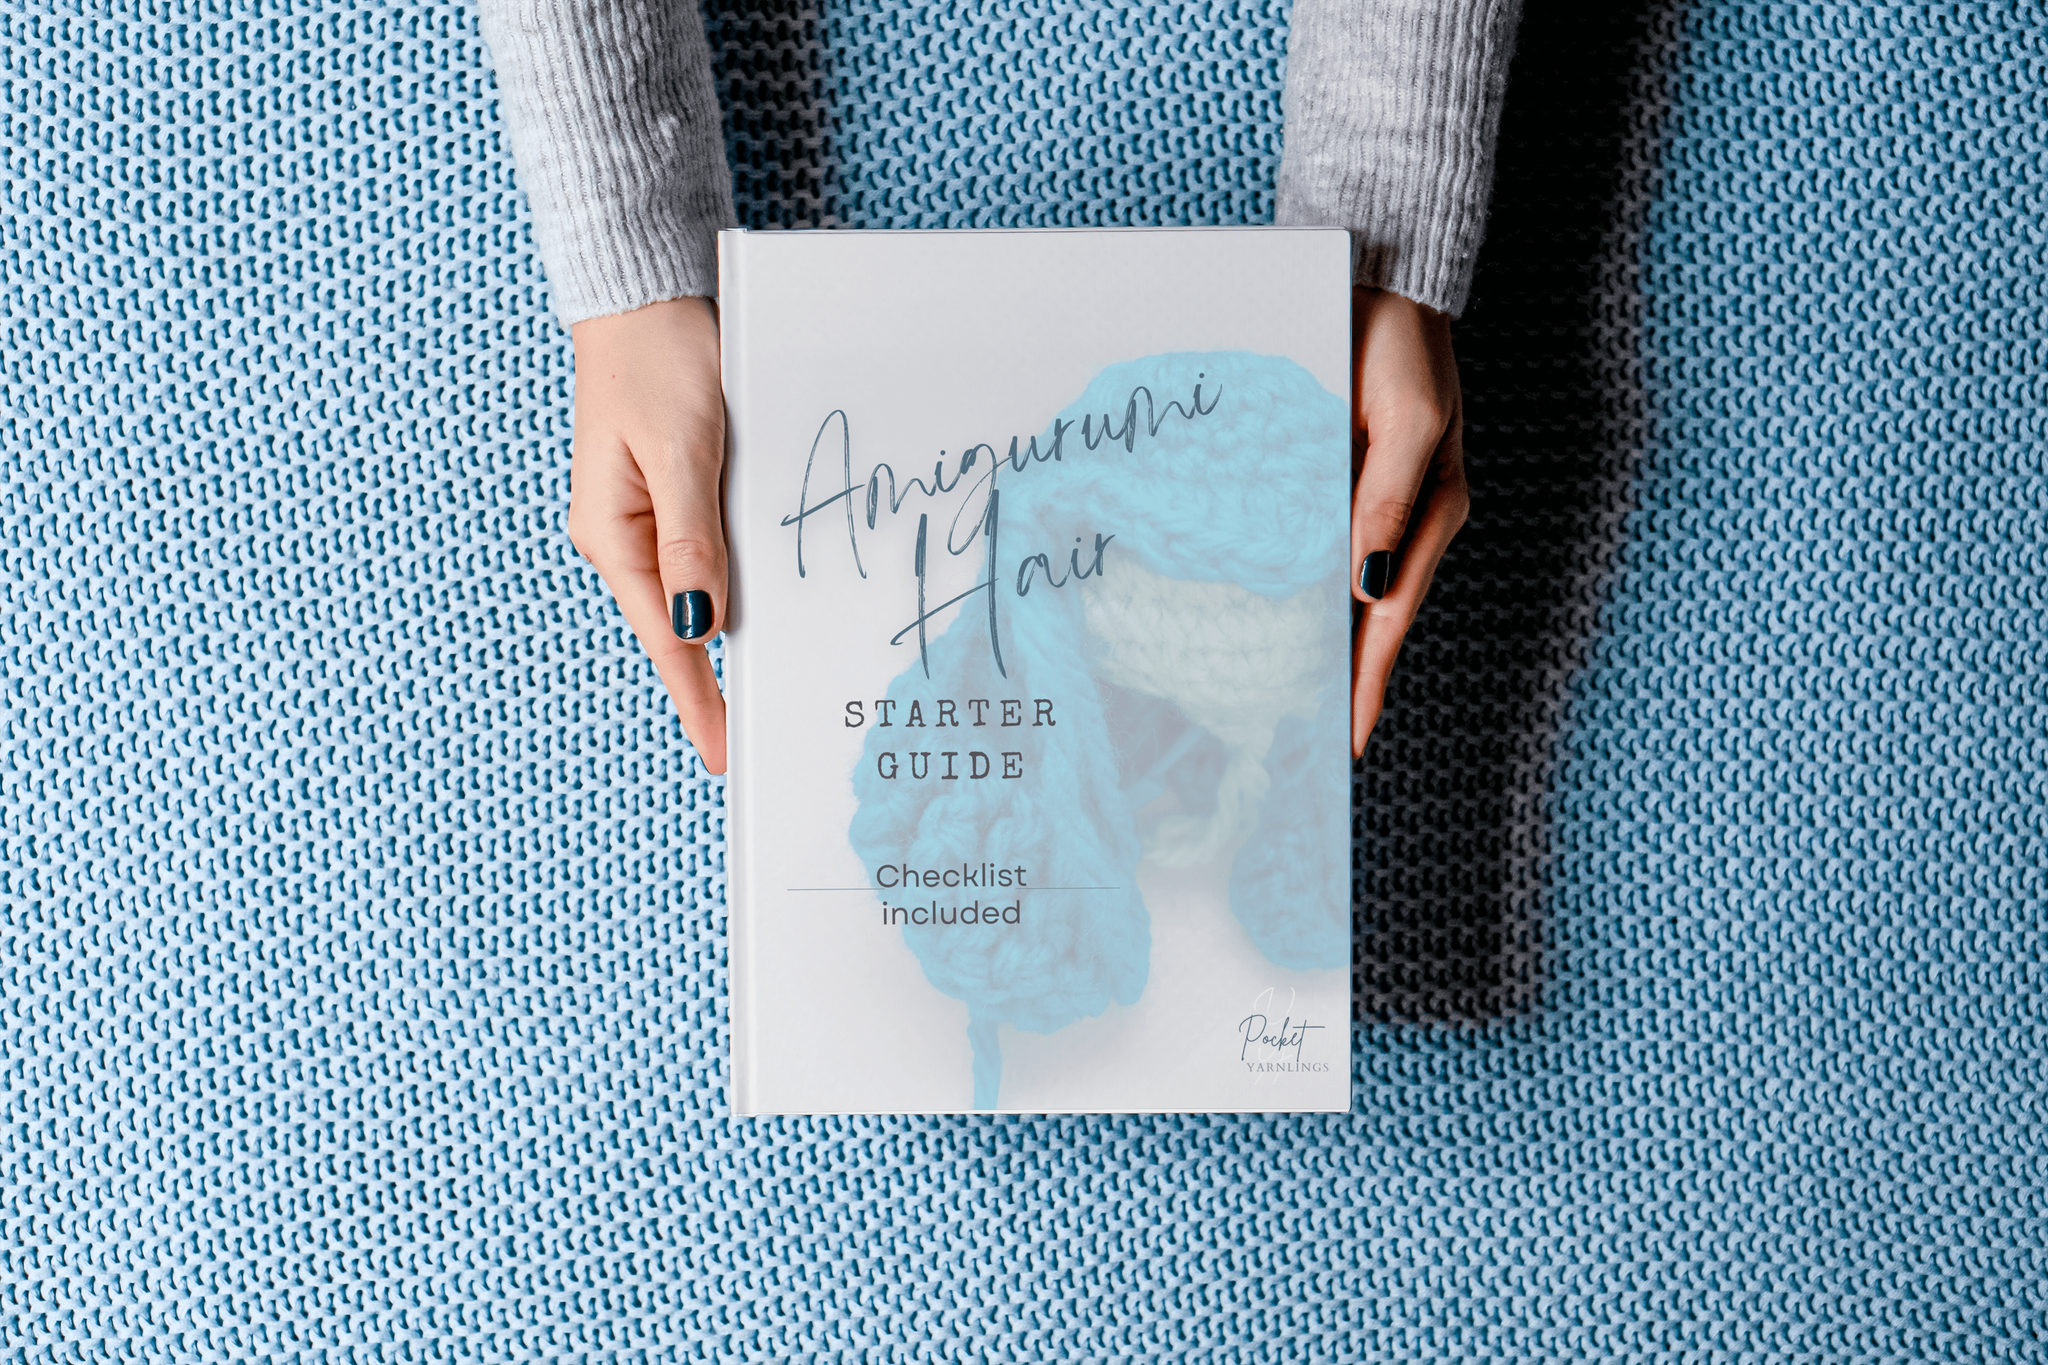
Free Amigurumi Hair Starter Guide
Click here to get the free checklist with the 7 steps to deciding the right hair for your next amigurumi doll! And some hair patterns to try! Click on image on left to grab it!
How to Attach the Curly Hair to the Doll?
This time, I will be covering hair-head attachments. These techniques are more for attaching wig caps to the Amigurumi heads. I know some crocheters like to use glue but for the purposes here, it will all be sewing techniques.
First off, we need to get the assembly pieces ready for attachment.
Assemble the Different Pieces Together
1) Amigurumi head
I generally prefer to crochet in the colour boundaries for the hair and head because it really helps later on for reference when you want to sew on the wig cap. Some crocheters prefer to just crochet the whole head as beige, which is fine too.
2) Wig cap
The different variations in the crochet patterns mentioned above was all done in a separate wig cap from the main amigurumi head. This must be combined with the head later.

3) Darning needle
This is the thicker needle, also known as tapestry needle. Needed for sewing the wig cap onto the Amigurumi head using the next point, the hair-coloured yarn.
4) Corresponding hair coloured yarn
Of course, the yarn used to sew the pieces together need to be the same colour as the hair so that the joined-up seams appear invisible. In the following examples, I intentionally used a different coloured yarn from the hair to illustrate the techniques used.
Technique to Sew the Parts together
Here I would be discussing either be the mattress stitch or the whip stitch, which will be both be covered next.
Mattress Stitch
This is generally my go to method for wig cap attachments to the head. Start off either method by inserting the darning needle through the bottom of head and out through the corner of side/ fringe.
Continue in the outline shown in above images. When completed but not pulled taut yet, it will appear as it does in the right image above. The stitches alternate between the wig cap and the head so that they stay together. This can continue all throughout the rest of the wig cap.


When pulled taut, it will appear as it does in above left image. I like to use this method frequently because the stitches become hidden. As you can see in redhead, the stitches joining the hair to the head are 'invisible'.
Some prefer the seam attachment tucked inwards so you can see the front and back loops of the wig cap edges. For this effect, you can try the next method, the whip stitch.

Whip Stitch
This is another great way to attach a wig cap to the head. It similarly starts off the same way by inserting the darning needle at the bottom of head and out through to the corner. This time, the stitches will appear overlapping the wig cap onto the head.

Using this method also helps to secure down the wig cap. However, as you can see, the stitches are visible and conspicuous. Of course, if it is in the same colour as the hair, it would not be so obvious but the individual stitches holding the cap down can still be seen.
Whether you choose to use the mattress or whip stitch, they are both great ways to keep the hair secured down to the Amigurumi head. Even within the same amigurumi head, you can combine both methods. It’s all about experimenting!

If you found this whole blog post useful, remember to pin to Pinterest so that others might find inspiration too!
Crochet Curly Hair Pattern
To try out an example of a curly crochet hair pattern, here is one to try out. First off, just a bit about terminology, then the pattern itself and it is followed by an accompanying short video just below it.
Terminology
Ch = chain
St = stitch (refers to number of stitches in one round)
Tr = treble crochet
Dtr = double treble crochet
2sc1 = single crochet increase (meaning 2 single crochet in same stitch)
Pattern for long curly wig cap
Round 1: Magic ring sc10 – 10st
Round 2: 2sc10 – 20st
Round 3: Sc20 – 20st
Round 4: (Sc3, 2sc1) x 5 – 25st
Round 5:
Fringe = Sl st 1, 2sc1, 2hdc1, 2dc1, sl st 1, then
(Hairlocks x 4) = Ch18, sl st 1, hdc1, dc1, tr1, dtr13, skip 4 st then sl st to main st
Crochet Curly Hair Video
Have a shot at crocheting this curly hair wig cap, which is basically an example of step 4 above. Check out the video below to see how to crochet a luscious curly wig cap for a doll amigurumi. To get hold of the pattern for it and the step-by-step pictures for it, go ahead and grab the Free Amigurumi Hair Starter Guide here or below.
Conclusion of Crocheting Curly Hair in Dolls
Crocheting curly hair for dolls is a fun and creative way to add a unique touch to your dolls. With a few simple techniques and some practice, you can create beautiful and realistic looking curls that will make your dolls stand out.
In this article, we have covered the basics of crocheting curly hair for dolls, including selecting the right yarn, choosing the right crochet hook, and creating different types of curls. We have also provided step-by-step instructions and helpful tips to make the process easier. We ended off with how to attach the curls onto the amigurumi hair.
Remember, practice makes perfect! Don't be discouraged if your first attempt doesn't turn out exactly as you had hoped. Keep practicing and experimenting with different techniques until you find what works best for you.
In addition, don't be afraid to get creative and try new things. You can use different colours of yarn to create unique and colourful hairstyles or add accessories like bows and hair clips or even headgear to make your dolls even more special. So grab your crochet hook and yarn, and start creating beautiful and unique hairstyles for your dolls today!
If you want to get started on your amigurumi hairstyling journey and don’t know where to start, just grab my free starter guide below. I even included a 7-step checklist on how to decide the hair for your next amigurumi doll and also some bite-sized hair patterns inside. Grab it below completely for free!
Free Amigurumi Hair Starter Guide
Click here to get the free checklist with the 7 steps to deciding the right hair for your next amigurumi doll! And some hair patterns to try! Click on image on left to grab it!
Related Articles
24 creative ways on How to Crochet Doll Amigurumi Hair
7 Techniques for Making Amigurumi Hair
Crocheting Limbs onto Amigurumi without attachment
Surface Crochet for Limb Attachment to Amigurumi
3 Crochet Techniques and 9 methods for Attaching Limbs To Body!
Round-Up of free Basic Amigurumi Body Patterns
Free Sample Chapter of ‘Making Basic Amigurumi Bodies Ebook’!