

How I crocheted a Mini Tent to hold my mini Amigurumis

To house my little mini Amigurumis, I decided to make a little teepee, which eventually became an elongated tent. It was handy, does not take up too much space and fit my little minis just right. This is how it turned out:

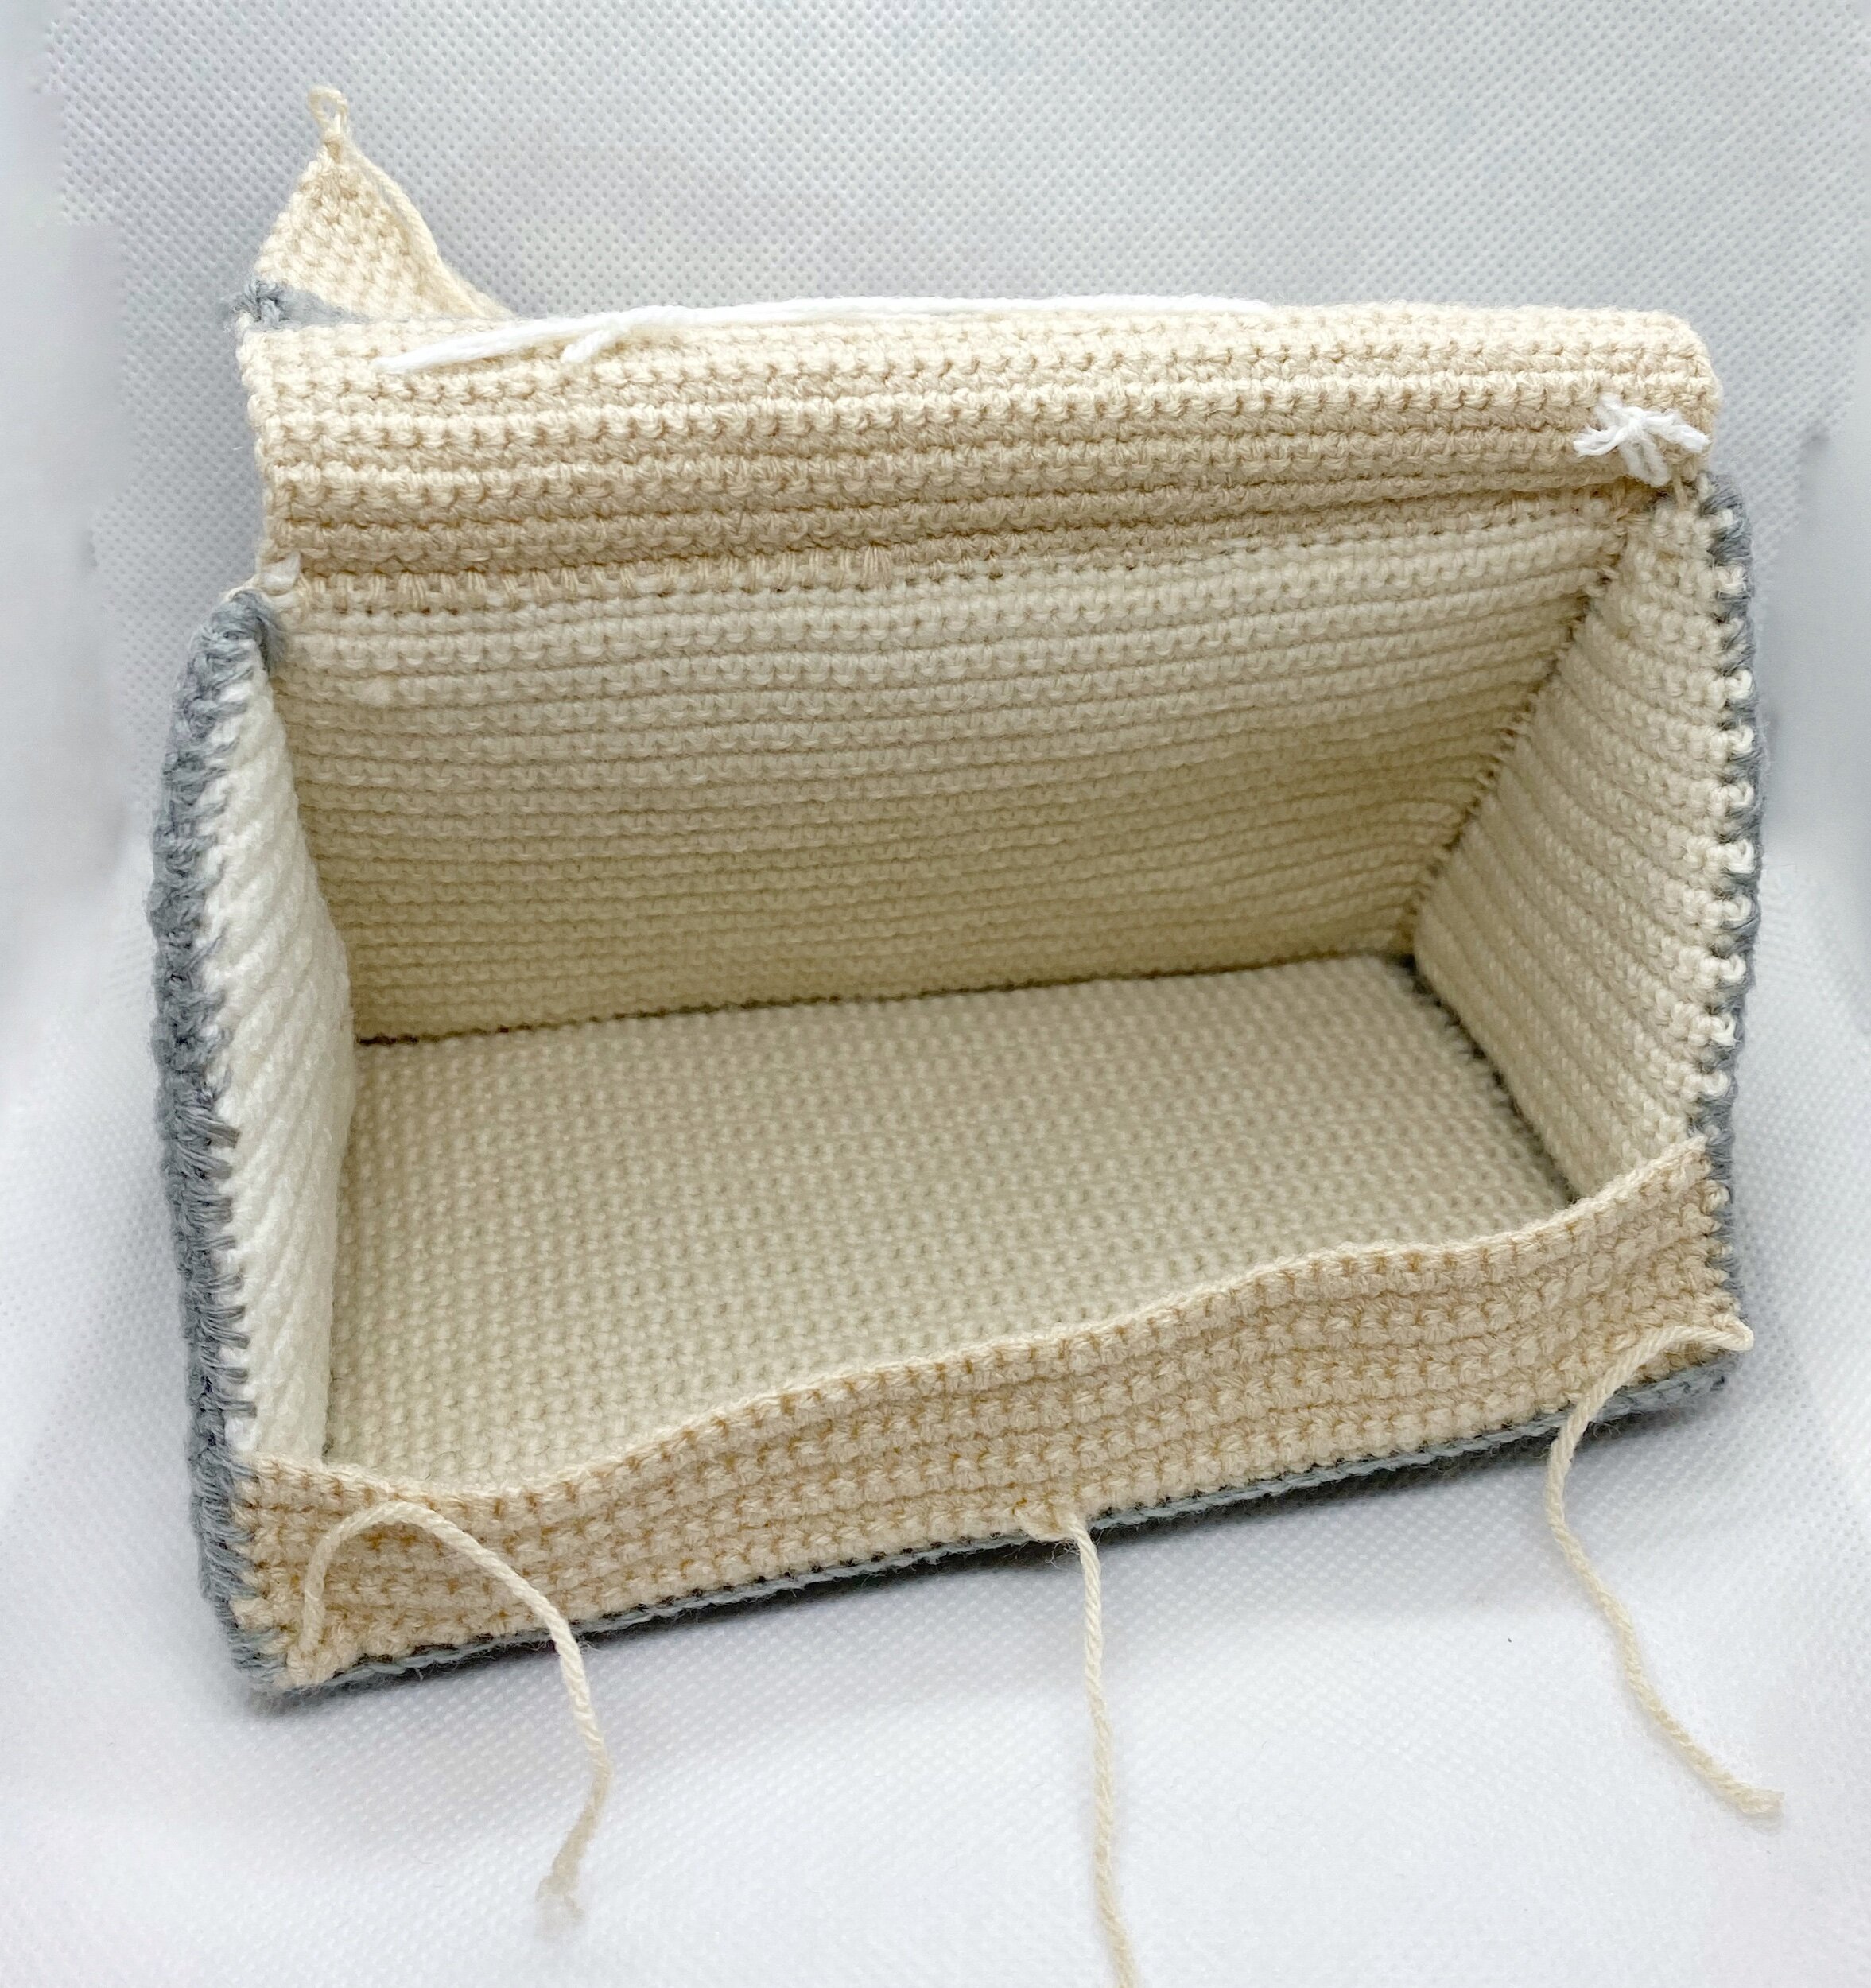
This is how it looks like when it opens up to the inside. I decided to make one side flap up and the rest of the sides rigid like a small pyramidal box. It can fit up to 4 little mini dolls just right!
Initial inspiration
So when I decided on making a little tent, which I was inspired by a little bedtime book my little one loves to read called ‘Camping Out’, I got inspiration from some Scandinavian designs like the following:


Basic skeleton
Then I moved on to figuring out how to make the basic structure in the easiest way possible. So I thought to create a long rectangle that folds up at various locations and then sew on two triangles at the sides.
Side panel
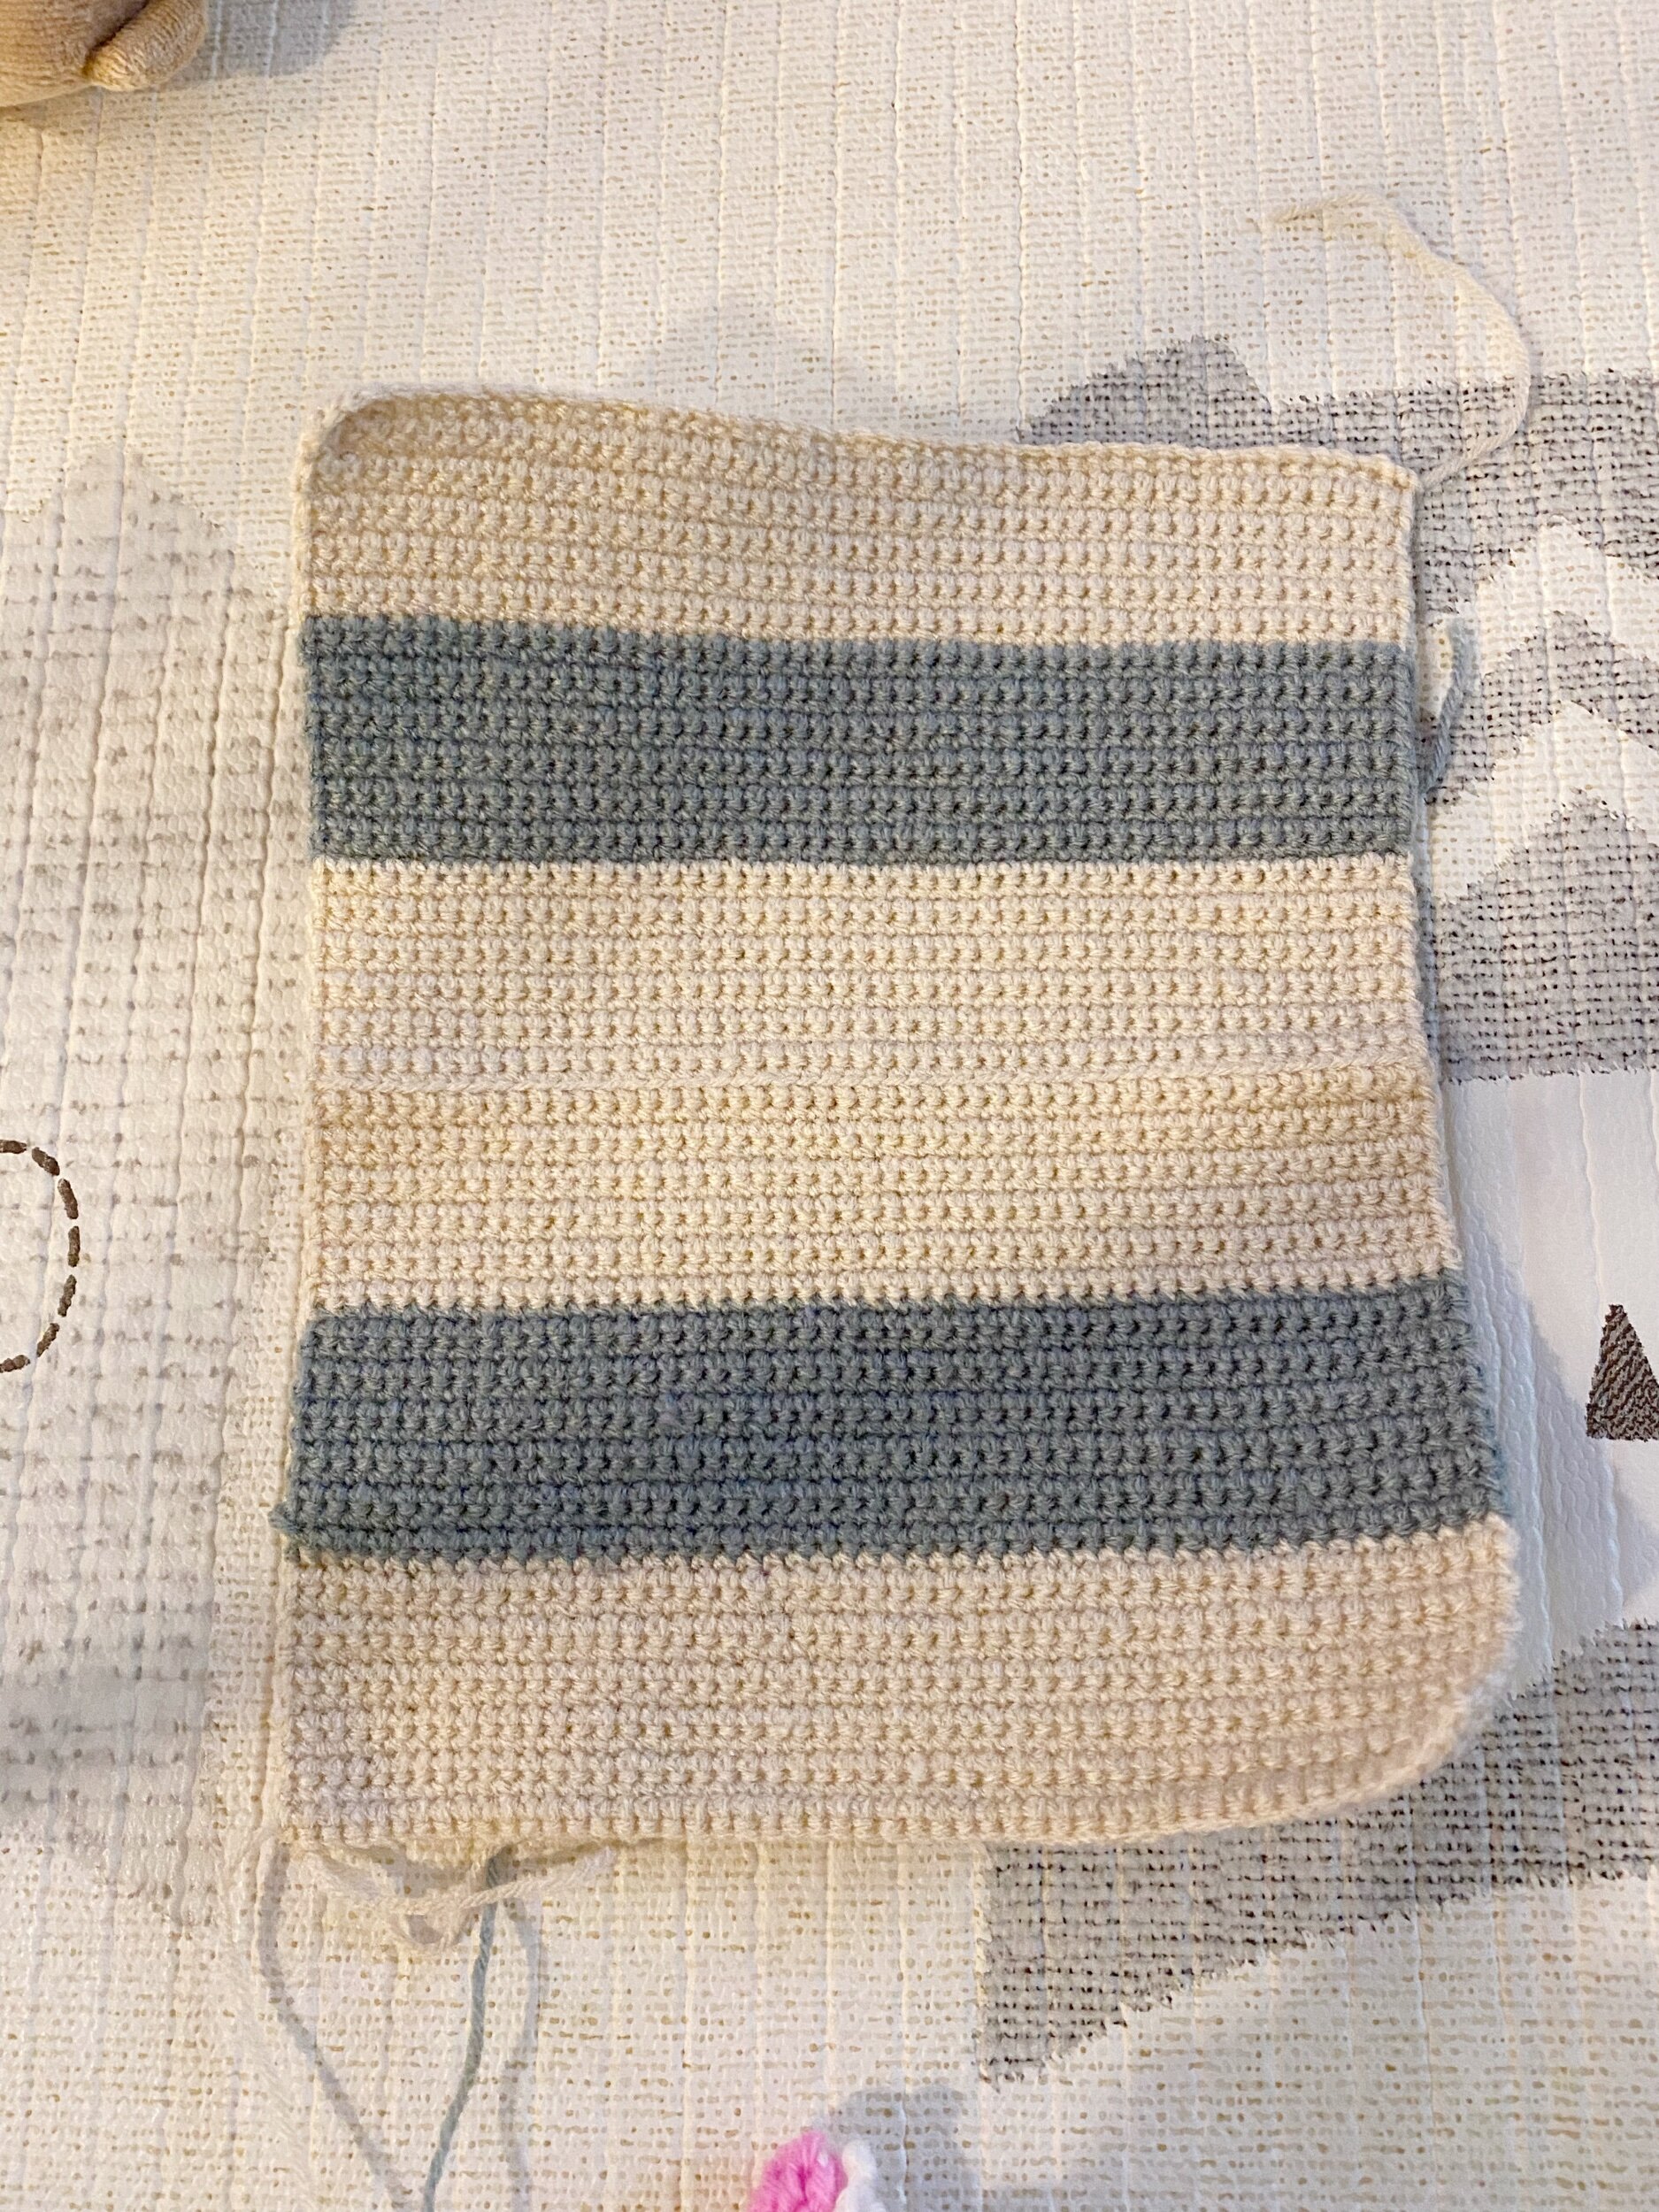
Just to add a little colour (I was also running low on light brown yarn), I decided to add some grey strips at the centre. For the part to get folded, I used a row of BLO (back loop only) stitches so that it is more ‘bendable’.
Bottom panel
The side panels then extend into the bottom panel so that the final main piece is a long rectangle. The biggest grey portion corresponds to the bottom panel. The demarcation for each panel is separated by a BLO row so it’s easy to keep track of the folded parts.

Internal panels
To shore up the side panel and the bottom panel so that they are firm, I had chosen to use a plastic non slip mat to place in between the large rectangle and smaller internal covering panels. I lined the internal panels white in colour so the interior appears larger.

Internal plastic non-slip mats
This is how it looks when I lined the plastic inside the external side panel and internal panel. I chose to use a plastic sheet as opposed to using a cardboard because it would then be washable! I also did not want to try other stiffening methods so that my little one can play with it.

Side triangles
After folding the long rectangle along the BLO rows, it forms a little pyramid. To end off the box, the sides are boxed in with two side triangles. Similarly, the side triangles are made up of 3 layers - external grey one, internal white one and the plastic sheet in between.

Assembly
This part is fairly quick to make as there is actually not a lot of assembly to do. It was just a matter of using whip stitch to sew on the side triangles to the main rectangle. Only two sides of the triangles are sewn down while the other two are free. I added a little white bunting detail in the end as well.

Final teepee with my little minis inside it!
This is how the little tent turned out in the end with my minis in it. There is a free floating flap to cover one side so that it opens up to reveal what’s inside. Ta-da! It’s great for storing little toys that my toddler leaves lying around, not to mention a great box gift!


Stay tuned to find out more about these little minis in their animal suits. One of them is a free pattern coming soon as well! Do look out for it!
Here’s a little sneak peek of more that will be coming soon!! Can’t wait to show you guys!
