

15 steps on How to Crochet Amigurumi for Absolute Beginners
If you have been wondering how do I start learning amigurumi, then this article is meant for you. I have broken it down into 3 different segments with 15 steps in total, hopefully to make this step-by-step guide in crocheting amigurumi easier to understand. First, let's get some introductory questions out of the way.
Table of Contents Show
Introduction
What is crochet?
Crochet is a form of handicraft in which yarn is made up into a textured fabric by means of a hooked needle and a series of repetitive hand movements.
What is amigurumi?
Amigurumi is the Japanese art of knitting or crocheting small stuffed animals and dolls. The word is derived from a combination of the Japanese words ami, meaning crocheted or knitted, and nuigurumi, meaning stuffed doll.
Do you need to know how to crochet to do amigurumi?
To create dolls or toys which are the final product, you could use sewing methods or even use felt to make them. Specifically to create amigurumi, one could use the crocheting method or the knitting method. So technically, you can also knit an amigurumi, apart from crocheting.
If you already know how to crochet, you could try making an Amigurumi with just some tweaking of your existing knowledge by adding on some amigurumi techniques.
On the flip side, amigurumis are a great way to get into crocheting as they are easy to learn and are usually pretty simple, even if you do not have prior experience with crocheting.
What is the difference between amigurumi and crochet?
Crocheting is the means with which you could create Amigurumis, which is the final outcome.
Crocheting could also involve many other techniques to create different outcomes like blankets, garments, hats, socks, scarfs and many other wearables. So simply put:
Crochet = method of creation
Amigurumi = outcome
For a breakdown of all the differences between amigurumi and crochet, including equipment needed, crochet techniques involved, shapes created, additional steps involved and time required to make, check out this blog article here titled 'Is Amigurumi Different from Crochet?'.
Is amigurumi easy?
Learning anything new is never really that easy but in terms of picking up a simple hobby, crocheting is pretty easy to learn. In addition to that, amigurumis are a great way to start off your crocheting hobby especially because amigurumi projects can often be pretty short and simple, as opposed to crocheting bigger items like blankets and garments.
Is amigurumi suitable for beginners?
Crocheting amigurumi is the most popular means of creating stuffed toys as it's very easy to do, quick, and can be completed at home. This is a hobby that you can do alone. You do not have to be with anyone else when you crochet. So it's perfect for beginners, but it's also a great choice for those who want to learn how to crochet. All you need to start off with is a hook and some thread. There are also plenty of crochet tutorials available online and free patterns to test out.

How long does it take to learn amigurumi?
If you’re looking to start crocheting amigurumi, you may be wondering just how much time you’ll need to get the hang of it. Depending on how much prior experience you have, it could take anywhere from a few hours to several weeks to learn how to crochet amigurumi. Assuming you have some basic crochet techniques under your belt, picking up amigurumi could be done within the span of an afternoon, perhaps even 1-2 hours.
If you are starting how to learn crocheting from scratch, it could take a little bit longer, perhaps 1-2 weeks if you are quite diligent about it. It also depends on a lot of other factors, if you have someone specifically teaching you step by step beside you, it could be a lot shorter.
If you decide to learn on your own, depending on your teaching materials, whether it be videos or books or magazines, it could just be hours to days for the most part. Because crocheting is such a popular hobby, the great news is that there is plenty of learning materials on the internet and Youtube!
Getting ready - Crochet Tools and Accessories
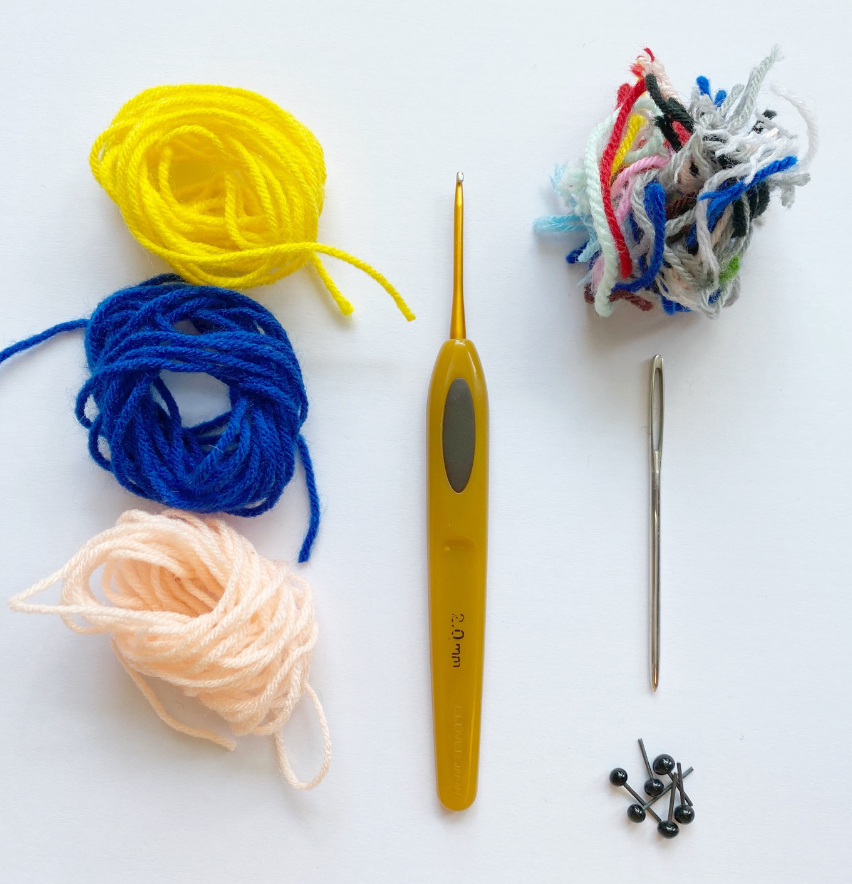
1) What supplies do I need for amigurumi?
If you are just starting out, all you really need is the crochet hook and yarn to get a hang of crocheting first! You could just get a single ball of yarn in your favourite colour, and a cheap metallic hook to start off with. I will be elaborating more on these later on. As for working specifically on amigurumi, you will also need some additional crucial supplies like a darning needle, stuffing and optional supplies like stitch markers and safety eyes.
Useful link to refer to:
👉 Get started with this step-by-step guide to crochet tools and accessories for beginners »
2) What yarn is best for amigurumi?
There are many different types of yarn that can be used for amigurumi but for a start, the commonly used ones include acrylic, cotton and wool.
Good quality wool is easy to crochet with and does not split apart but can be pricy to start with. Acrylic yarn is easy to work with and inexpensive, and often comes with an extensive colour selection. However, the ami can sometimes turn out fuzzy. Cotton yarn can create professional looking amis but are relatively inelastic which makes it slightly more difficult for beginners to use.
Another consideration is how many yards of yarn do you need for amigurumi? For a start, just get one tiny 25 gram ball of acryclic or cotton yarn in one colour, which is roughly about 62 metres or 68 yards, for example a scheepjes catona cotton yarn ball. Try crocheting a small ball first before creating something like snowman. More on that right at the bottom with examples to try out.
Useful link to refer to:
👉 Learn how to pick the perfect yarn in this 12-point checklist for the best yarns for amigurumi »
3) What size hook do you use for amigurumi?
For easier reference, on the yarn label, it will mention the corresponding appropriate hook size to use with that yarn. This works out well in general with crochet, but should you use a smaller hook for amigurumi instead? Or does the size of the crochet hook matter?
Yes it does make a difference using a smaller hook for amigurumi. For instance if the cotton yarn label says use a 2.5-3.5mm hook, I would pick a 2.0mm hook to use, or for a acrylic yarn label that says 4.0mm hook, I would use a 3.0mm hook instead. Specifically for crocheting amigurumis, using a smaller hook for a thicker yarn helps to reduce the gaps that you see in the final stuffed pieces.
Useful link to refer to:
👉 Learn how to choose the perfect hook in this step-by-step guide to finding the best crochet hook for amigurumi »
4) What do you stuff amigurumi with?
Stuffing amigurumi is an additional step only done for 3D crocheted objects, as opposed to other forms of 2D crochet projects. Crocheters often use polyfil, which is the most traditional form of stuffing, great for children's toys as they make them soft and are easy to wash.
Another great way to stuff is to use recycled yarn stash, which creates a similar soft consistency as using the polyfil and recycling is great for saving costs and the environment! Be careful the colours are not too dark or at least make sure there are no gaps or the stuffing colours might be seen through the amigurumi.
Useful link to refer to:
👉 Learn how to fill your crochet toys evenly with this guide to stuffing amigurumi for the perfect plushie feel »
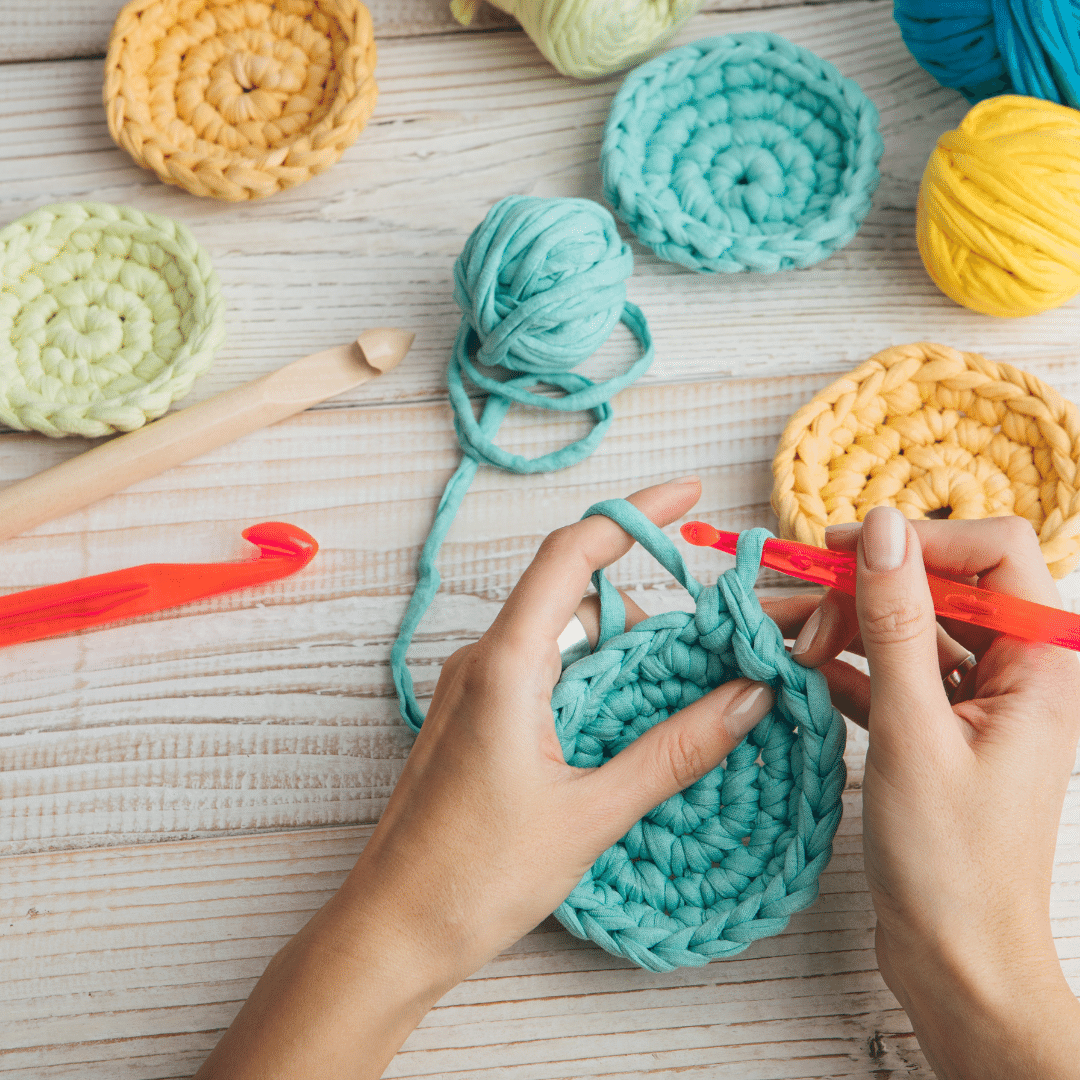
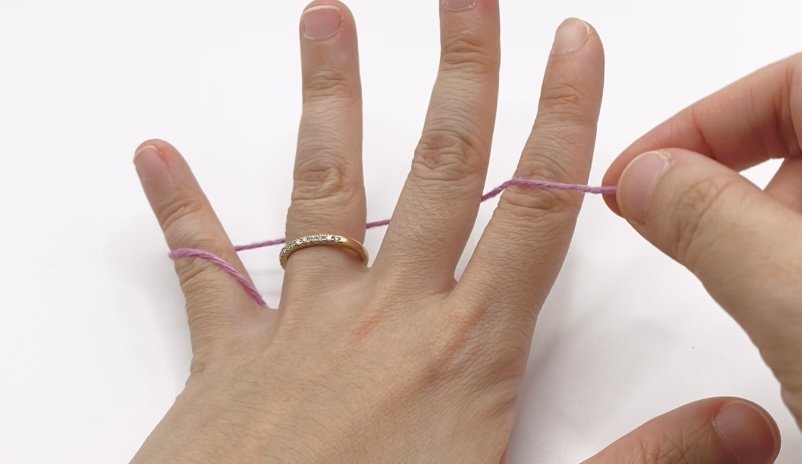
5) How do you hold the yarn in amigurumi and what is the best way to hold crochet hook?
To hold the yarn first, place it in between the little and ring finger, wrap yarn around little finger. Place yarn below the ring and middle fingers and then wrap around the index finger. Finally, grab yarn between middle finger and thumb.
As for holding the hook, there are 2 ways to do it, one is the knife grip and the other way is the pencil grip. With the knife grip, it involves the hook grip part between the middle finger and thumb, with index finger resting on hook. As for the pencil grip, the index, middle fingers and thumb are all on the hook grip.
Useful link to refer to:
👉 Learn the proper hand positions in this step-by-step guide to 6 ways of holding your crochet hook and yarn »


💡 Want to learn all the basics of crocheting amigurumi in one place?
Grab my free 77-page Amigurumi Foundation eBook — your complete step-by-step guide to mastering tools, stitches, and beginner toy techniques (normally $17!).
Starting off - Basic Crochet and Amigurumi Stitches
6) How do I start an amigurumi?
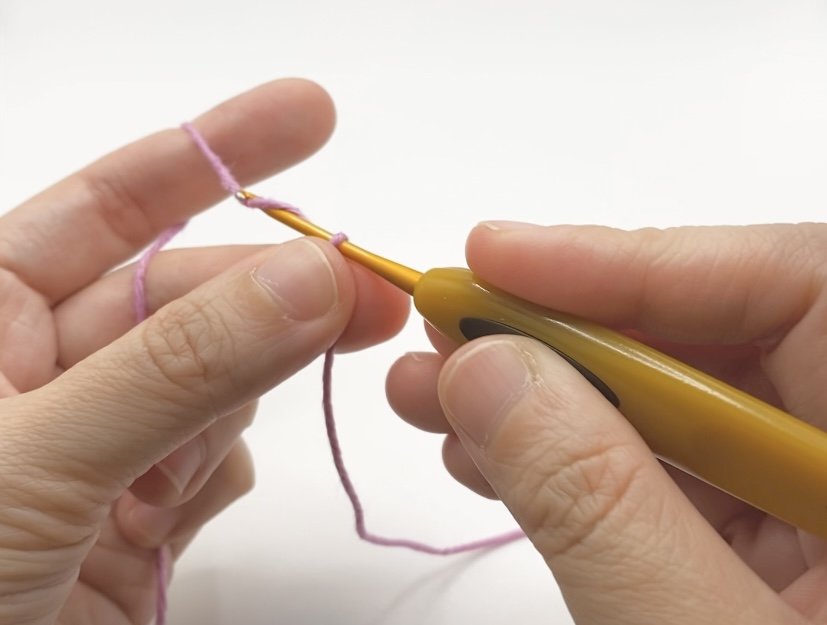
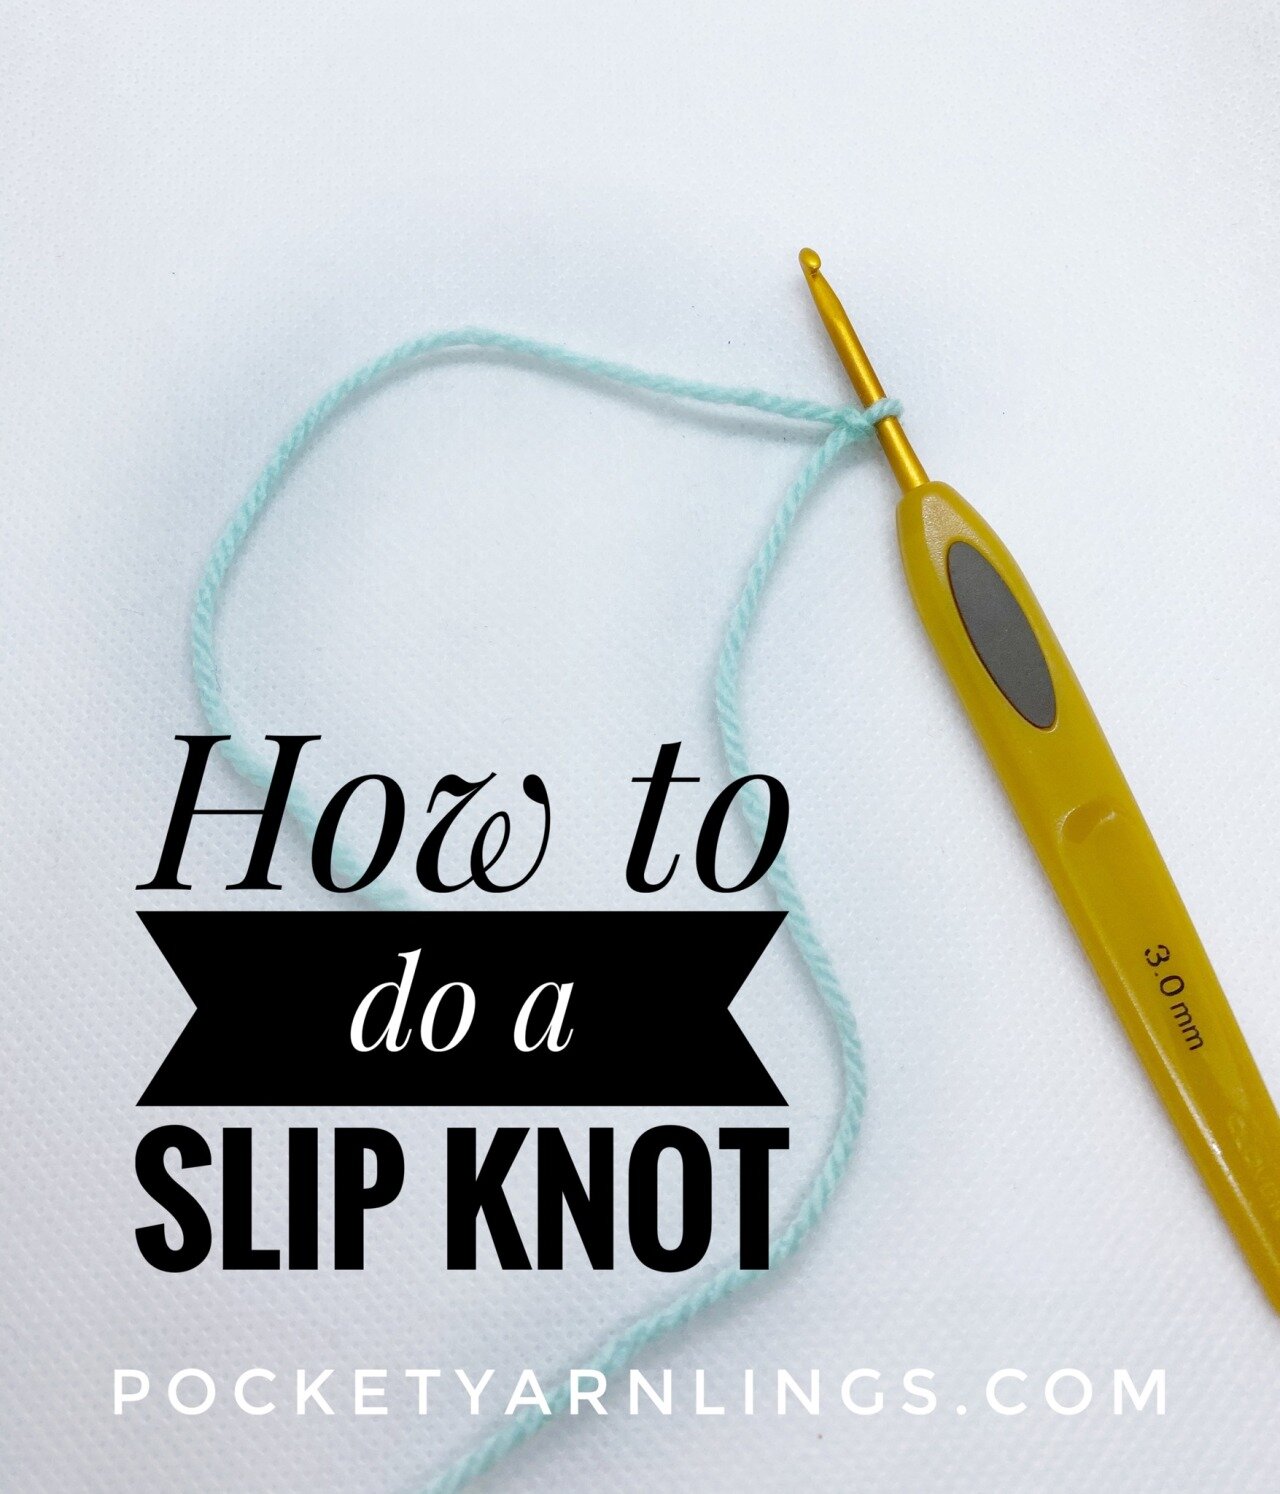
After holding the hook and yarn, you can proceed to start crocheting the amigurumi. There are 2 ways to do this, the simpler way and the more polished way. The easier way to is to use chain 2 and single crochet, which involves tying a slip knot first and then subsequently chain 2. Then single crochet into the 2nd chain away from the hook. Continue to crochet any number, depending on how big you want the initial circle to be.
Useful links to refer to:

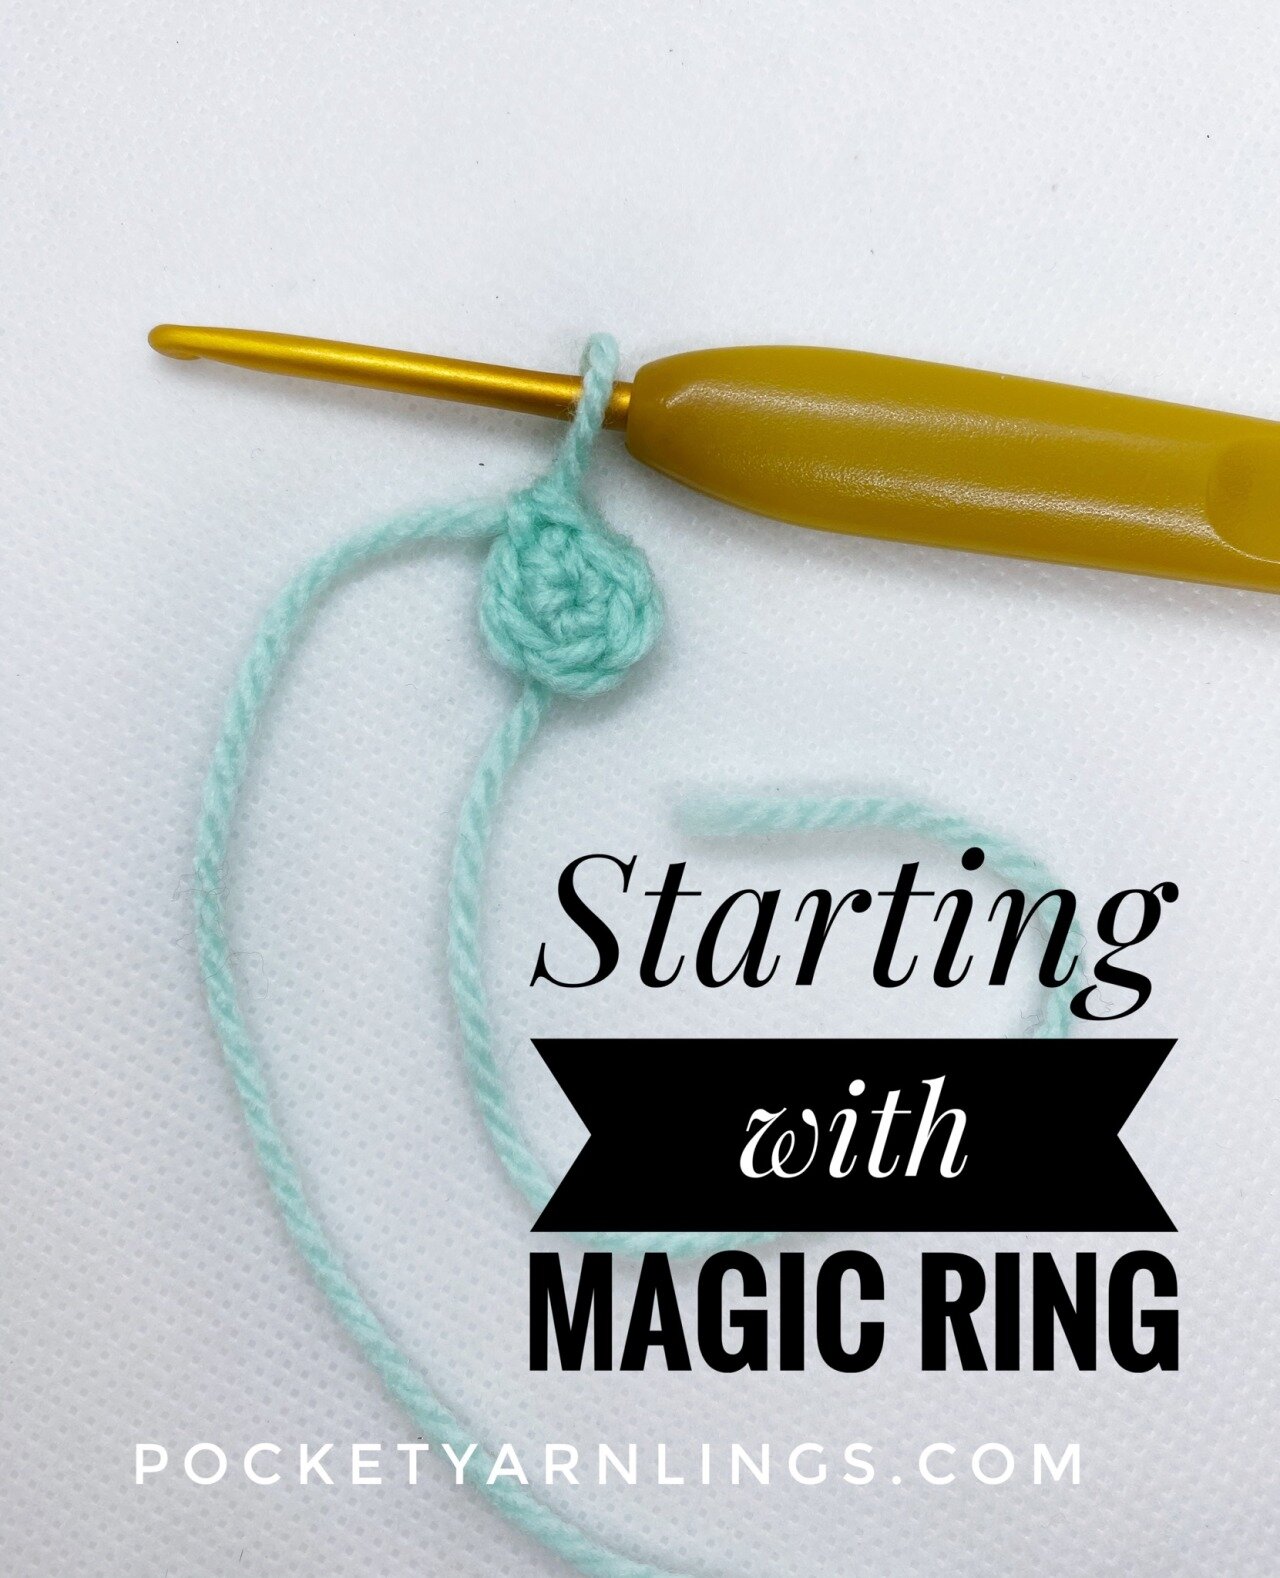
The more polished way to start crocheting amigurumi is to use the magic ring or adjustable ring or magic circle. First, cross the free end of yarn on top of trailing end. Put index and middle finger and a little bit of thumb through hole. Reach out for the opposite yarn and pinch it across. Then flip the yarn strands on the left hand. Yarn over and pull through loop on hook to form chain 1. Continue single crocheting into centre of loop. I use this most frequently to start my amigurumis.
Useful links to refer to:
🔍 Deep Dive: 24 Easy Peasy things you need to know about Magic Ring in Crochet »
7) What crochet stitch is used in amigurumi?
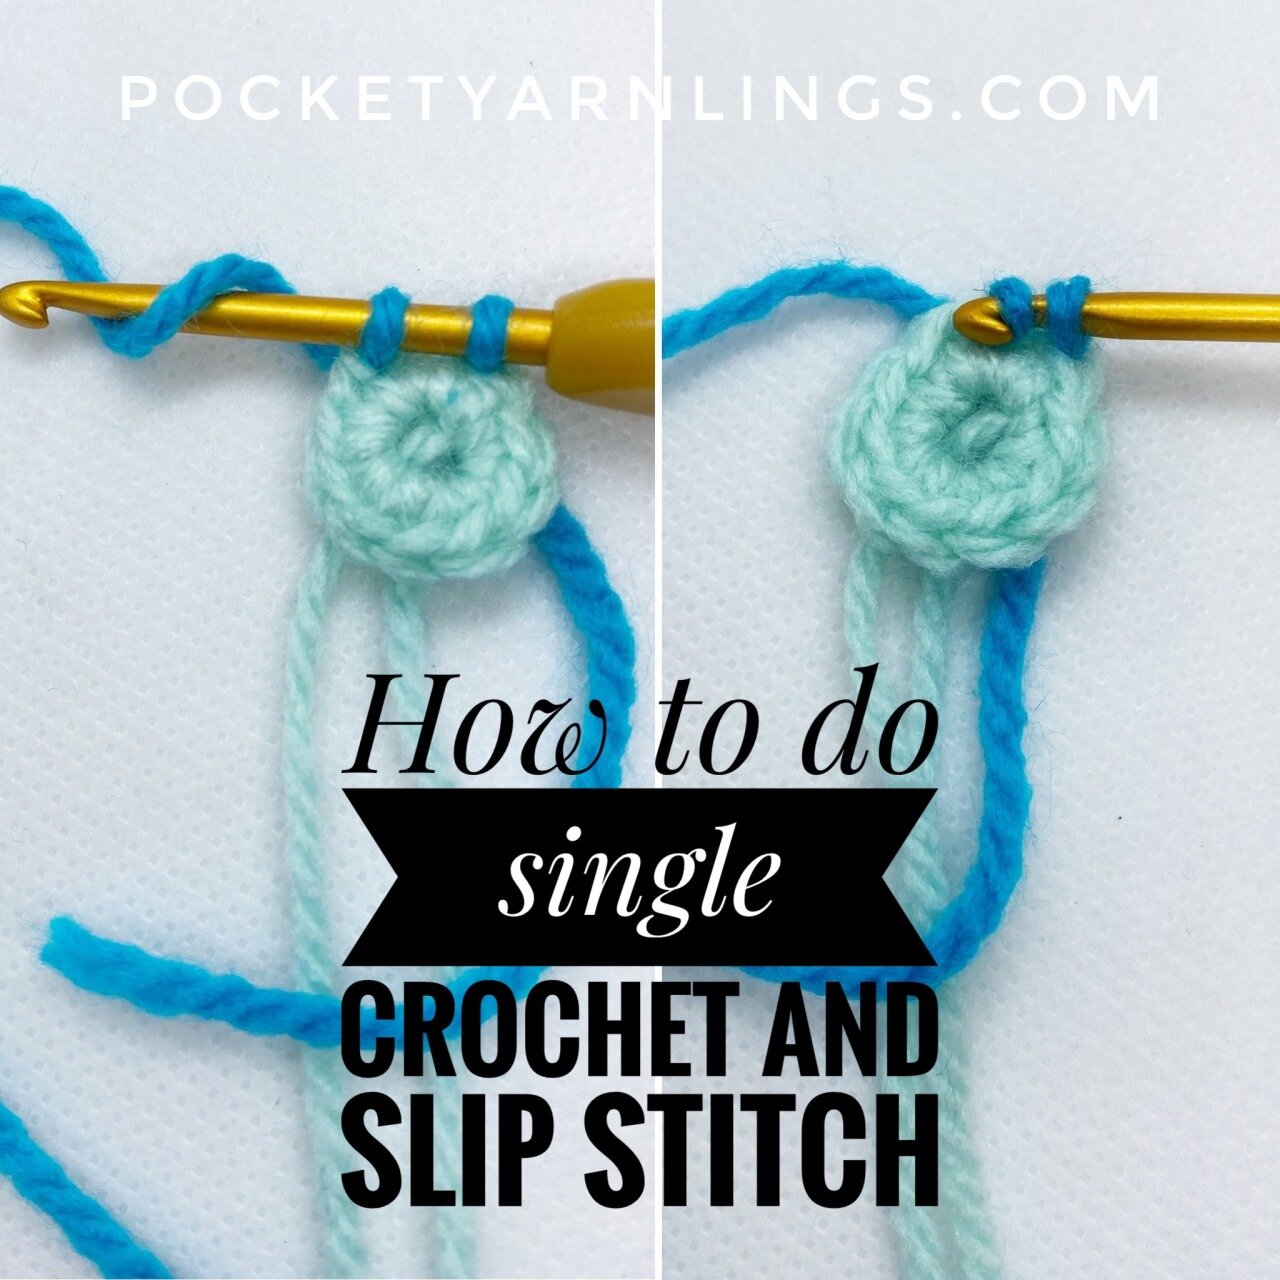
The most common crochet stitch used in amigurumi the the single crochet stitch. That is the most basic unit and they are consecutively done in a round rather than a row. With just that type of crochet stitch, you could make a basic flat 2D shape but with amigurumi, you actually have to build upon that, as you will see later on.
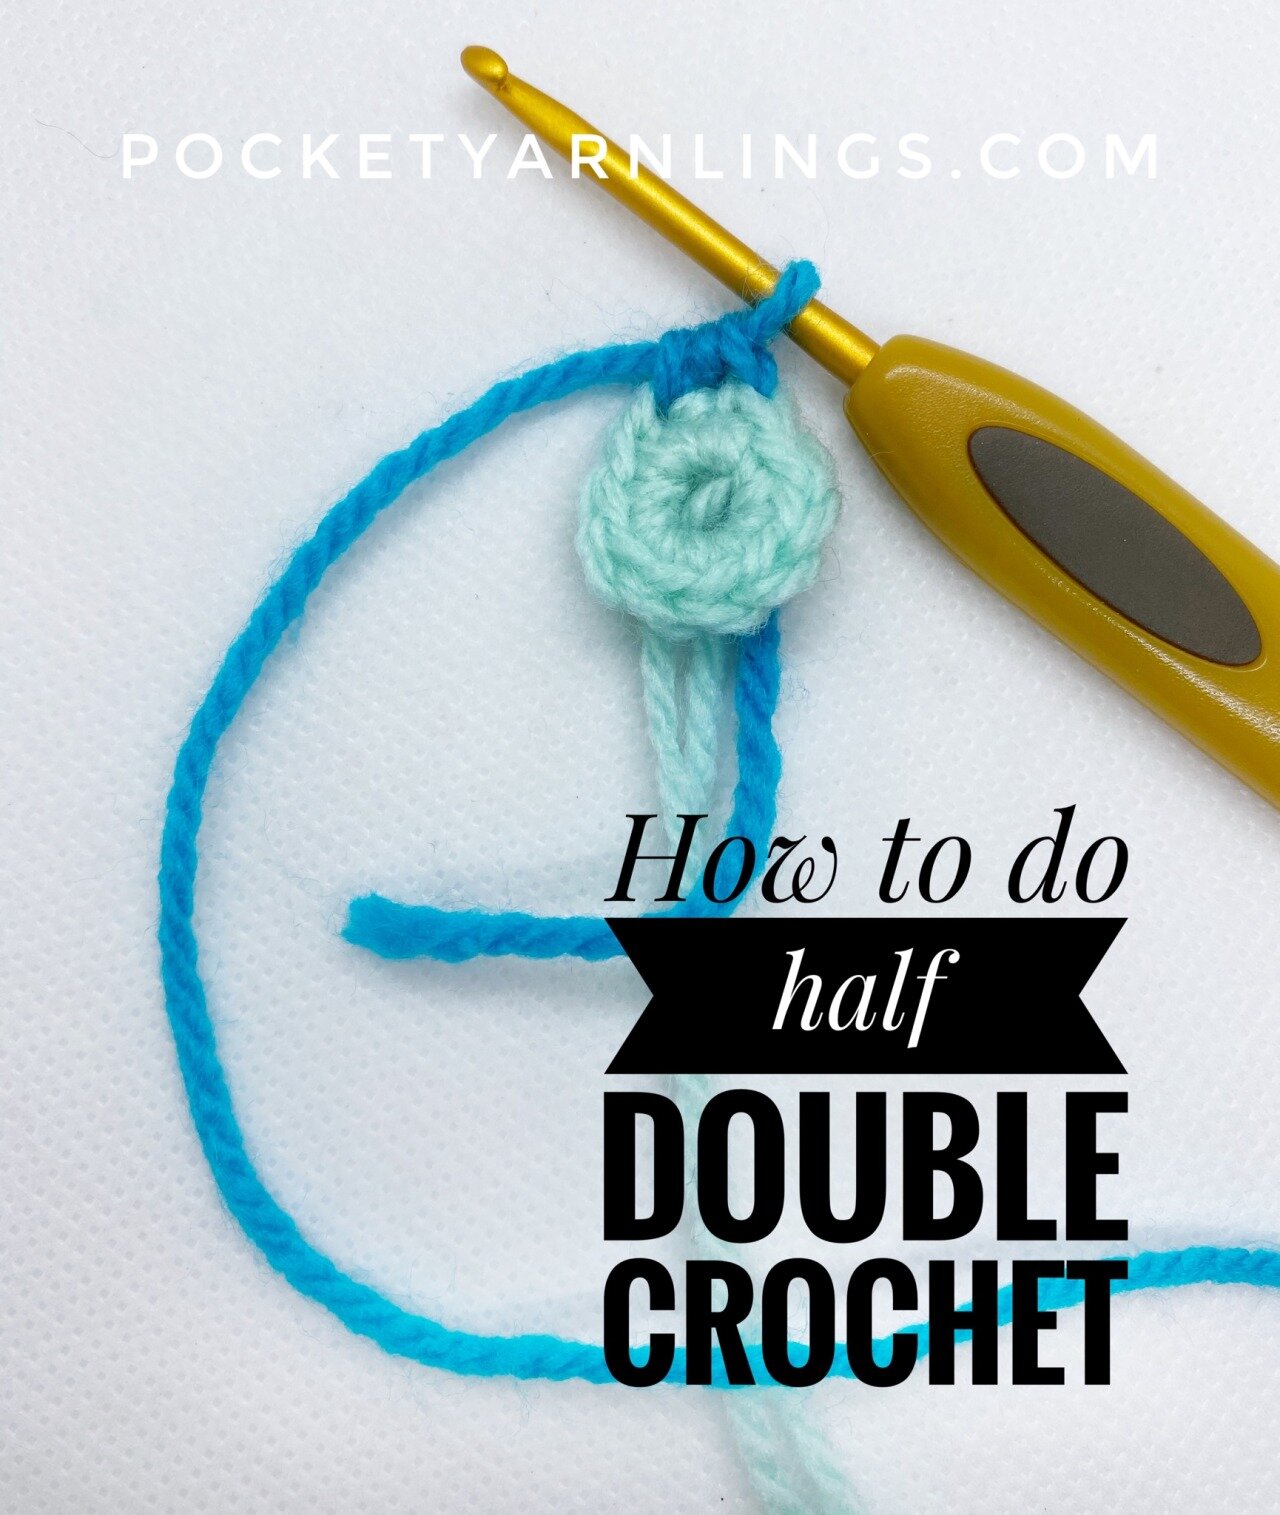
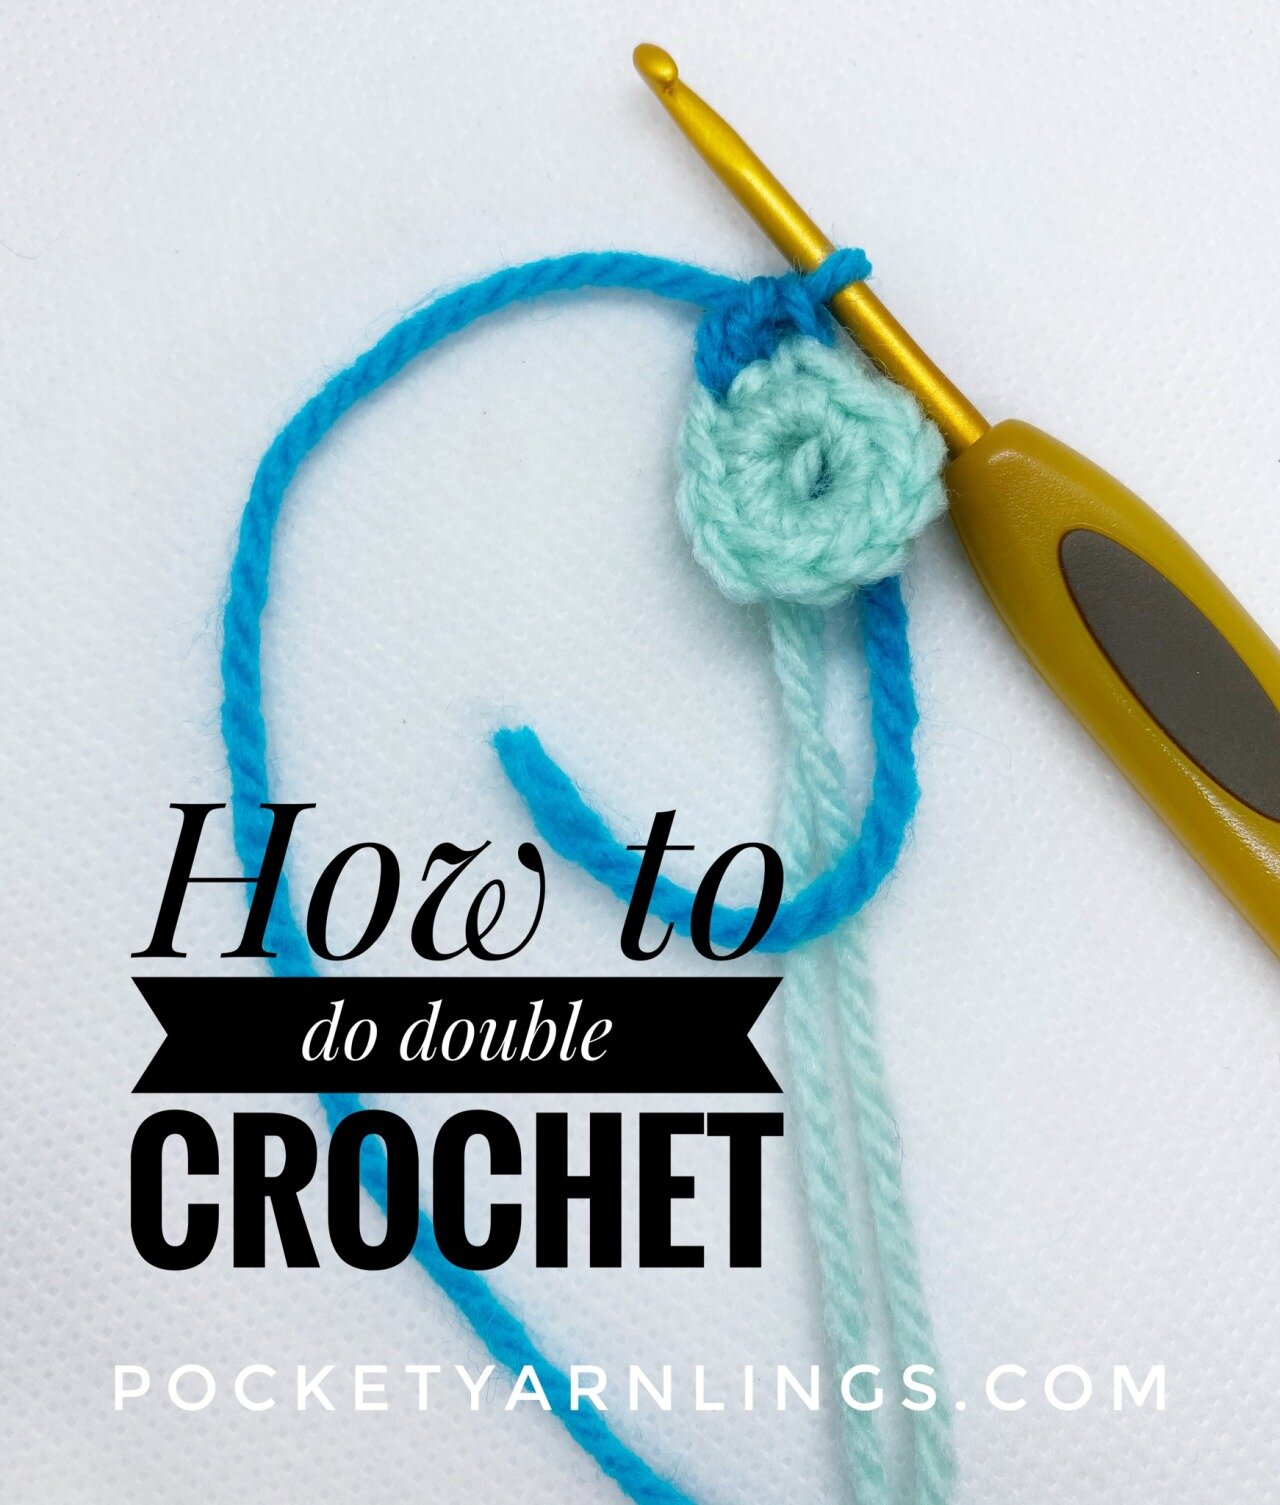
As for whether amigurumi is always single crochet, it involves more than that, including increases and decreases of the basic single crochet stitch. Also, amigurumis can be made up of taller stitches like half double crochet (hdc), double crochet (dc), or treble crochet (tr), or a combination of all of the above!
Useful links to refer to:
👉 How to Do a Single Crochet
🔍 Deep Dive: Master Single Crochet »
👉 How to Do a Half Double Crochet
🔍 Deep Dive: Master Half Double Crochet »
👉 How to Do a Double Crochet
🔍 Deep Dive: Master Double Crochet »
👉 How to Learn Basic Crochet Stitches step by step for Absolute Beginners - 6 Easy Steps! »
8) What is increase in amigurumi?
Increases in stitch refers to single crocheting twice in the same stitch. For some designers, their pattern will simply include increase, while for mine I tend to put 2sc1 or 2 single crochet in the same stitch. So what is the purpose of increase in crochet? It is to widen the round in the amigurumi for instance when you are making a sphere and the initial small circle slowly gets wider.
On the flip side, to decrease in amigurumi involves combining 2 consecutive single crochet stitches together to make the round narrower. Similarly with the making sphere example, this helps with narrowing the circle from the widest plane of the sphere, until you can close off the crocheted piece. There is the single crochet decrease or the invisible decrease method, of which the latter helps with reducing gaps in the amigurumi.
Useful links to refer to:
👉 Increases and decreases in stitches
🔍 Deep Dive: 15 different detailed Ways on How to Increase in Crochet »
🔍 Deep Dive: 15 different detailed Ways on How to Decrease in Crochet »

9) Do you join rounds in amigurumi?
When working with crochet projects, especially if doing flat 2D projects, oftentimes you have to crochet in chains and then in rows. As for amigurumi, you should be crocheting in rounds rather than rows. After completing one round, you could continue seamlessly into the next round, which also means it is easy to to lose count of your stitches, which is why I would recommend adding stitch markers to the beginning of the round.
Finishing up - Amigurumi Techniques
10) How do you change the colour of your seamlessly crocheted amigurumi?
Insert hook into desired stitch, yarn over and pull through to get 2 loops on the hook with the original first colour. Yarn over the new second yarn colour and place further along the hook, then pull it through the 2 loops on the hook (with the original colour). Then continue crocheting with the new colour and you have seamlessly changed colour!
Useful links to refer to:
👉 Changing crochet colours
🔍 Deep Dive: 12 Nifty Types of Colour Changes in Amigurumi Crochet »

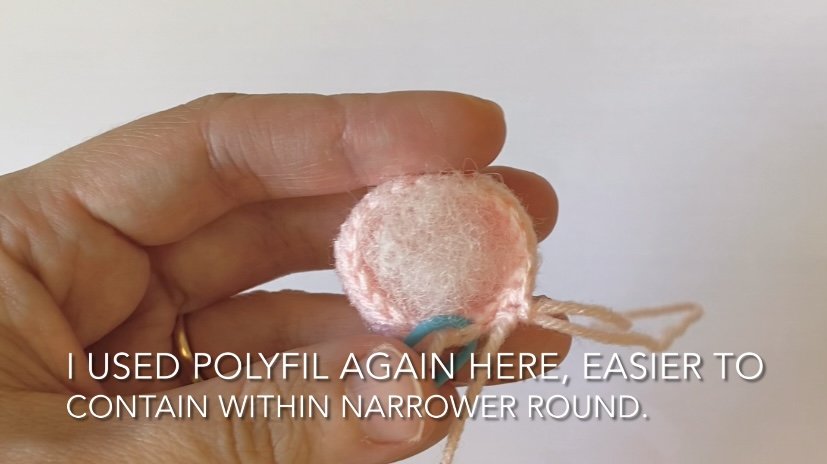
11) How much stuffing is needed for amigurumi?
There are 2 ways to stuff amigurumi, some crocheters prefer to insert a larger amount into the amigurumi, flatten it and then remove the excess, or instead you could slowly add smaller pieces until it fills up nicely.
Consider stuffing when at widest part, or after decreasing the stitches to make the rounds narrower. It is easier for the stuffing to stay in place once the amigurumi narrows off. How to keep stuffing from showing in amigurumi would involve not overstuffing and also some tricks to reduce the gaps in the amigurumi.
Useful link to refer to:
👉 Learn how to fill your crochet toys evenly with this guide to stuffing amigurumi for the perfect plushie feel »
12) How do you close a hole in amigurumi?
If you are thinking about how do you seal amigurumi, try out 1 of the next 2 methods. The longer method would involve crocheting the main piece and then a separate piece to cover the first one and then sewing them together, like a circular base.
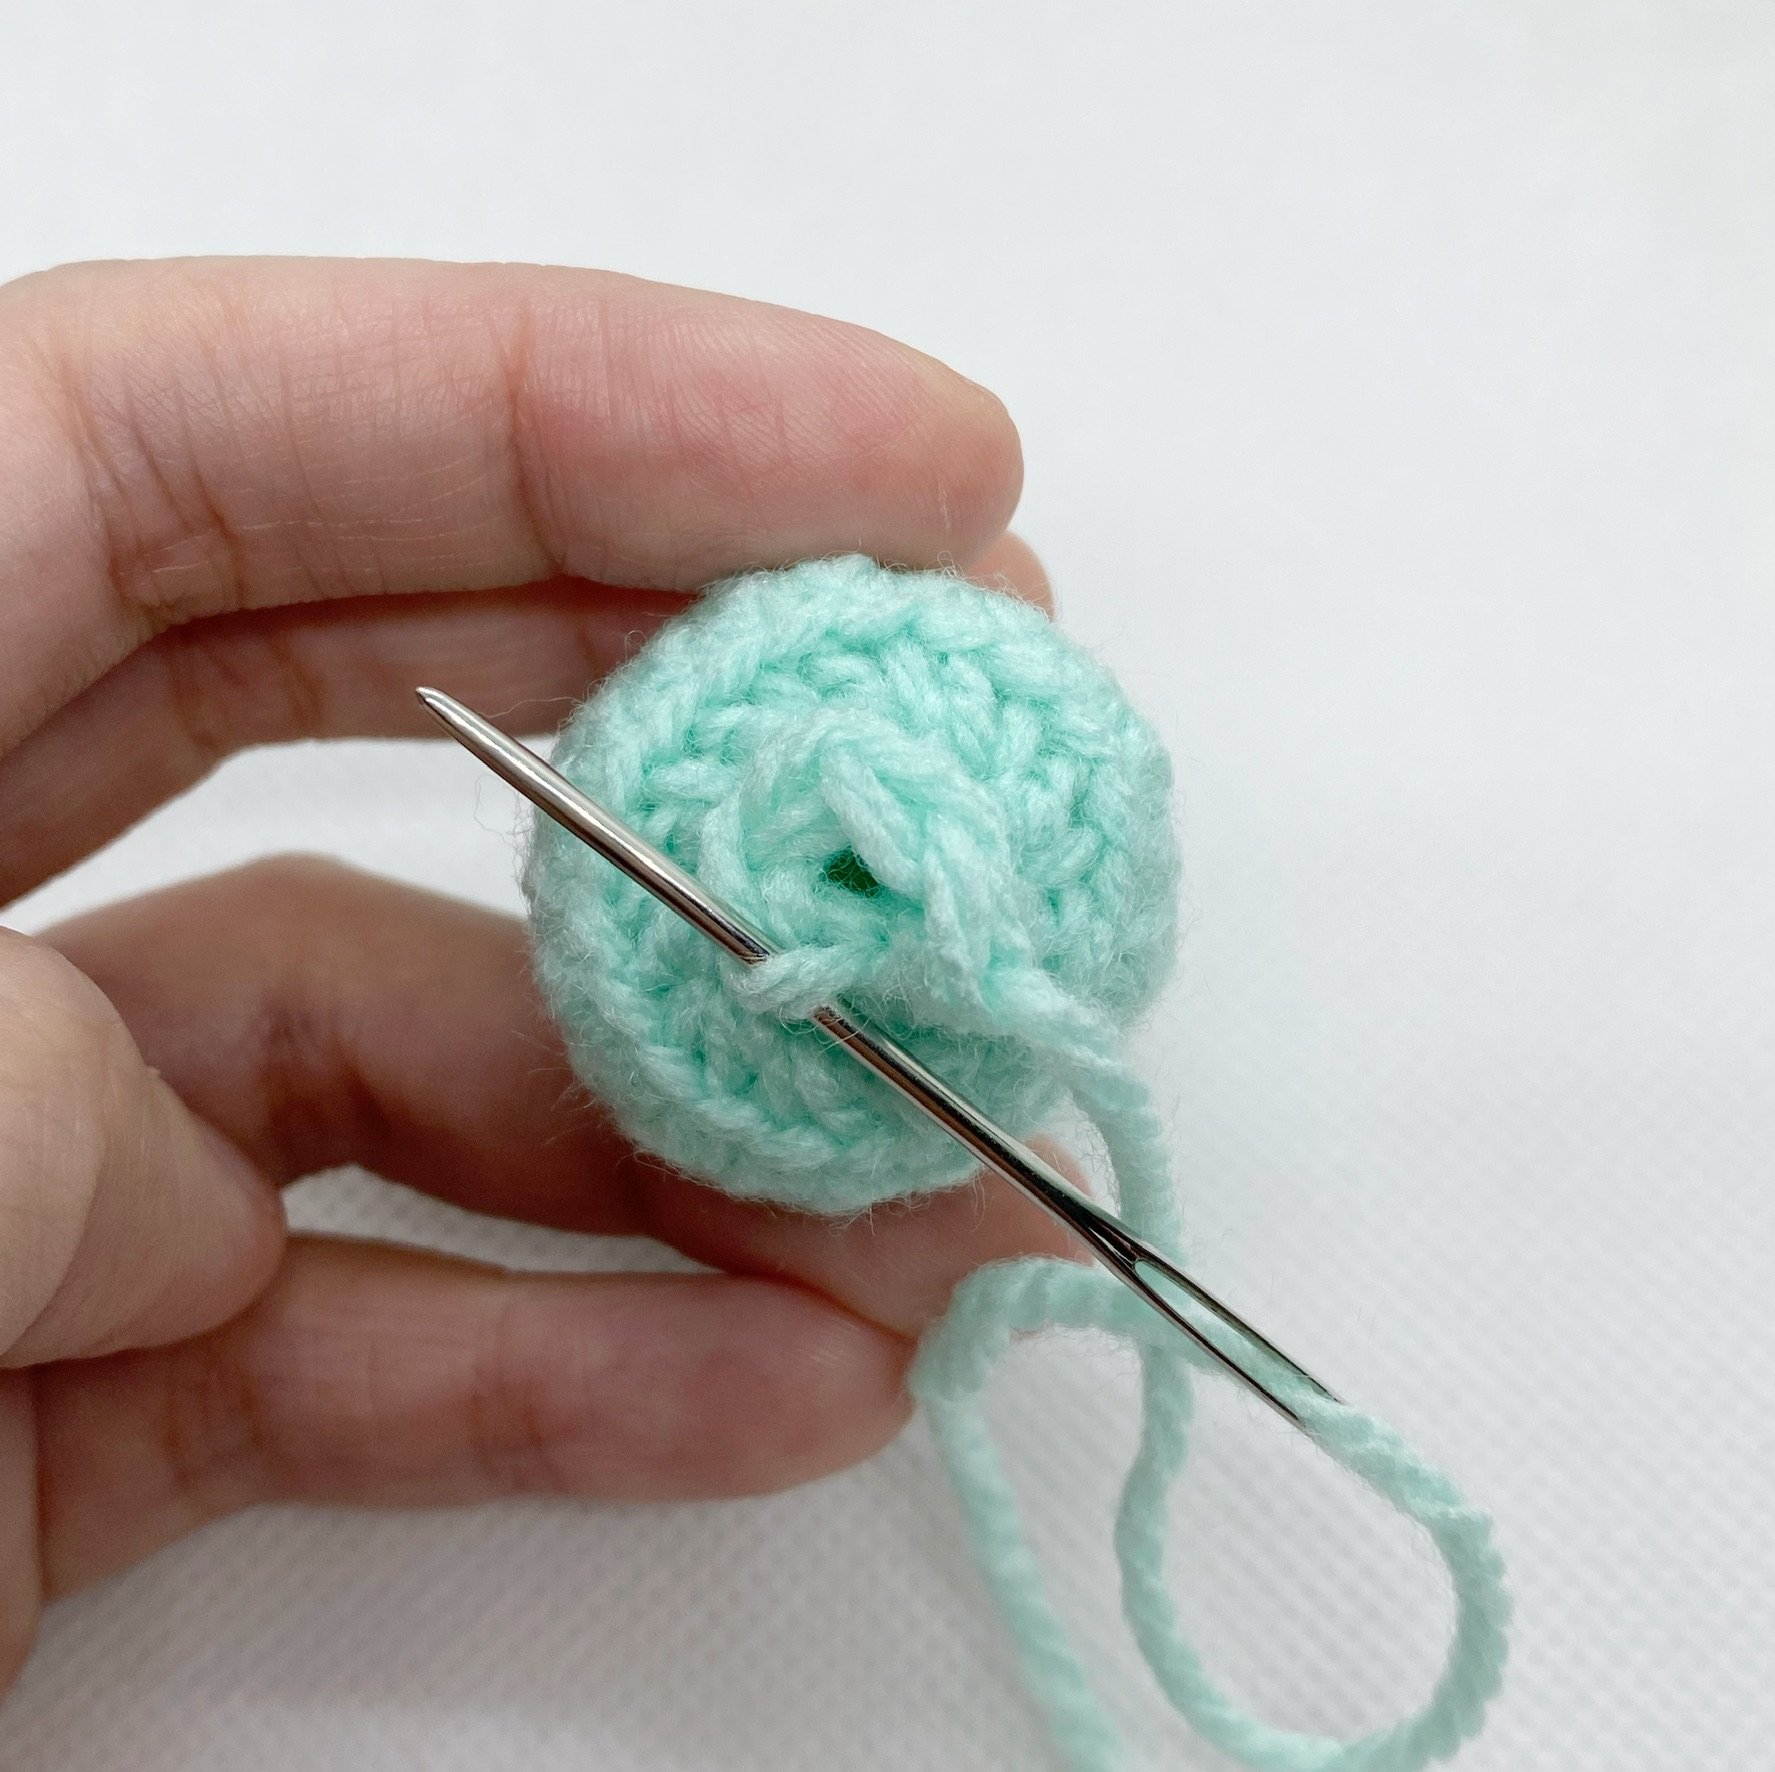
The quicker method would be to continue decreasing the amigurumi (as mentioned above) until the round narrows and then use the darning needle to insert inside all the front loops of the last round and pull the base close. This method is not only faster but neater and is the preferred method for most crocheters.
Useful link to refer to:
👉 Learn the final steps in this step-by-step guide on how to end a crochet project neatly »
13) How do you fasten off and weave in ends crochet?
Of course after closing up the amigurumi, there would be some loose ends. So how do you hide the ends of yarn or secure the ends in amigurumi? To do this, the next step would be to weave in the stray ends and conceal them within the amigurumi, something not done in other forms of crochet.
Here you will need a darning needle and some scissors. I will usually thread the remaining yarn through a few stitches to anchor it down. Then draw out multiple stray yarn ends through same hole and tie a dead knot with them, cut it off and use the scissors to push the knots into the ami itself.
Useful link to refer to:
👉 Learn the final steps in this step-by-step guide on how to end a crochet project neatly »
14) How do you sew together amigurumi parts?
Crocheting amigurumi often involves creating many different parts and then assembling them all together at the end. So by sewing the parts together, you are securing the amigurumi parts as well.
There are 2 sewing techniques for this, which include using the whipstitch and the mattress stitch. The former is more frequently used for combining amigurumi and it involves overlapping the 2 pieces together with obvious seams.
As for the latter method, it involves stringing the yarn through one piece and into the other and out of the original piece with the seams being hidden.
Useful links to refer to:
15) How do you read amigurumi?
After getting all the basic components of amigurumi done, if you want to try out even more patterns and techniques, then you would have to start learning how to read patterns. Different crochet designers have different style guides, even though craft yarn council has some basic guidelines to follow, designers often like to write in a way most natural to them. The following would include the basic abbreviations to represent each stitch.
Basic stitches
Ch = chain
Sc = single crochet
Hdc = half double crochet
Dc = double crochet
Tr = treble crochet
2sc1 = single crochet increase
Sc2tog1 = single crochet decrease
Sl st = slip stitch
St = stitch (refers to number of stitches in 1 round)
FLO = front loop only
BLO = back loop only
Try out different amigurumi designer's patterns to have a feel of their writing, many do have available free patterns for you to test out whether their style guide is easy to follow!
Useful link to refer to:
👉 Learn how to read crochet patterns with ease in this step-by-step Amigurumi Pattern Reading guide for beginners »
🎬 Start your amigurumi journey visually.
This beginner-friendly playlist teaches 10 of the 15 core techniques from this guide — from magic ring to increases, stuffing, closing, and more.
Conclusion
Amigurumis can be a great way to learn crocheting. You just need a series of the 15 steps mentioned above, which broadly includes first getting ready with crochet tools and accessories, then starting off with basic crochet and amigurumi stitches, and finally finishing up with specific amigurumi techniques not used in other forms of crochet.
As for what is the easiest amigurumi crochet, I would suggest just using one small ball of yarn to create a simple sphere first to get your feet wet. I have this entire blog post on 'How to Get Started with Amigurumi in 8 simple steps' which details all the techniques mentioned above in a step-by-step format to finally create a sphere at the end.
If you’d rather have everything you’ve just learned — and more — in one beautifully organized guide, you’ll love my free 77-page Amigurumi Foundation eBook. It’s normally $17, but I’m giving it to Pocket Yarnlings readers to help you start your crochet journey with confidence.
💡 Want to learn all the basics of crocheting amigurumi in one place?
Grab my free 77-page Amigurumi Foundation eBook — your complete step-by-step guide to mastering tools, stitches, and beginner toy techniques (normally $17!).
What’s Next
🧵 How to Crochet Different Shapes in Amigurumi »
Learn how simple shapes like spheres, cones, and cylinders come together to create your own amigurumi designs.
🐙 Free Crochet Octopus Pattern »
Put your new skills into practice with this beginner-friendly octopus — minimal sewing, maximum cuteness!
🐾 Easy Crochet Animals for Beginners »
Explore even more quick, adorable animal projects to build confidence and keep your hooks moving.